First steps into machine embroidery, just like into any new venture, can bring many questions. What machine should you get? What supplies will you need? Where should you start? There are many what-s and how-s indeed.
This guide, Machine Embroidery for Beginners: What Supplies You Need, will help you understand the basic supplies required for machine embroidery. We will not waste your time on non-essential things. First, you will see the full starter list, and then we will explain every important item in detail.
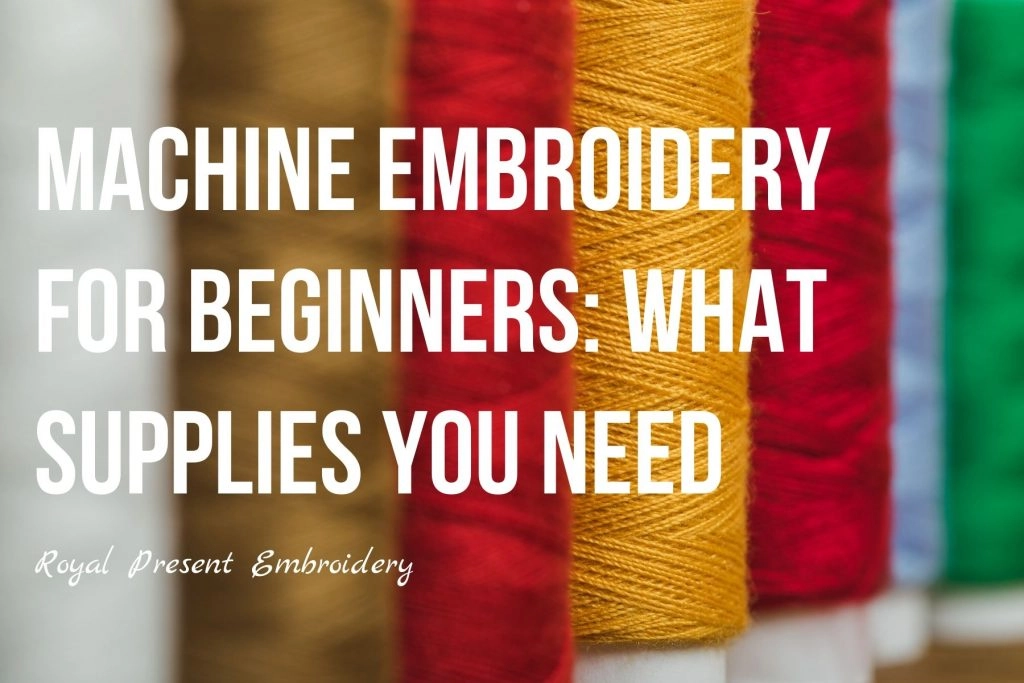
Machine embroidery for beginners: what supplies you need
A machine embroidery starter kit is made up of the following:
- Embroidery machine, with hoops included.
- Machine embroidery supplies:
- machine embroidery threads: bobbin thread for the bottom and needle thread for the top;
- machine embroidery needles;
- machine embroidery stabilizers: tear-away, cut-away and wash-away film;
- temporary spray adhesive.
- Helpful extras:
- scissors;
- pins;
- iron;
- fabric marker;
- fabric clips.
- Computer, laptop or another device and a memory stick.
- Embroidery software.
Now that the list is clear, let us speak in detail about each item.
Embroidery machine
To tick this box, you need to decide which type of embroidery machine you are going to get. Will it be an embroidery-only machine or a sewing and embroidery combo machine? What embroidery area will meet your needs and wishes? As soon as you begin researching, you will realize that there are many things to consider when choosing an embroidery machine.
A good embroidery machine for a beginner should be easy to operate. At the first stage, you do not need too many extra features. A regular one-needle embroidery machine is perfect for learning the craft.
If you plan to embroider towels, napkins, children’s clothing and small gifts, a simple home embroidery machine may be enough in the beginning. If you want to embroider jacket backs, large pillows, table runners or commercial orders, you may need a larger hoop and a stronger machine later.
Before buying a machine, check the hoop size, supported file formats, file transfer method, service availability and included accessories. A machine that looks simple but has reliable hoops, good support and clear file transfer can be much better for a beginner than a complicated model with features you will not use yet.
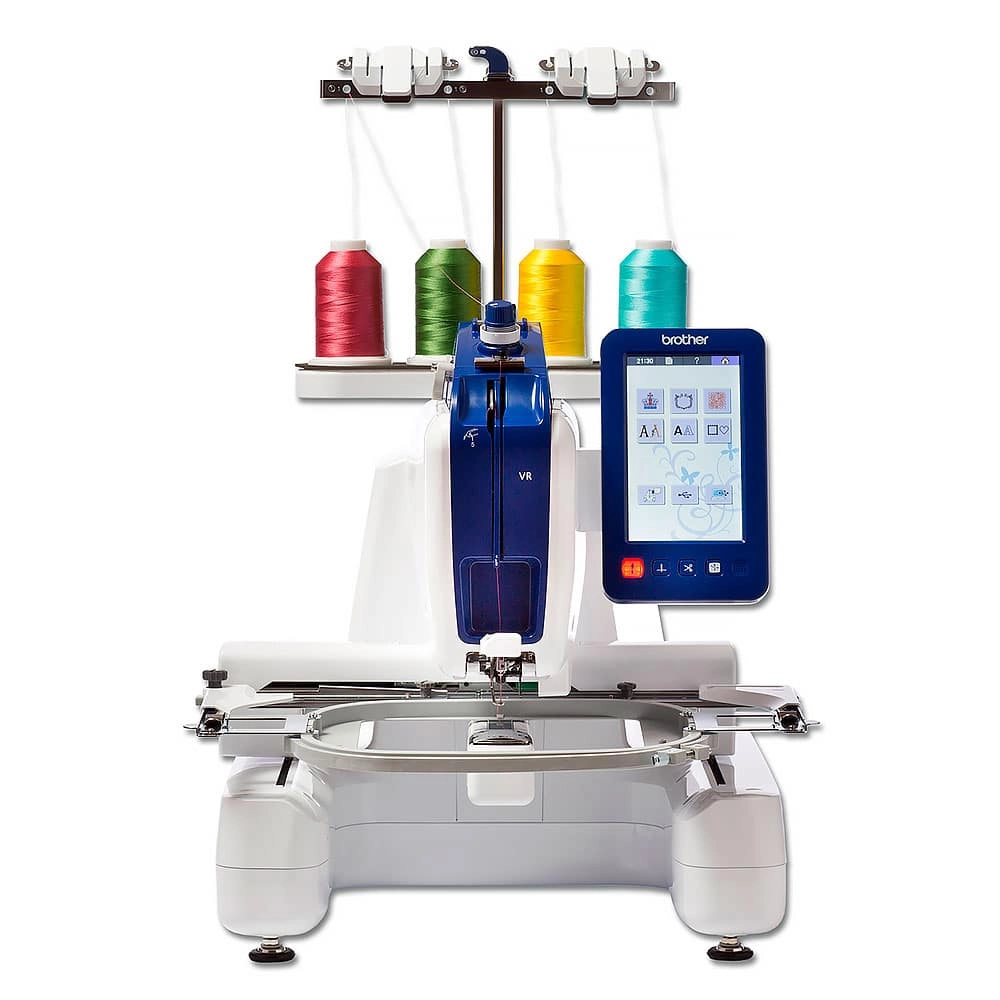
Brother VR embroidery machine
A few words on how to choose an embroidery machine
- Do your research. Learn the basic features every embroidery machine has: hoop size, supported formats, transfer method, number of needles, stitch speed and service options.
- Start small. A beginner does not need a complicated machine with too many advanced features. First, learn hooping, stabilizers, thread tension, file transfer and basic stitch quality.
- Check service availability. Your embroidery machine should be easy to service. Try to choose a brand that has service support in your area.
- Check hoop sizes. Hoop size controls what projects you can make. A 100x100 mm / 4x4 inch hoop is useful for many beginner projects, but larger designs require larger hoops.
- Check file formats. Different embroidery machine brands use different file formats. Before downloading or buying designs, always check which format your machine reads.
If you are not sure which format your machine needs, read our guide: Embroidery Machine File Formats .
Machine embroidery supplies: machine embroidery threads
Machine embroidery threads are specialty threads used in machine embroidery. They differ from regular sewing thread and hand embroidery thread. You should not replace machine embroidery thread with ordinary sewing thread because it may cause thread breaks, poor stitch quality and mechanical problems.
There are two main kinds of machine embroidery threads:
- Bobbin thread — the bottom thread.
- Needle thread — the top thread, the one visible on the front side of the embroidery.
The needle thread creates the visible top stitches of the embroidery. The bobbin thread supports the stitches from the back side. These threads have different purposes, and it is important not to mix them up.
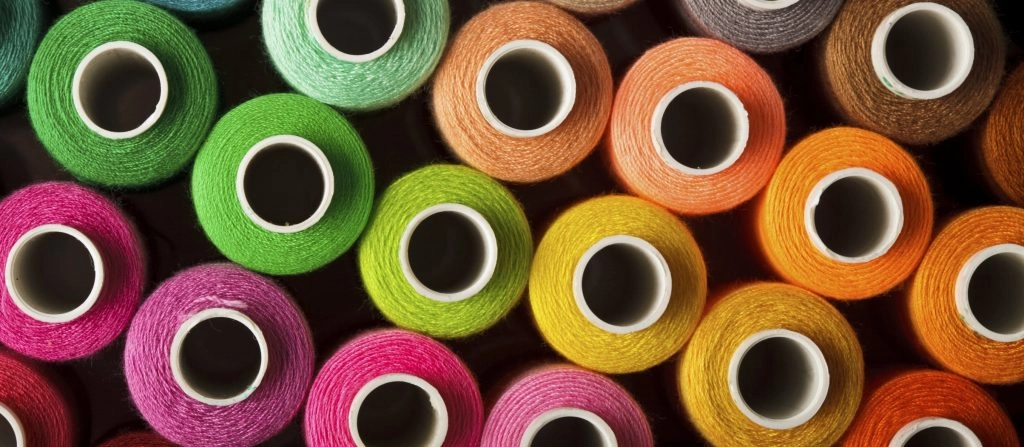
Machine embroidery threads
The needle thread
Needle thread can be rayon, polyester, silk, cotton, wool and other types. There are many types of top thread, but in the beginning you will mostly need rayon and polyester. These are the most common and practical thread types for ordinary machine embroidery projects.
In the beginning, you need only the basic colors. A practical starter set can include rayon or polyester thread in these colors:
- red;
- yellow;
- orange;
- green;
- blue;
- purple;
- black;
- white.
Do not hurry to buy metallic, wool or other decorative needle threads at the very beginning. There will be time for specialty threads later. First, learn how to work with basic rayon and polyester.
Do not stock up on too many colors too early. Threads are demanding in terms of storage conditions and age. If you do not use them for a long time, they may become dry and fragile.
Tip: If you cannot decide what colors and how many threads to get, look at machine embroidery designs you like. Design files usually include color charts with information about the number of colors used. When you learn how to read the color chart and preview the design in embroidery software, you will understand which colors you need most often.
Another way to begin working with colors is to buy a pre-assembled thread color kit. Such kits are available from many thread manufacturers and may include anything from a small basic range to hundreds of colors. Still, for a beginner, a smaller practical set is usually better than a huge collection that may sit unused.
Note: Do not rush into buying a large number of threads. If threads sit unused for too long, they may dry out. Dry thread can break, cause bird nests and create many other embroidery problems.
What thread brands should you start with? Try different brands gradually. Threads from each brand have their own behavior: some are softer, some are stronger, some have more shine, and some work better with dense designs. You can start with generic threads from local craft stores and then try industry brands such as Madeira, Gunold, Royal, Reingold and others. Experience with different threads is as important as knowledge of fabrics and embroidery machine operation.
The bobbin thread
The bobbin thread is the thread that goes into the bobbin compartment. It is used on the back side of the embroidery and usually differs from the top thread. Bobbin thread often comes in black and white, and it is usually finer than the top embroidery thread.
You can buy large spools of bobbin thread and wind your own bobbins each time you work. Another option is to buy pre-wound bobbins. Pre-wound bobbins save time and are available from many manufacturers, including Madeira, Gingko and others.
Either way, prepare your bobbins before you start embroidering. Stopping in the middle of a project only to wind a bobbin can be annoying, especially when you are still learning.
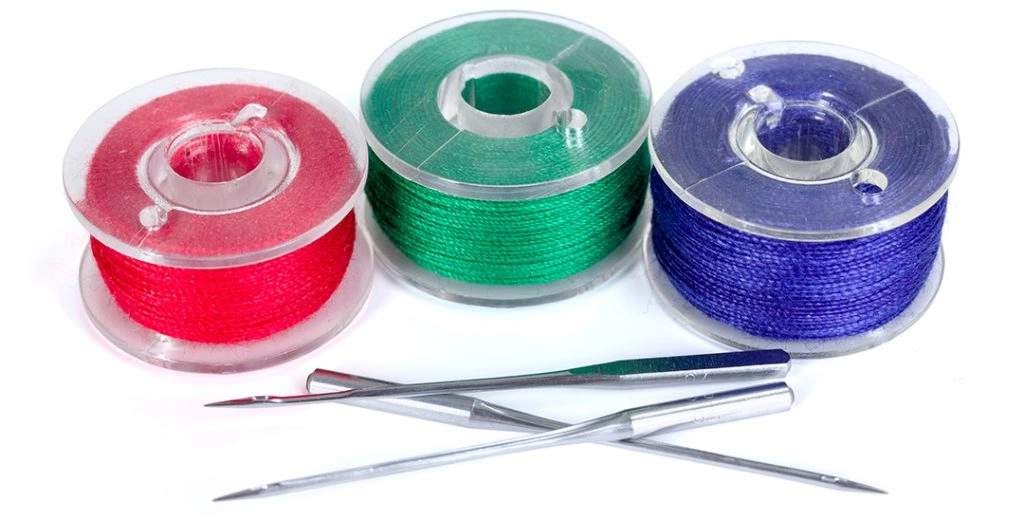
Bobbin thread and machine embroidery needles
Machine embroidery supplies: machine embroidery needles
The first thing to know when getting machine embroidery needles is that they differ from regular sewing needles. They differ in shaft size, point form and other details.
The second thing to know is that embroidery needles come in different sizes and types. Each fabric or thread may require needles of its own size and type. Choosing the right embroidery needle is very important because the wrong needle can ruin your project.
You will also need to change needles regularly because they get dull. Dull needles, just like wrong needles, can damage fabric, break thread, create skipped stitches and spoil the final embroidery.
What types of needles will you need in the beginning? Since the beginner stage is all about gaining experience, it is useful to keep a small variety of embroidery needles at hand. Get a few sets of different sizes and types, then learn how to use them in different projects.
A beginner can usually start with common embroidery needle sizes such as 75/11 and 80/12. Use smaller needles for lighter fabrics and finer threads. Use stronger needles for heavier fabrics, dense designs or thicker threads.
Learn more here: How to Choose the Right Needle for Machine Embroidery .
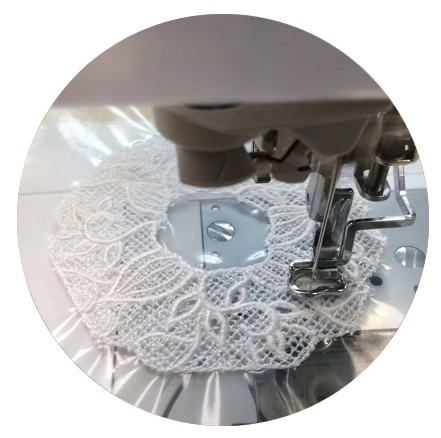
Machine embroidery supplies: machine embroidery stabilizers
Machine embroidery stabilizers are paper-like and film-like materials used to support fabric during embroidery. Stabilizers are one of the most important parts of machine embroidery. Many beginner problems are not caused by the design or the machine, but by the wrong stabilizer.
What do stabilizers do? Here are just a few of their magic powers:
- Stabilizers support fibers of the fabric during the embroidery process.
- Stabilizers help stitches lay in a neater way.
- Stabilizers help the final product look better.
- Stabilizers keep the stitches and fabric together, making the embroidery last longer.
- Stabilizers help prevent puckering, shifting and distorted outlines.
Stabilizers are our little saviors, so beginners should get familiar with them from the start.
Water-soluble stabilizer for machine embroidery
There are many different types of stabilizers: cut-away backings, tear-away backings, wash-away films, water-soluble toppings and more. Some are temporary, while others are permanent. Some are transparent, some come in black or white, and some may have different weights.
In the beginning, you do not need every type. Medium-weight tear-away and cut-away backings are a good set to start with. These two types can be used for many beginner projects.
Embroidery projects where the back side may be visible often require tear-away backing. Backing goes on the back side of the item or fabric. After the embroidery is finished, it is torn away.
Projects where the back side will not be visible, such as pillowcases or some decorative items, often require cut-away backing. Cut-away stabilizer remains behind the embroidery and gives long-term support.
After you understand the basics, add wash-away toppings to your set. Toppings are used for machine embroidery on nappy and textured fabrics such as fur, terry cloth towels, fleece, velvet and similar fabrics. The topping keeps stitches from sinking into the pile.
In the beginning, information about stabilizers may seem overwhelming. Do not worry. With practice, you will quickly understand which stabilizer works for each fabric and each project.
A good place to continue learning is: Choosing Stabilizers for Machine Embroidery .
Machine embroidery supplies: temporary spray adhesive
Temporary spray adhesive, also called sticky spray, is glue in spray form. It is a helpful tool for many embroidery projects and can be useful for beginners as well as experienced embroiderers.
What does temporary spray adhesive do? It gives extra support to stabilizers by securing them to the fabric before and during embroidery. This extra adhesion is helpful for hooping because when you hoop a sandwich of fabric and stabilizer, the tension applied to each layer is not always the same.
Uneven tension can cause embroidery defects: uneven stitching, shifted outlines, overlapping contours or puckering. Temporary spray adhesive can help reduce these problems.
Use spray adhesive carefully. A light layer is enough. Too much spray can make needles sticky, collect dust and cause thread problems. Spray away from the embroidery machine and let the adhesive settle before hooping.
Learn more here: Temporary Adhesive Spray for Embroidery .
Machine embroidery supplies: helpful extras
Some helpful extras may already be in your home. Still, they are important enough to include in the beginner preparation list.
Scissors
Machine embroidery usually requires three types of scissors:
- Dressmaker’s shears — for cutting fabric.
- Embroidery scissors or thread clippers — for trimming jump stitches and cleaning the embroidered area.
- Applique scissors — useful if you are going to work with applique machine embroidery designs.
In the beginning, these types will do. Later, if you find it useful, you can get a rotary cutter and other specialty cutting tools.
Pins, fabric marker and iron
Pins can be useful for stabilizing small fabric pieces, especially in applique projects. Use them carefully and never let pins enter the needle area.
A fabric marker is very useful for precise placement of designs on fabric. Some designs, such as borders, frames, monograms and napkin corners, require very accurate placement.
An iron is a must-have for preparing fabric before embroidery. Pressing fabric is not only about making it look neat. It is also a technical step. Some fabrics change after heat is applied, and you need to understand how the fabric behaves before embroidery.
Fabric clips
Fabric clips are exactly what their name says. They are clips of various types used to keep the unhooped fabric away from the needle area.
Why do you need them? As a beginner, you may face a very common problem: sewing the unhooped part of the embroidered item to the back of its hooped part. This often happens with T-shirts, sweatshirts, towels, bags and other ready-made items. Fabric clips keep the excess fabric safely away from the needle.
Fabric clips for keeping extra fabric away from the needle area
The term fabric clips is a general name for many tools of different shapes. Embroidery masters use different things for this purpose. Some use regular household items such as claw hair clips or stationery clips. Others prefer special sewing and embroidery clips.
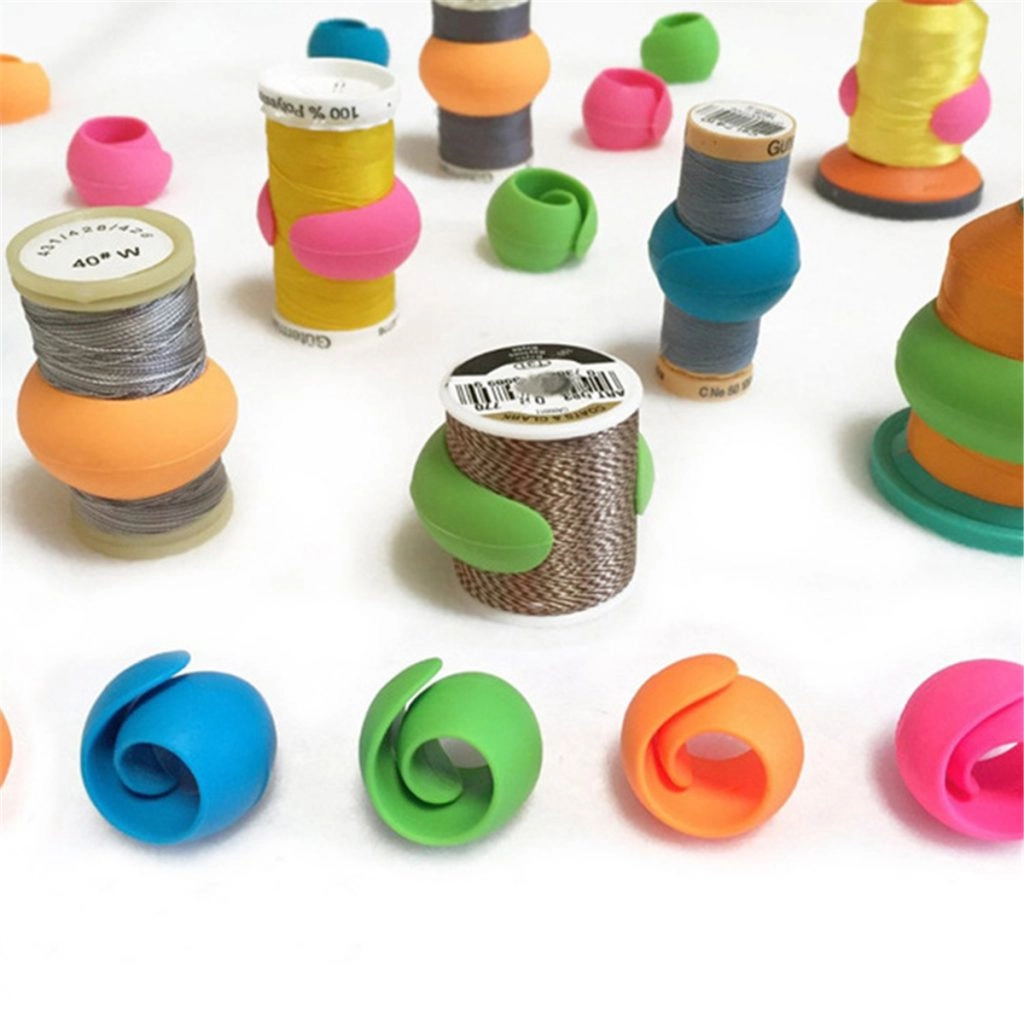
Thread Spool Huggers
Thread spool huggers help keep thread ends under control. This makes thread storage neater and helps prevent tangled loose ends.
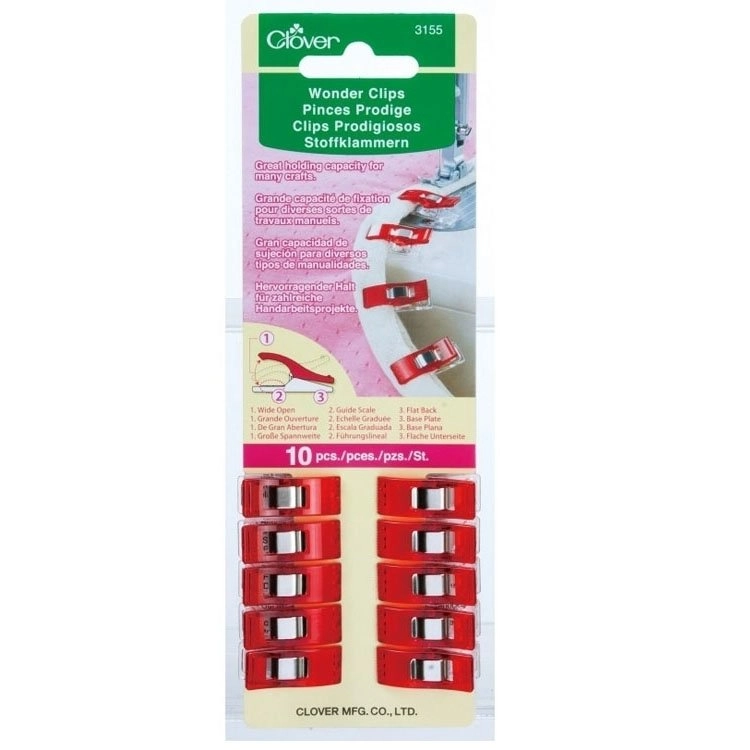
Clover Wonder Clips
Clover Wonder Clips and similar clips can help hold fabric, keep extra layers away and organize embroidery projects. They are especially helpful when pins are not the safest option.
Computers and memory sticks
A computer or laptop is an essential part of machine embroidery. Computers help us store and look through machine embroidery designs before transferring them to an embroidery machine.
Why do you need to look through designs before stitching them onto an item? There are many reasons. For example, you need to check whether the design format suits your machine. If it does not, you may need to convert the design into the correct machine format.
If the format is wrong, your embroidery machine may not recognize the design file at all. Another important reason to check the design on a computer is size. If the design is too large for your hoop, your machine will not stitch it. You also need to check stitch count, colors and thread sequence.
Wrong format or wrong size are not the only reasons an embroidery machine may not recognize a design. A machine may also reject a file because of wrong folder placement, USB issues, unsupported stitch count, unsupported design size or incorrect transfer method.
Along with a computer, you may need a memory stick to transfer designs to your embroidery machine. Some embroidery machines use a USB stick. Some use a data transfer cable. Some older machines may use memory cards or special transfer software. Always check your machine manual.
A very common beginner mistake is copying the whole ZIP archive to the embroidery machine. Most embroidery machines cannot read ZIP archives. First, unzip the downloaded file, then copy only the correct embroidery format to your USB stick or machine software.
If you cannot open a downloaded ZIP archive, you can use our free tool: Online ZIP Unzip Tool .
Embroidery software
The last, but not least, item on the beginner essentials list is embroidery software. What is embroidery software and why do you need it?
Embroidery software is a type of computer application that helps you work with embroidery designs. There are several types of embroidery software, and they are usually classified by what they can do with embroidery files.
1. Embroidery software for design transfer
This is the most basic type of embroidery software. Its main function is to transfer a design file from a computer to an embroidery machine. It often comes with the embroidery machine, so you do not need to buy it separately.
This type of software is simple, but it may be enough if you only need to move ready-made designs to your machine.
2. Embroidery software for format conversion
Format converters usually have a limited set of features. They can help you look into the design, check its size, stitch count, format and sometimes colors. Their main function is to convert designs from one machine format to another.
What is a design format? In simple words, the design format is the file type that your embroidery machine reads. An embroidery machine recognizes the design by its format and then knows how to stitch it.
If the format is wrong, the machine will not read the design. This is where embroidery converters can help. Some free converters are available online.
A converter can help save a design in another format, but it does not remove machine limitations. Always check hoop size, stitch count and final design quality before stitching.
One useful free program for opening, viewing and simple editing of embroidery files is: Free My Editor Embroidery Software .
3. Editing embroidery software
Editing embroidery software allows users to make changes to embroidery designs. Some programs are free, and others are paid. Their features may include format conversion, thread color changes, adding or deleting some design elements, basic resizing and simple editing.
However, editing software is not magic. A beginner should not expect perfect results just by clicking buttons. Machine embroidery design editing requires at least some understanding of how designs are digitized.
For example, you may want to fit a large design onto a smaller pocket. An editing program may let you resize it, but if you simply use the size-down feature without understanding stitch density and recalculation, the design can be ruined. Shapes may come out wrong, stitches may become too dense, outlines may shift, and the final embroidery may look poor.
Resizing and editing require basic knowledge of digitizing. If learning digitizing is not in your plans, it is better to ask for professional resizing when the design needs a serious size change.
Always save a copy of the original embroidery file before editing. Work on a copy, test stitch the result and never edit the only version of your purchased design.
4. Digitizing embroidery software
Digitizing embroidery software is used to create embroidery designs from scratch. This type of software is for users who know how to digitize. Digitizing is a professional skill, and it is very different from simply opening or converting a ready-made embroidery file.
Professional digitizing software can include programs such as Tajima DG/ML, Compucon, Wilcom and other advanced systems. There are also programs often used by home or semi-professional embroiderers, such as PE-Design, Janome Digitizer, Bernina Embroidery Software, Embird and others.
A beginner does not need professional digitizing software right away. First, learn your machine, thread, stabilizer, hooping, file formats and stitch quality. After that, if you still want to create your own designs from scratch, you can begin learning digitizing.
Good first machine embroidery projects for beginners
For your first projects, choose simple embroidery designs. Do not start with huge, dense, multicolor projects on expensive fabric. Start with stable cotton, a simple design and the correct stabilizer.
Good beginner designs usually have:
- a small or medium hoop size;
- clear shapes;
- moderate stitch density;
- not too many color changes;
- no tiny lettering;
- no difficult specialty thread;
- no complicated applique steps for the first test.
A 100x100 mm / 4x4 inch embroidery design is often a good starting point. This size works for many beginner projects: small towels, napkins, fabric bags, simple monograms, children’s items and test stitchouts.
You can also practice with: Free Machine Embroidery Designs before stitching on an important item.
First test stitch: the safest beginner method
Before embroidering on a final item, make a test stitch. This is one of the best habits a beginner can learn.
- Choose stable cotton fabric.
- Use medium-weight tear-away stabilizer.
- Hoop the fabric and stabilizer smoothly.
- Choose a small or medium design.
- Use regular polyester or rayon embroidery thread.
- Use a fresh embroidery needle.
- Watch the first stitches carefully.
- Check the back side after stitching.
- Write down what worked and what did not.
This simple test teaches more than many long forum discussions. Embroidery is technical, but your hands learn quickly when you test in a controlled way.
Common beginner mistakes in machine embroidery
Beginner problems are normal. Most of them come from wrong stabilizer, dull needle, incorrect hooping, wrong file format or fabric that is too difficult for a first project.
- Using sewing thread instead of embroidery thread — may cause breaks and poor stitch quality.
- Skipping stabilizer — causes puckering, shifting and distorted outlines.
- Using the wrong stabilizer — tear-away is not ideal for stretchy fabrics.
- Copying the ZIP archive to the machine — unzip first and copy only the embroidery format.
- Using an old needle — causes thread breaks and fabric damage.
- Starting with difficult fabric — velvet, terry, knit, leather and slippery fabric are not first-test fabrics.
- Ignoring hoop size — the design must fit your machine hoop.
- Resizing too much — heavy resizing can ruin stitch quality without proper recalculation.
If something goes wrong, do not panic. Change one thing at a time: needle, stabilizer, thread, hooping, fabric or file format. This is the fastest way to understand what caused the problem.
FAQ about machine embroidery supplies for beginners
What do I need to start machine embroidery?
You need an embroidery machine, hoops, machine embroidery thread, bobbin thread, embroidery needles, stabilizers, scissors, pins, iron, fabric marker, fabric clips, a computer or USB stick and basic embroidery software.
What stabilizer should a beginner buy first?
Start with medium-weight tear-away stabilizer, cut-away stabilizer and water-soluble topping. These three options cover many common beginner projects.
Can I use regular sewing thread for machine embroidery?
It is better to use machine embroidery thread. Regular sewing thread may break more often and may not create the same smooth embroidery finish.
What is the best first fabric for machine embroidery?
Stable woven cotton is one of the best fabrics for a first test. Avoid stretchy, fuzzy, slippery or expensive fabrics until you understand hooping and stabilizer.
What hoop size is good for beginners?
A 100x100 mm / 4x4 inch hoop is very beginner-friendly. It is suitable for small designs, monograms, towels, napkins and test stitchouts.
Do I need to unzip embroidery files before using them?
Yes. Most machine embroidery designs are downloaded as ZIP archives. Unzip the archive first, then copy the correct embroidery format to your USB stick or machine software.
Final advice for machine embroidery beginners
That is it. The boxes in the list of machine embroidery beginner essentials are ticked and ready. The only thing left to say is simple: be patient, take your time and practice a lot.
Time, patience and practice are the key elements of success in machine embroidery. Learn one thing at a time: first your machine, then thread, then stabilizer, then fabric, then software. Do not try to master everything in one day.
Start with simple projects, test stitch before embroidering on the final item, and keep notes about what worked. With practice, the technical part becomes easier, and machine embroidery turns from a confusing new craft into a beautiful creative tool.

Author: Ludmila Konovalova
My name is Ludmila Konovalova, and I lead Royal Present Embroidery. Embroidery for me is more than a profession; it is a legacy of my Ukrainian and Bulgarian heritage, where every woman in my family was a virtuoso in cross-stitch and smooth stitching. This art, passed down through generations, is part of my soul and a symbol of national pride.
Date: 27.05.2024

 Get Sign-In Link
 Login with Google
 Login with Facebook
 Login with Amazon
 Login with Paypal