My Editor is a free embroidery software from Wings Systems that can help you open, view, edit and convert machine embroidery files. It is useful for home embroiderers who want to check a design before stitching, change thread colors, remove small parts of a design, copy elements, preview stitch order and save a file in another embroidery machine format.
This guide explains how to use My Editor free embroidery software with machine embroidery designs downloaded from Royal Present Embroidery. You will learn how to open a design, recolor it, change thread brands, delete unnecessary elements, copy parts from one design to another and remove individual stitches.
Important: My Editor is helpful for viewing, simple editing and format conversion, but it is not the same as professional manual digitizing software. It does not replace Wilcom, Tajima, Hatch or other professional embroidery digitizing programs.
What can you do with My Editor embroidery software?
My Editor is useful when you need to work with purchased embroidery files before sending them to your embroidery machine. With this free software, you can:
- open machine embroidery files and preview the design;
- check the embroidery size before stitching;
- view the stitch sequence and color order;
- change thread colors;
- convert thread colors to another manufacturer’s palette;
- remove an element from a design;
- copy and paste parts between designs;
- edit or delete individual stitches;
- save the embroidery file in another supported machine format;
- preview the design in 3D before stitching.
This is especially helpful if your embroidery machine needs a specific format such as PES, JEF, DST, EXP, HUS, VP3 or another embroidery file type. If you are not sure which format your machine uses, read our guide: Embroidery Machine File Formats .
Download My Editor only from the official website
We recommend downloading My Editor only from the official Wings Systems website. This helps you avoid unsafe downloads, unwanted software or outdated installer files from random websites.
Official My Editor page: My Editor free embroidery software by Wings Systems
The official website requires registration before downloading. After registration, the download link is sent to your email address.
Before opening embroidery files in My Editor
Royal Present Embroidery designs are usually downloaded as a ZIP archive. Before opening the design in My Editor, unzip the archive first. Your embroidery machine and embroidery software need the actual embroidery file, not the ZIP archive itself.
- Download the ZIP archive from your Royal Present account or email download link.
- Unzip the archive on your computer.
- Open the extracted folder.
- Choose the embroidery format needed for your machine.
- Open that file in My Editor.
If you cannot unzip the archive, use our free online tool: Online ZIP Unzip Tool .
How to open a machine embroidery design in My Editor
The first thing you usually need is to open and preview the embroidery design. Open My Editor, click File, then choose Open. Find the embroidery file on your computer and open it.
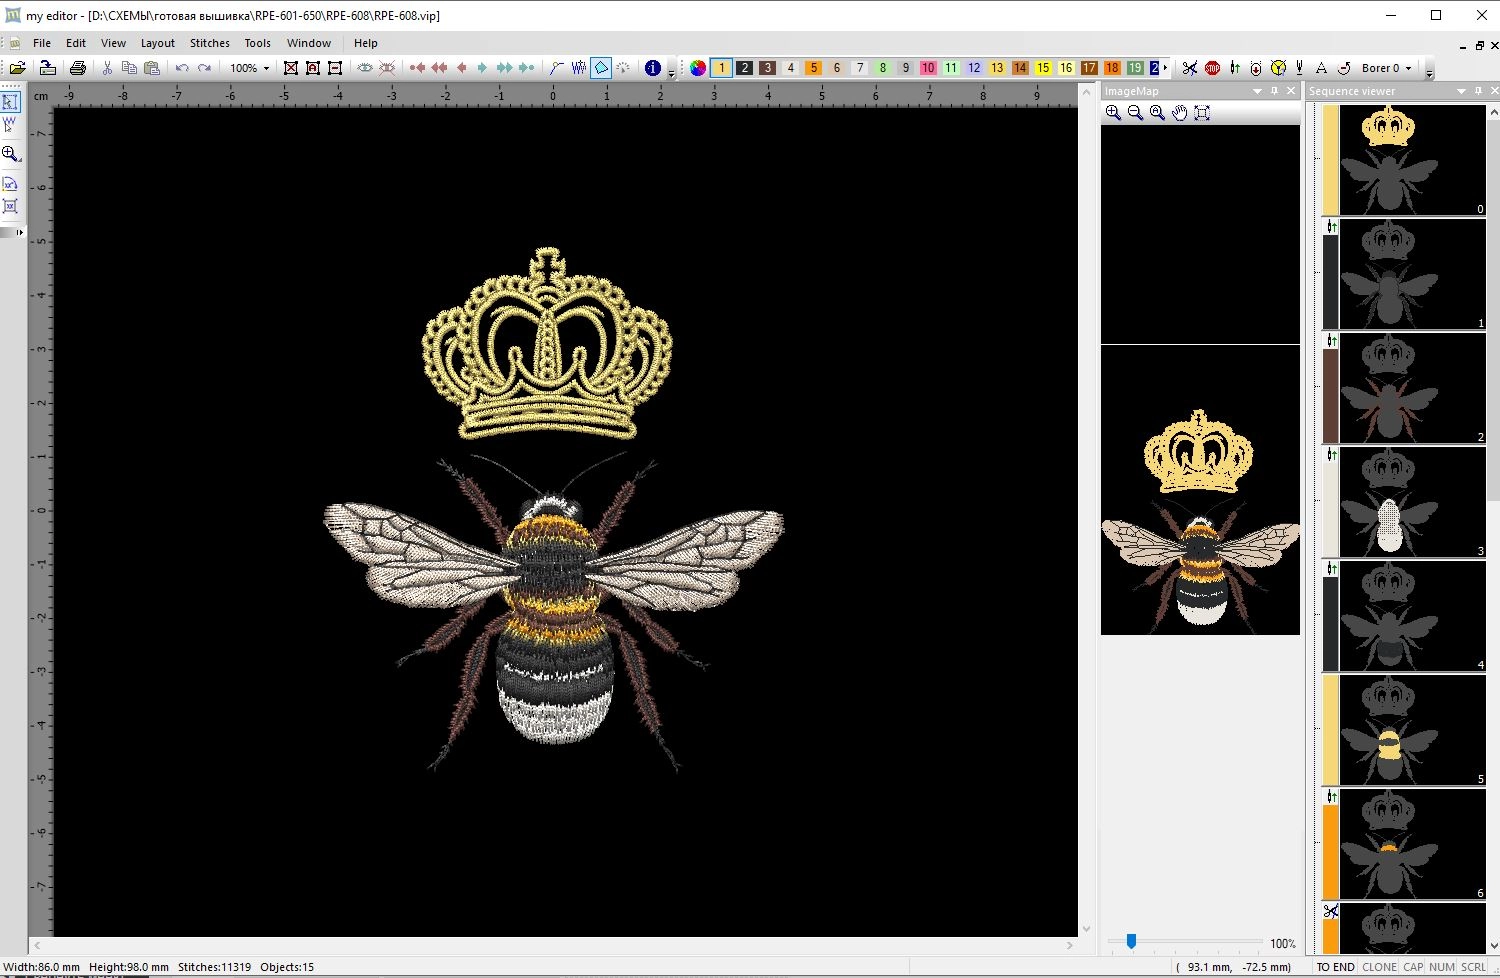
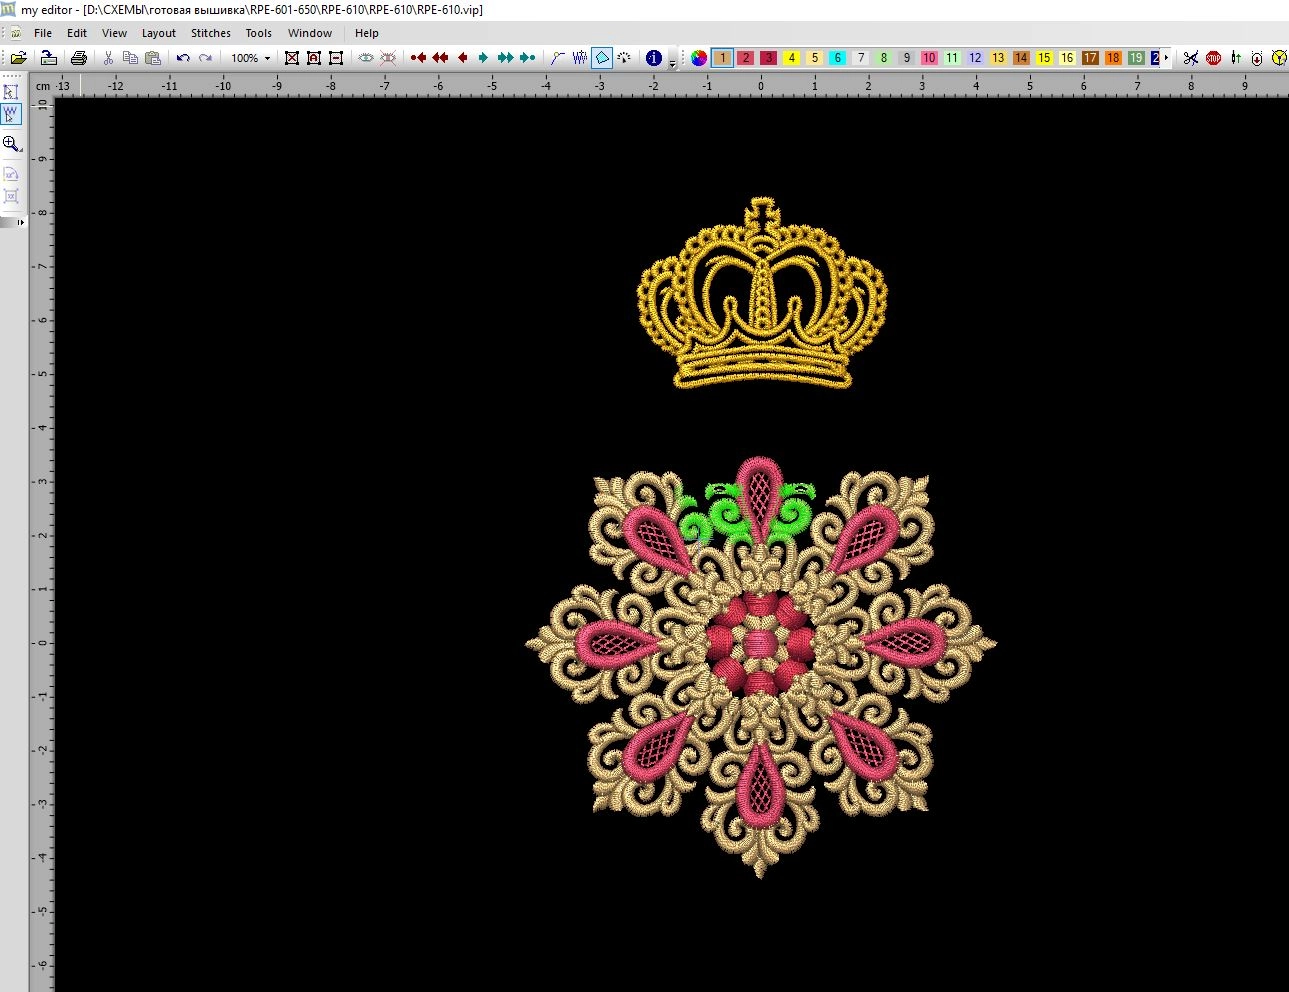
After opening the file, you will see the design in the main workspace. On the right side, My Editor shows the stitch and color sequence, which helps you understand how the design will be embroidered.
How to change thread colors in My Editor
My Editor can help you change thread colors before stitching. This is useful when you want to adapt a purchased embroidery design to your fabric, project style or available thread collection.
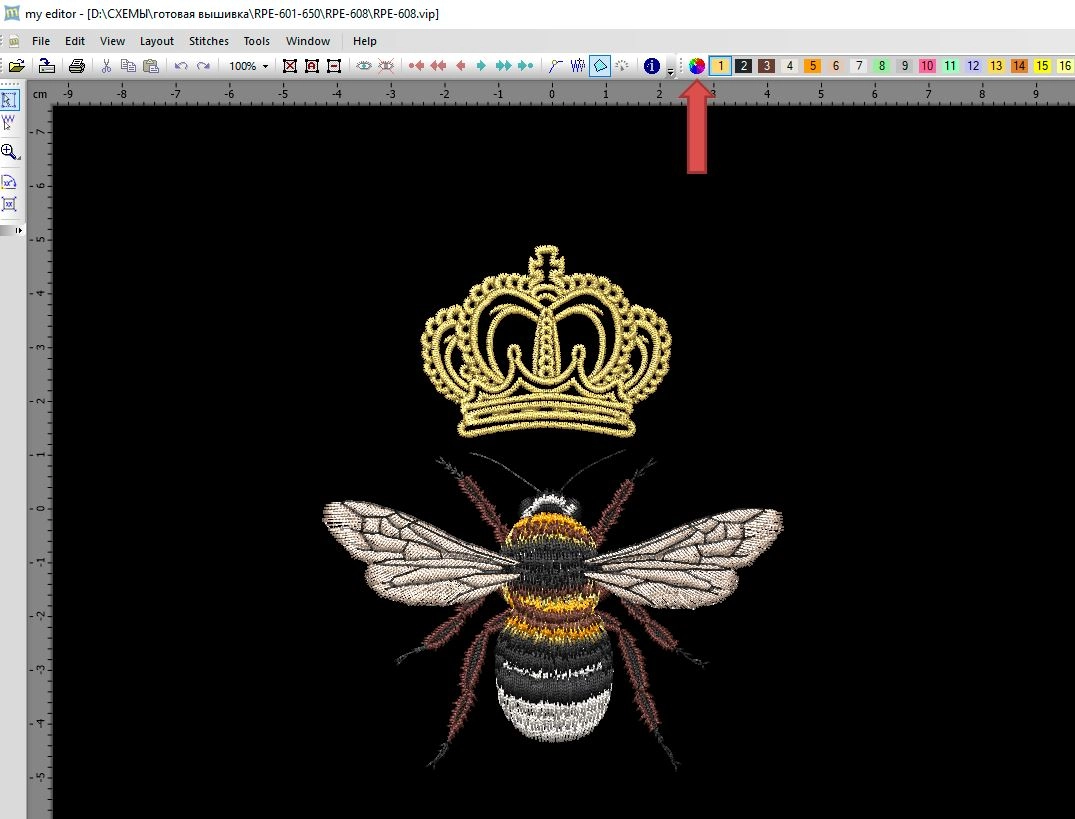
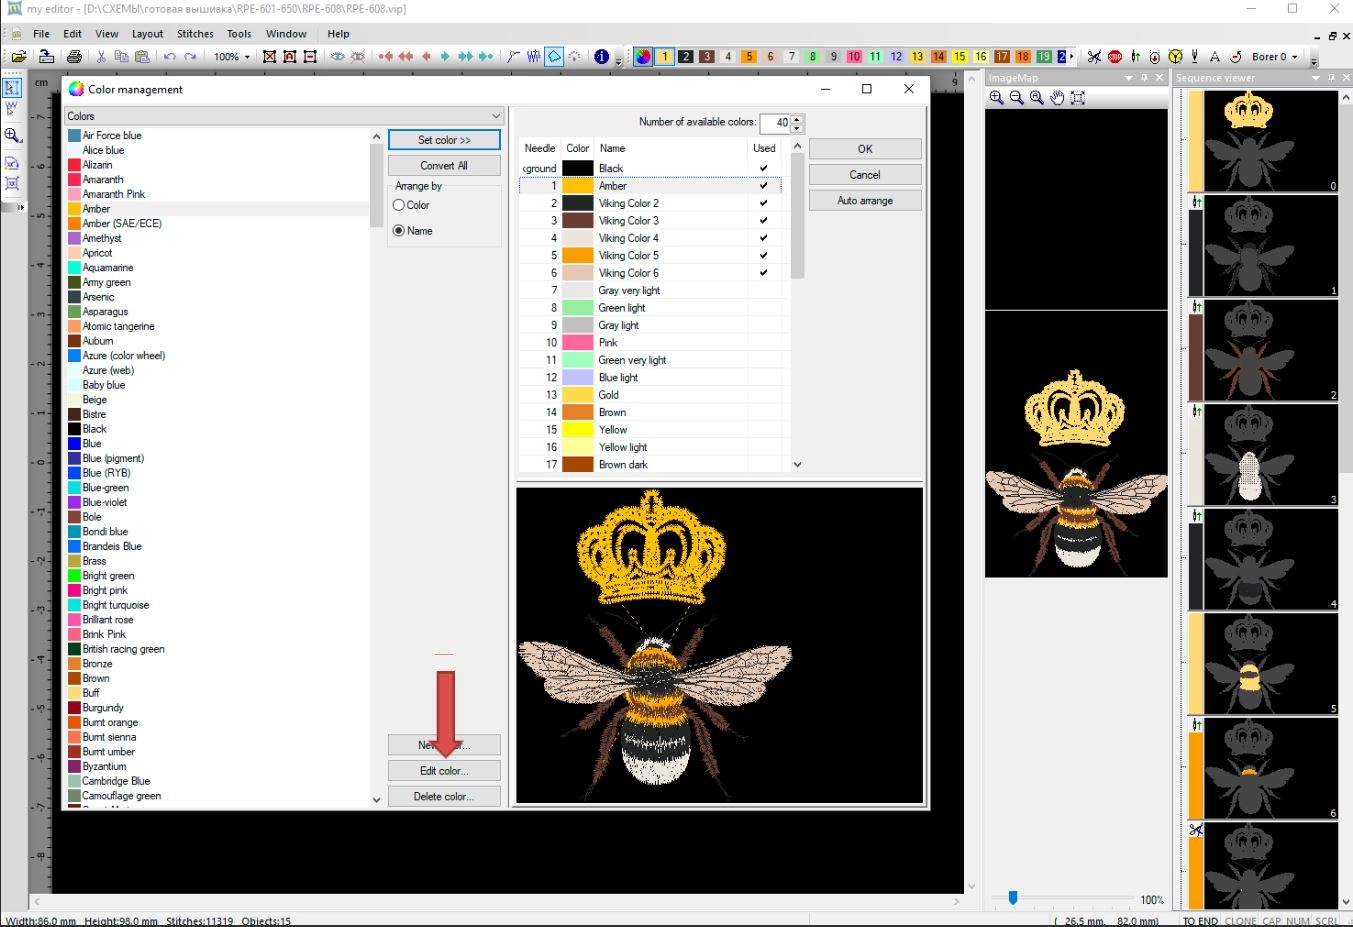
To change colors, open the Color Manager. In My Editor, this button looks like a small multicolor circle on the toolbar.
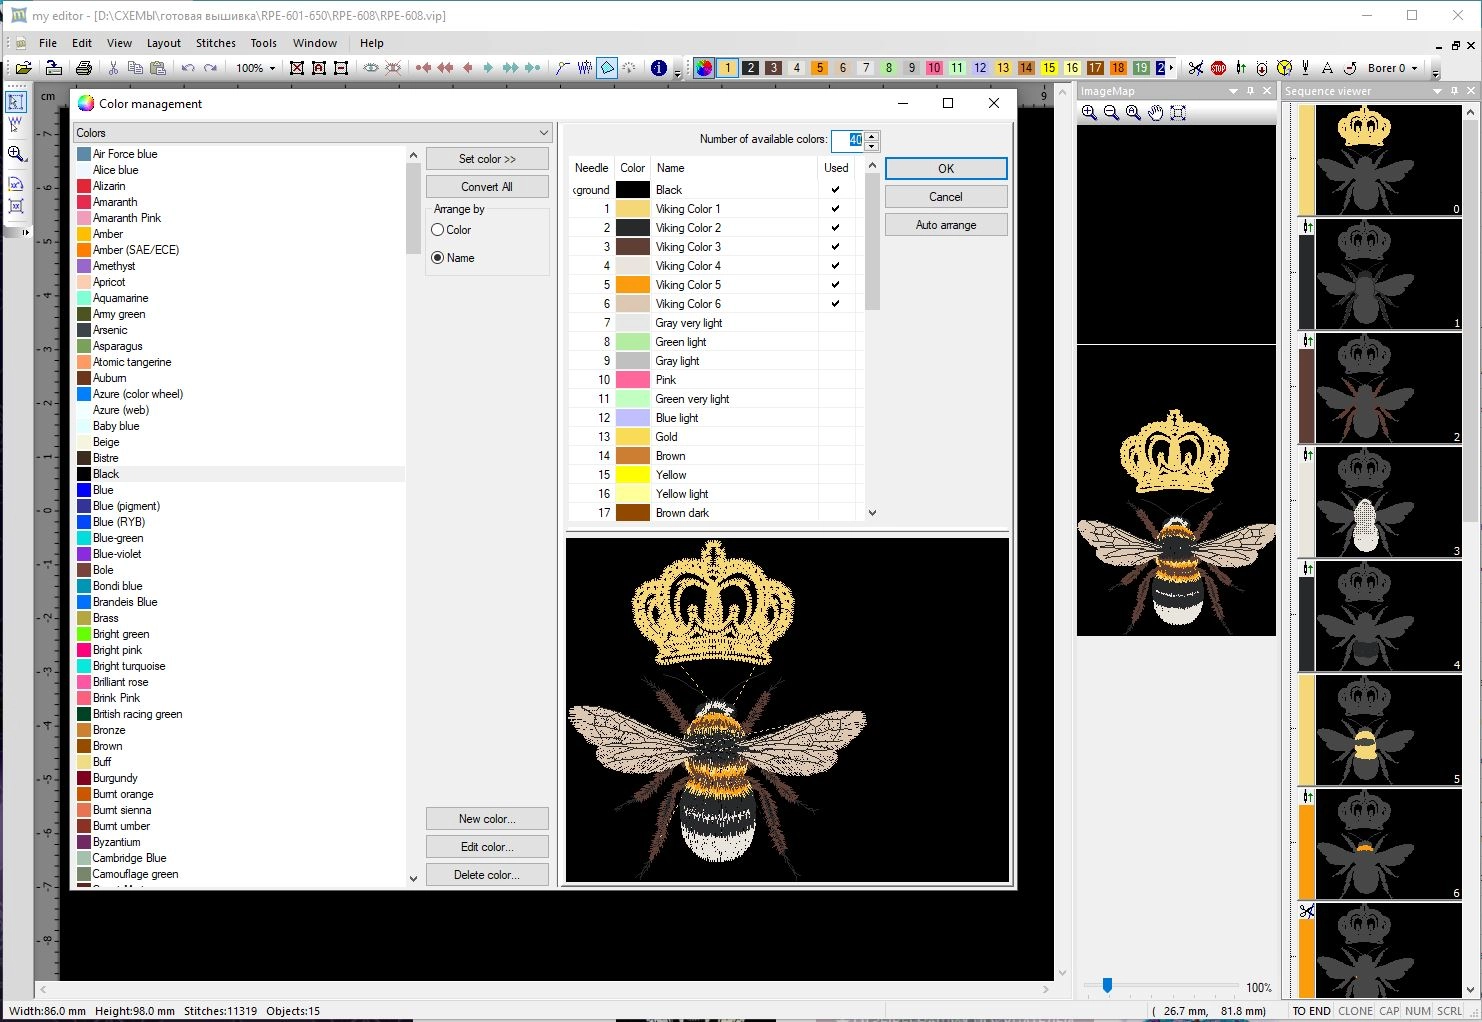
After clicking Color Manager, a color palette window opens. On the left side, you can see available colors. On the right side, you can see the colors used in the current embroidery design.
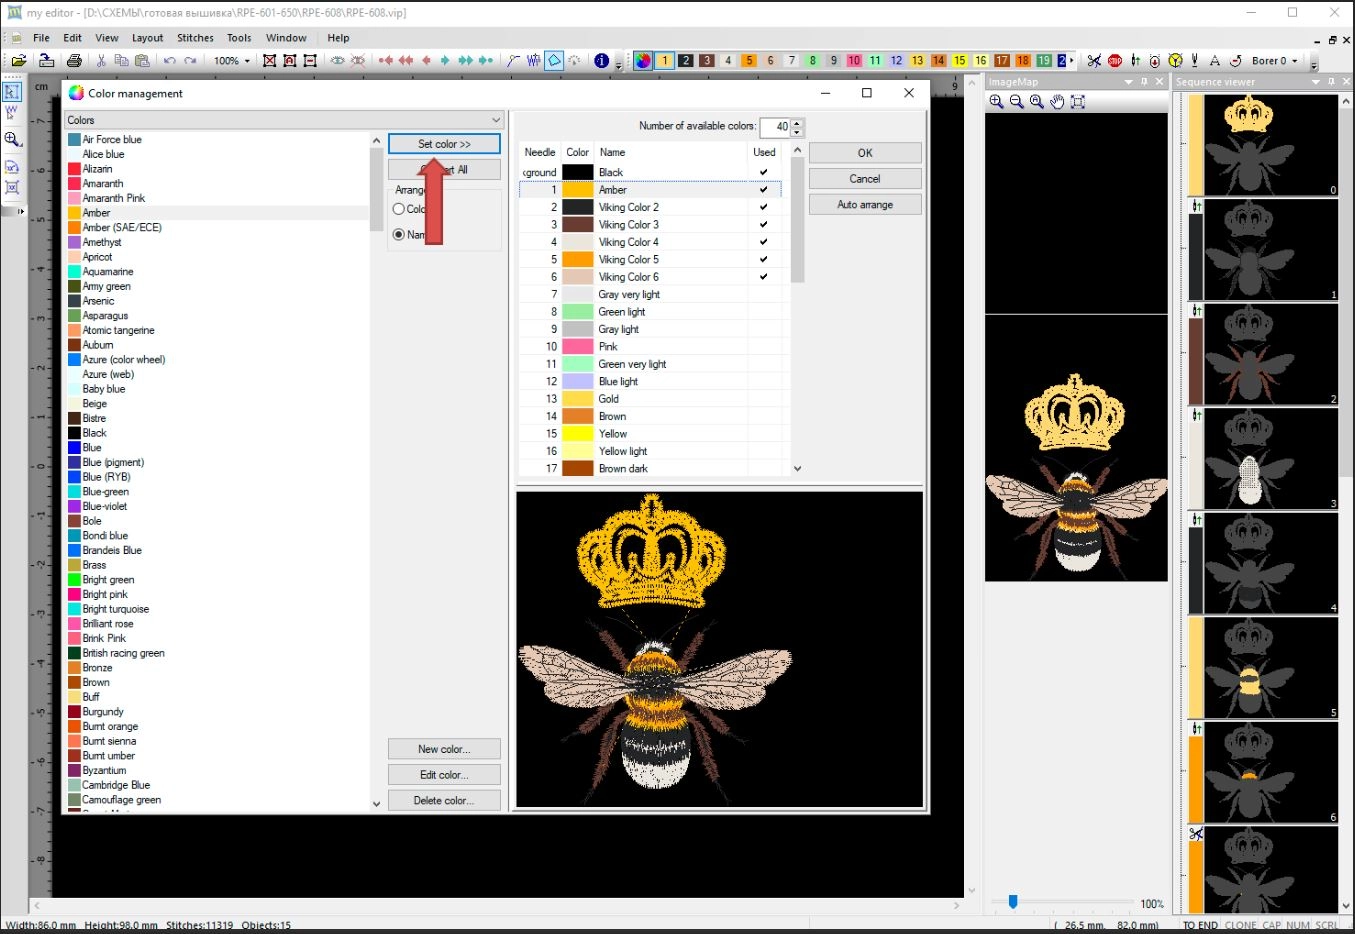
To replace a color, choose a new color from the palette and apply it to the color position you want to change. For example, you can change the crown color from a sandy yellow to a brighter amber shade.
How to create a custom thread color in My Editor
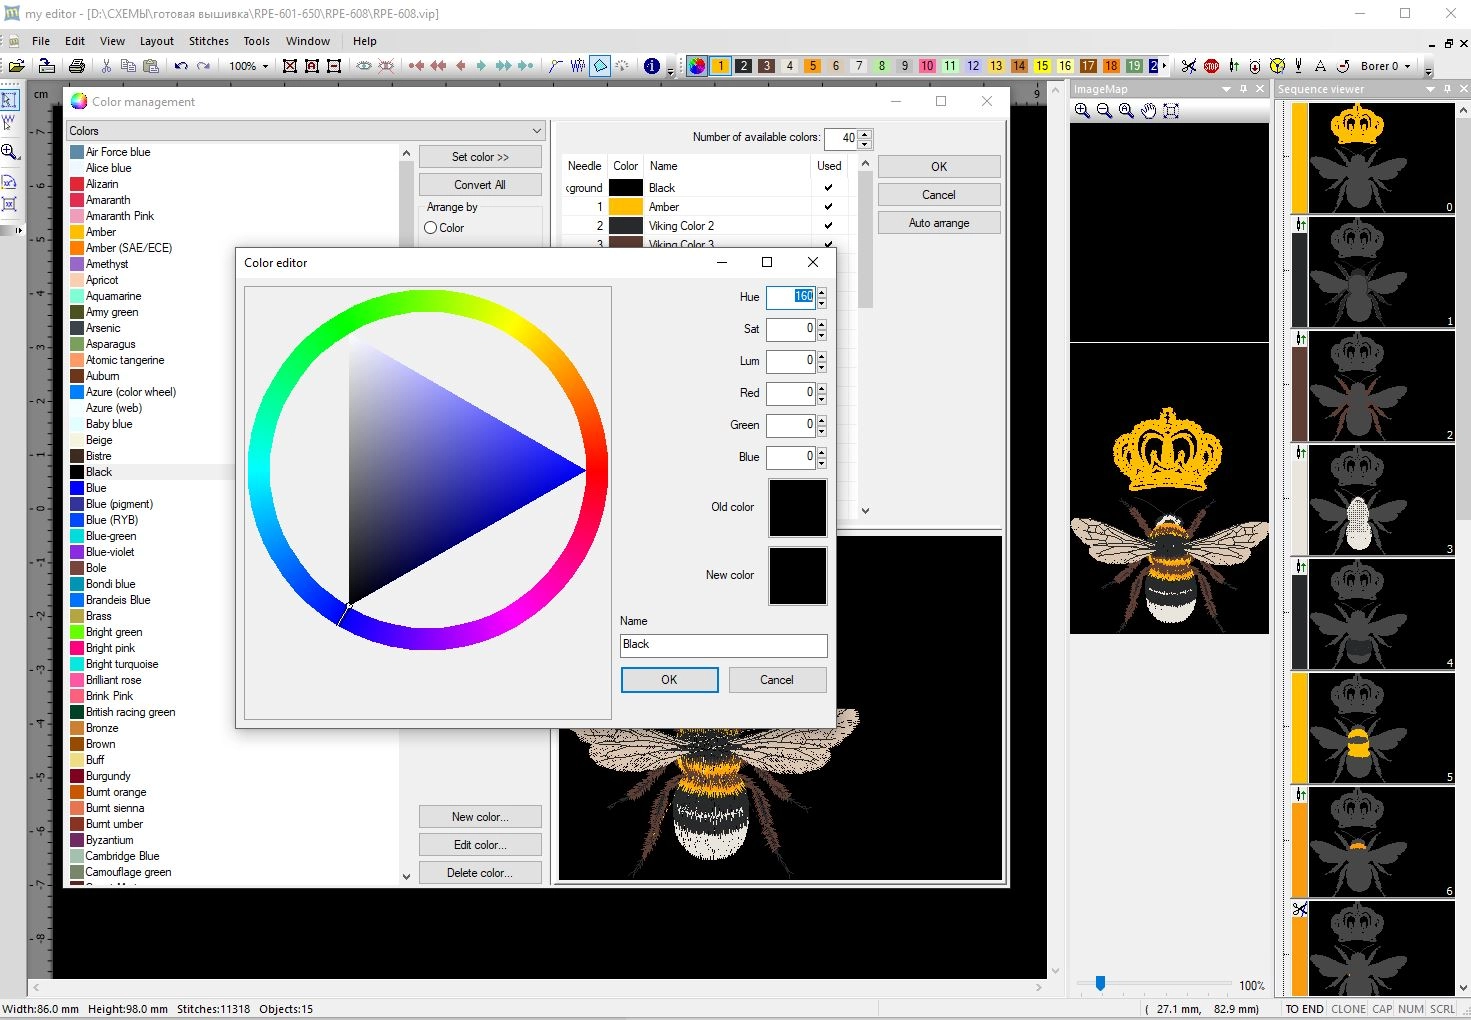
If the color you need is not available in the palette, you can create a custom thread color. Select a color in the palette and click Edit color.
The Color Editor window allows you to create a new shade using the color wheel and numeric color values. You can adjust the color, name it and save it to your palette.
How to convert colors to another thread manufacturer
Many Royal Present embroidery designs use Madeira thread colors in the color chart. If you use another thread brand, My Editor can help convert the color palette to a different manufacturer.
Open the Color Manager, choose the thread manufacturer you need and use the conversion option. Always check the result visually, because automatic thread conversion may not be perfect for every design.
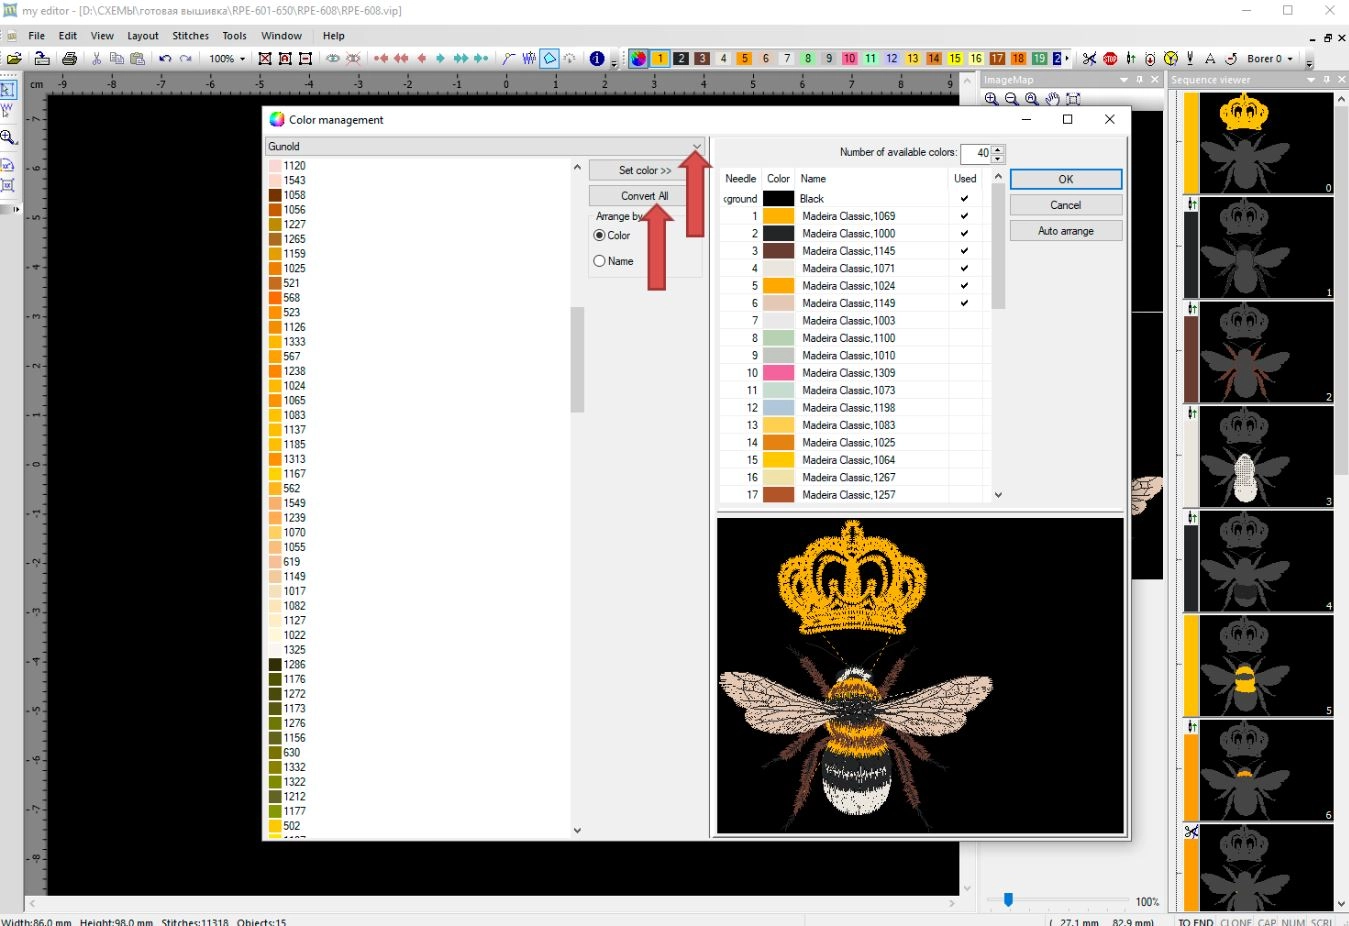
If the converted colors do not match the original look, choose the closest shades manually or create custom thread colors.
How to remove an element from an embroidery design
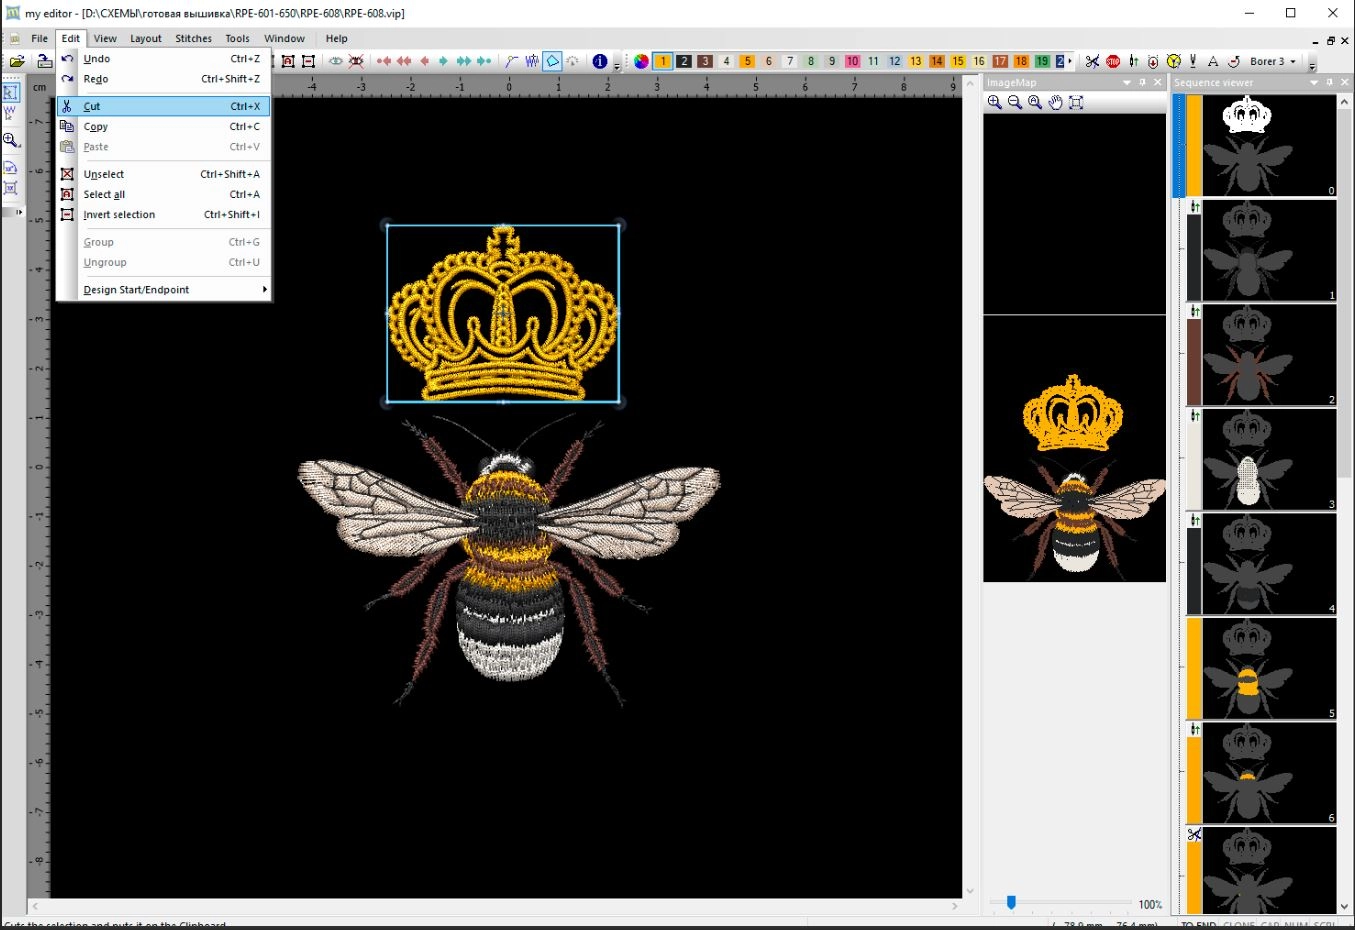
One of the most useful features in My Editor is the ability to remove a separate element from a design. For example, if a design includes a crown and a bee, but you only want to embroider the bee, you can select the crown and delete it.
First, select the element you want to remove. The selected part will be surrounded by a selection frame.
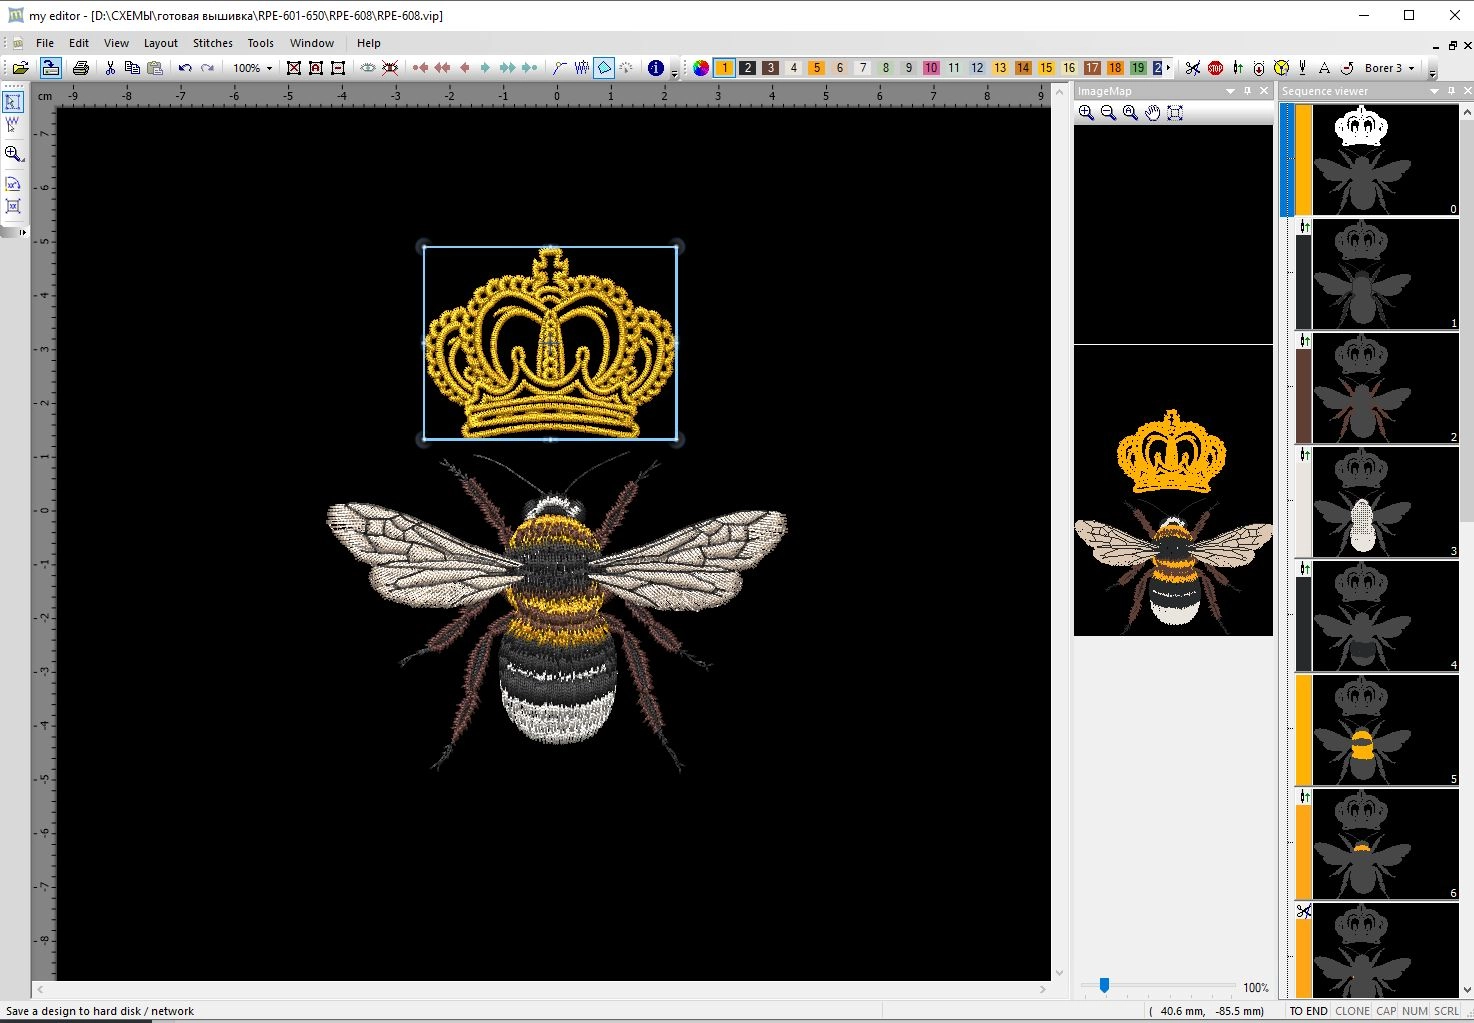
Then use the delete option. After deleting the selected element, only the remaining part of the design stays in the workspace.

This option is helpful when you want to simplify a design, use only one motif from a larger composition or create a different embroidery project from the same file.
How to copy and paste embroidery elements between designs
My Editor also allows you to copy or cut an element from one embroidery design and paste it into another design. This can be useful when you want to combine motifs or create a new composition from existing embroidery files.
Select the element you want to copy or cut. Then use the Edit menu and choose Cut or Copy.
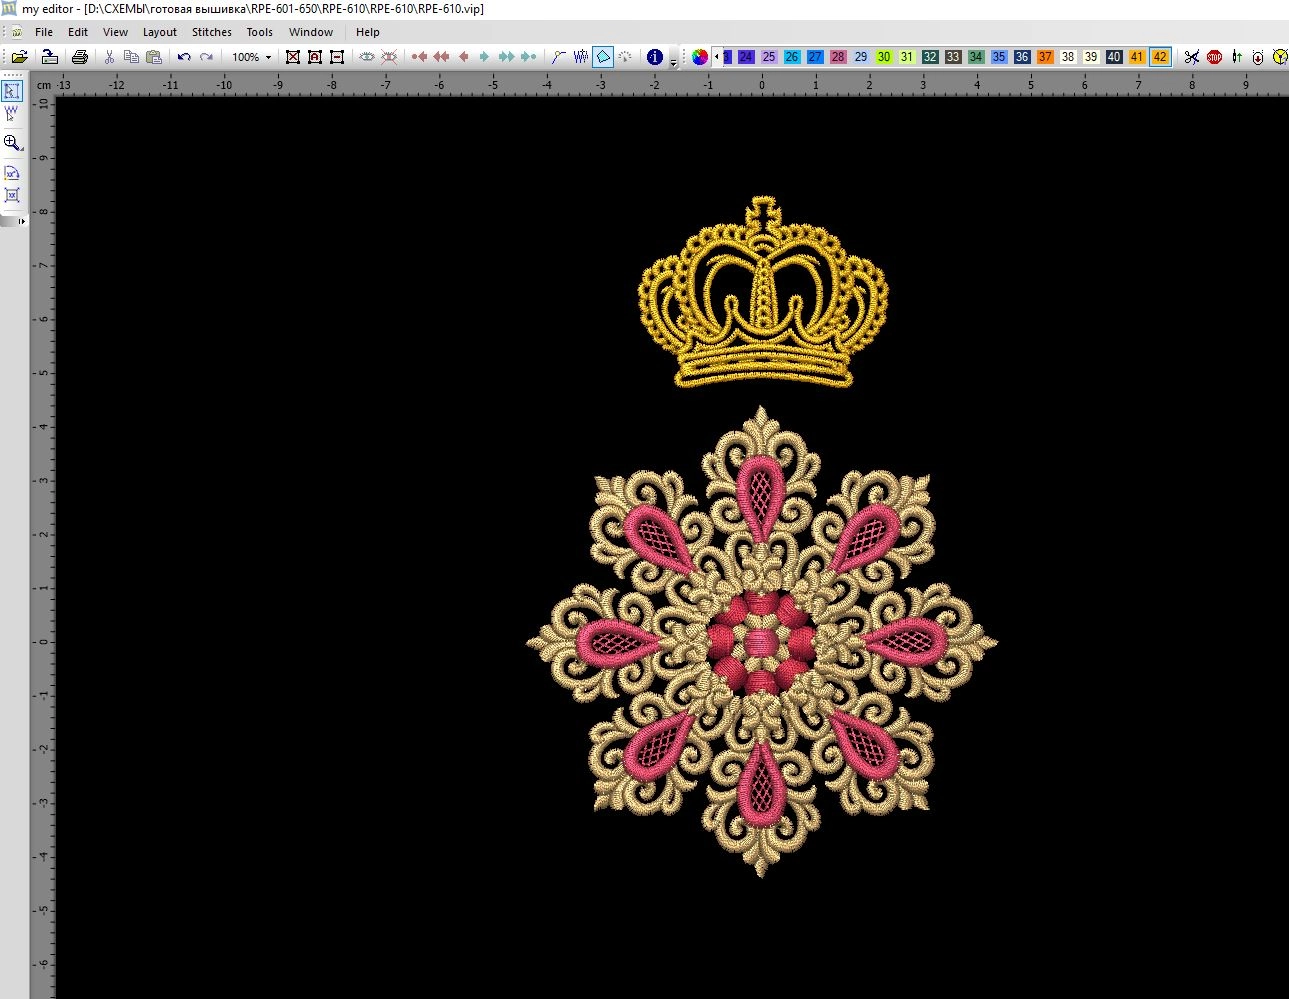
Open another embroidery design and use Paste. The copied element will appear in the new design workspace.
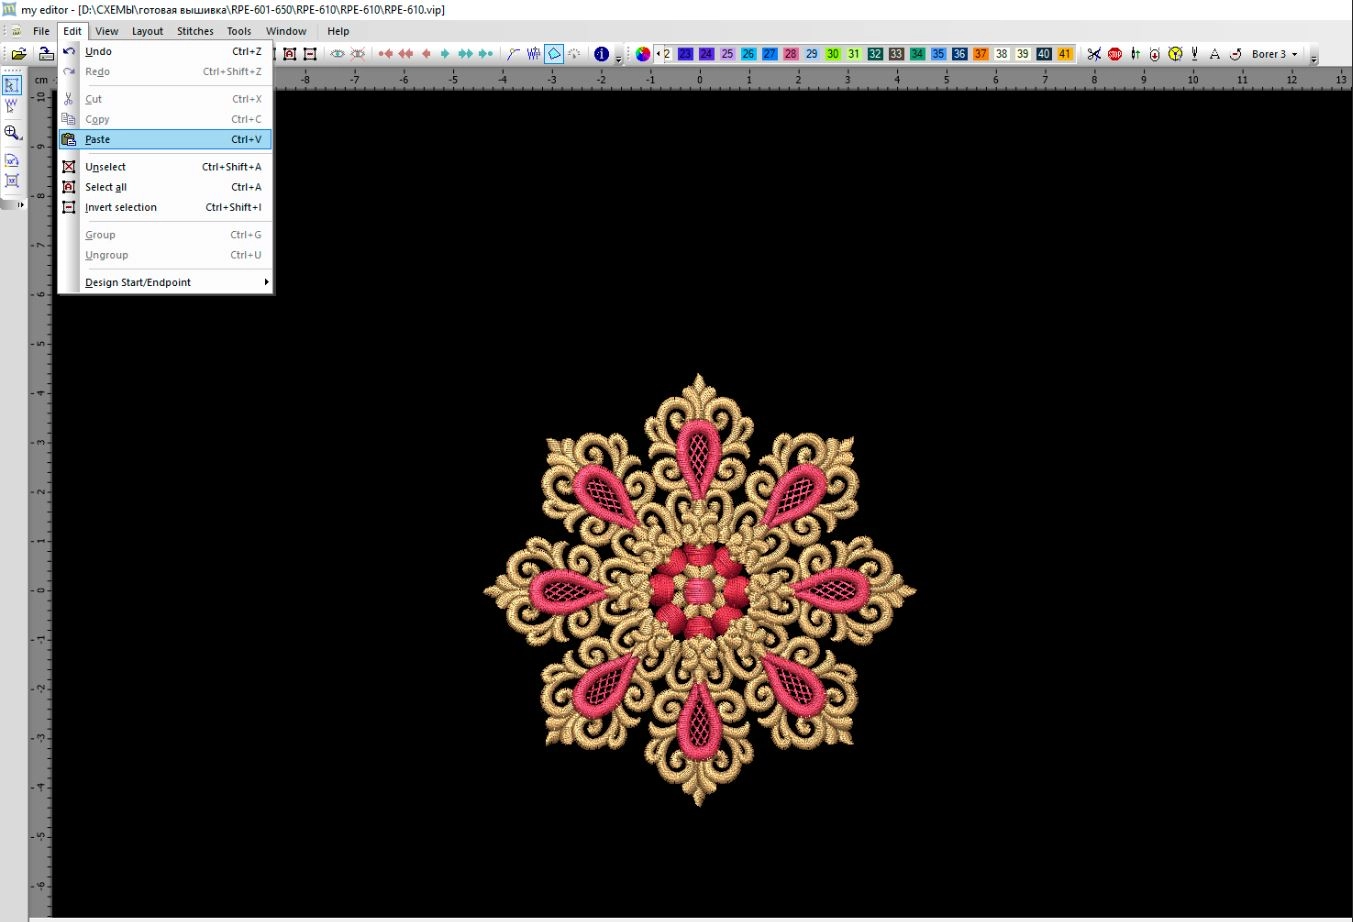
After pasting, position the element carefully. Make sure the final embroidery still fits your hoop and that the design is not too dense for your fabric.
Important: When you combine elements from different designs, always test stitch the final file. Copying and pasting can change the embroidery sequence, density balance and final stitchout result.
How to remove individual stitches in My Editor
My Editor can also edit stitches directly. This is useful when you need to remove a loose thread end, unwanted stitch or small unnecessary part inside the embroidery file.
Use the Edit stitches tool from the left toolbar. After selecting the stitch or stitch area, you can delete it from the design.
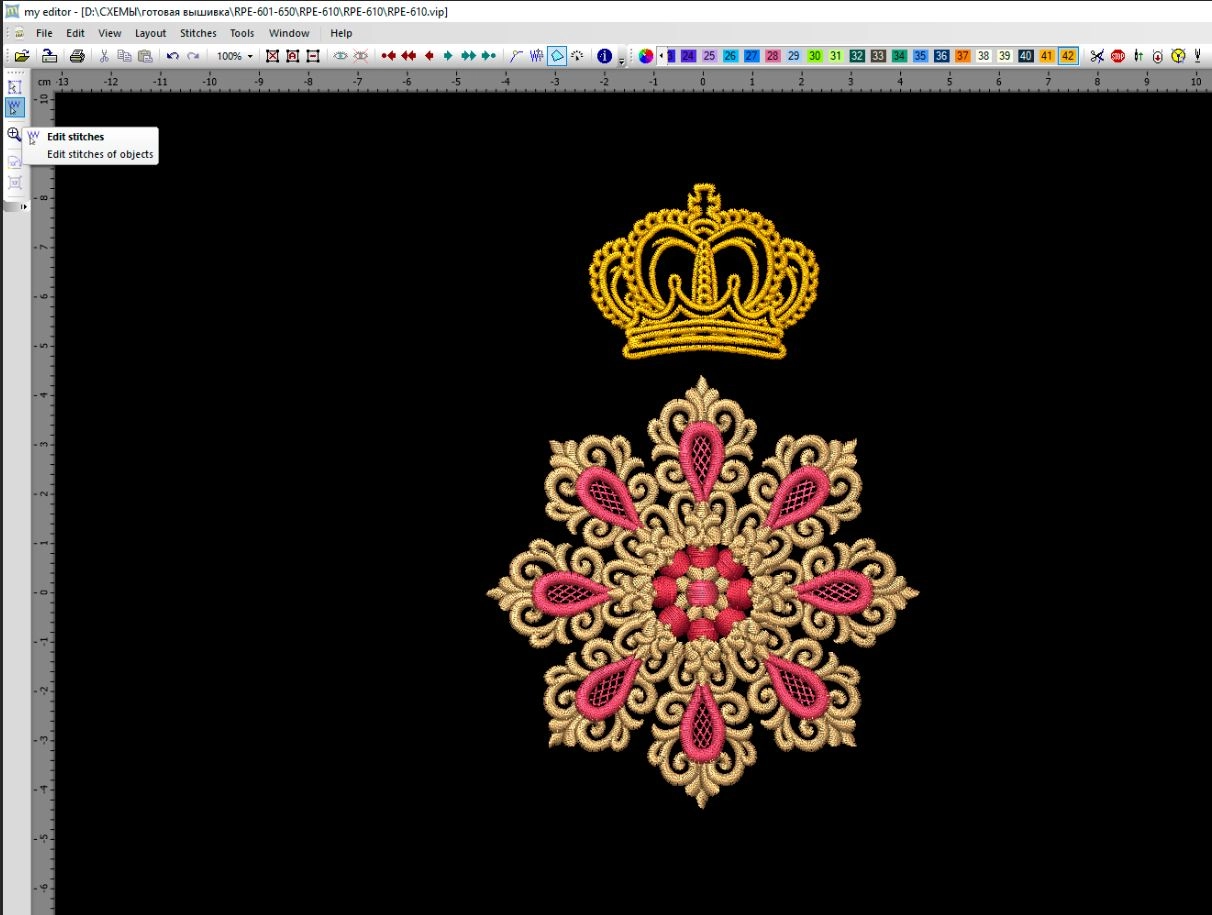
In this example, a small part of the design was selected and changed. Stitch editing is a more advanced function, so use it carefully and always save a copy of the original file before editing.
Can My Editor convert embroidery file formats?
Yes, My Editor can save embroidery files in many supported machine formats. This is useful if you downloaded a design and need another format for your machine.
For example, if your machine needs JEF but you opened a PES file, you can try saving the design in the format supported by your machine. However, format conversion does not remove machine limitations. Always check hoop size, stitch count, color sequence and test the converted file before stitching.
For more help with embroidery file formats, visit: Embroidery Machine File Formats .
What My Editor cannot do
My Editor is a very useful free program, but it has limits. It is not a full professional digitizing system and it cannot automatically turn every JPG, PNG or logo into a perfect embroidery design.
- It is not a replacement for professional digitizing software.
- It cannot magically fix a poorly digitized embroidery file.
- It cannot guarantee perfect results after heavy resizing or editing.
- It should not be used to heavily redesign complex commercial embroidery files without testing.
Use My Editor for viewing, checking, simple editing, color changes, file conversion and small corrections. For complex embroidery creation, professional manual digitizing is still needed.
Useful links for Royal Present customers
- Embroidery Machine File Formats — learn which format your machine needs.
- Online ZIP Unzip Tool — unzip downloaded embroidery files online.
- Free Machine Embroidery Designs — download free designs and test your machine.
- Machine Embroidery FAQ — find answers to common embroidery download and file questions.
- Royal Present Embroidery Store — browse machine embroidery designs for home decor, clothing and gifts.
FAQ about My Editor free embroidery software
Is My Editor free?
Yes. My Editor is free embroidery software from Wings Systems. Download it only from the official website.
Can My Editor open PES embroidery files?
Yes, My Editor can open and save many embroidery machine formats. Always check the final file before stitching.
Can My Editor convert PES to JEF?
My Editor can save designs in different supported formats. If you convert a file, check the hoop size, stitch sequence and test the design before embroidering the final item.
Can I use My Editor to change thread colors?
Yes. You can change thread colors, create custom colors and convert colors to another thread manufacturer’s palette.
Can I delete part of an embroidery design in My Editor?
Yes. You can select and delete some elements or even edit individual stitches. Always save a copy of the original file before editing.
Can My Editor create embroidery designs from JPG images?
My Editor is mainly useful for viewing, editing and saving embroidery files. It is not a full professional digitizing program for creating complex embroidery designs from artwork.
Do I need to unzip Royal Present embroidery files before opening them in My Editor?
Yes. First unzip the downloaded ZIP archive, then open the correct embroidery machine file format in My Editor.

Author: Ludmila Konovalova
My name is Ludmila Konovalova, and I lead Royal Present Embroidery. Embroidery for me is more than a profession; it is a legacy of my Ukrainian and Bulgarian heritage, where every woman in my family was a virtuoso in cross-stitch and smooth stitching. This art, passed down through generations, is part of my soul and a symbol of national pride.
Date: 30.04.2026

 Get Sign-In Link
 Login with Google
 Login with Facebook
 Login with Amazon
 Login with Paypal