What can an embroiderer, be it a beginner or an experienced “stitch wolf”, say about machine embroidery stabilizers? Well, quite a lot! Starting from questions about their choice, moving onto tips on their use, words of caution against particular types of stabilizers or even their brands… The list can go on and on! That’s why we give these machine embroidery heroes such a generous share of limelight both in our blog and our Embroidery Library.
First we approached the theme in general terms in the article about machine embroidery topping and backings. Then, we turned to specific items, like “Getting to know Madeira Embroidery Stabilizers”, “Temporary Adhesive Spray for embroidery”, “CoverUP permanent topping for machine embroidery” etc.
Now, after the series “Choosing fabric for machine embroidery” has stirred so much of your interest, we’ve realized that not only the way one uses stabilizers matters, but the process of choosing stabilizers for machine embroidery itself is quite important as well. Thus, the present series of articles “Choosing stabilizers for machine embroidery” came to be. It dwells on the way the delicate process should be done and hopefully, after reading it, the issue will be a lot easier to resolve.
The series “Choosing stabilizers for machine embroidery” comes in two parts. The first part (the one you’re reading) sums up all approaches to stabilizer classifications in a comprehensive embroidery “database”. The information will help you create practical system of knowledge. The second part of the series will deal with the principles of the knowledge application. You’ll know what aspects of embroidery process should be taken into account when stabilizers are chosen and how exactly these aspects play their part. And, as always, practical tips and examples will go along each piece of theoretical information.
Note: All brands and manufacturers’ names, mentioned in the text, are used only as examples for better comprehension of the theme. We do not give any commercial advice or reference on the matter to our readers. Should you choose to use any other brand of stabilizers, by all means, please, do.
Now, that we’ve cleared it out, let’s get down to the discussion, which will go in the following order:
Content
1. What is “machine embroidery stabilizer”? How is it different from any other types of stabilizers?
2. Machine embroidery stabilizers classifications:
– Classification of stabilizers according to their placement (topping, backing),
– Classification of stabilizers according to their structure (woven, non-woven),
– Classification of stabilizers according to their color (basic: black, white, transparent, semi-transparent, and multicolored),
– Classification of stabilizers according to the way they’re adhered to the fabric (non-adhesive and adhesive: fusible and self-adhesive ones),
– Classification of stabilizers according the way they’re removed from the fabric (wash-away, heat-away, tear-away, cut-away),
– Classification of stabilizers according to their weight and sickness.
3. Conclusion
What is “machine embroidery stabilizer”? How is it different from any other types of stabilizers?
Stabilizers for quilting, hand embroidery, sewing, machine embroidery, interfacings, printing paper… What are these things? Is there any difference between them? If there’s, what a machine embroiderer should be making of all of it? Can we swap them and use one type instead of another? Interested in answers to the questions? Ok, then, let’s read on!
So, all of the mentioned things (stabilizers, interfacing etc.) are used for needle-work of some type or another. Basically, all of them help the fabric withstand various manipulations an artist wants to make. Like in cases when you need to enhance the fabric’s drape, hand or ability to take needle punching, heavy stitching or prevent it from fraying or stretching etc.
The main difference between them is that interfacings have a more permanent character than stabilizers. This means that the structure, characteristics and properties of interfacings, in comparison to stabilizers, are more fabric-like. Interfacings can’t be torn away. You can only cut them with the help of scissors. Also interfacings (even the most light-weight ones) are generally more durable than stabilizers. Such “capacity” of interfacings makes them perfect for projects when fabric enhancement should be there permanently. Stabilizers (toppings, backings etc.), on the other hand, are used mainly as temporary measure.
Example with interfacing: When sewing shirts’ collars and cuffs, you need them to keep their form. Thus you’ll use some type of interfacing between the layers of the collar (cuff) fabric. This interfacing makes the pieces stiffer for as long as the garment is used. In quilting you’ll also need to use interfacing as you’ll need to enhance the endurance of the fabric throughout all the period of its use.
Example with stabilizers: Machine embroidery on terrycloth towels requires the use of a special kind of stabilizer (solvable topping) to prevent stitches sink into the pile of the fabric. This stabilizer matters only during the work, when stitches are being applied. Afterwards, it’s removed and only the embroidered décor remains.
Now, the biggest confusion between interfacing and stabilizers is caused by the spheres of their use. From the examples above one might think that interfacings are used only in sewing and quilting and stabilizers are used only in various types of embroidery. That is not entirely true. Sometimes it’s possible (and required even) to use some type of interfacing for machine embroidery. At other times it’s impossible to sew without machine embroidery stabilizers.
Examples of using interfacings in machine embroidery:
- Machine embroidery of jersey knit baby-ware items (onesies, t-shirts, etc.) If a design that you want to machine embroider on the item isn’t light (anything that isn’t linework, Red Work, etc.) then you’ll need to use permanent light-weight interfacing to cover the stitches of the back of the embroidery. This type of interfacing is usually called “cover-the-stitch” or “cover the back” and is basically a light-weight semitransparent fusible woven fabric (e.g. Gunold Cover the Back, Sulky Tender Touch Madeira, etc.) It’s applied after the embroidery is done on the back of the ground fabric to prevent any irritation the stitches might cause to the skin.
- Machine embroidery of natural leather. We spoke in detail about particularities of machine embroidery on natural leather in the fourth part of the series “Choosing a fabric for machine embroidery”. So, as you remember, natural leather, being a non-woven type of fabric, requires an additional layer of woven stabilizers or interfacing to be able to support embroidery stitches.
- Machine embroidery of appliqué designs becomes ten times easier and quicker if appliqué pieces are attached to the ground fabric with a fusible type of interfacing (fusible mesh or netting). Of course, instead of this, you can use some temporary spray adhesive or any type of machine embroidery fusible stabilizer.
Example of using stabilizers in sewing: Similarly, sewing (just like embroidery) light weight fabrics might be tricky stitch-placing-wise. Thus, when sewing on lightweight fabrics (like chiffon or crepe) sometimes a tear-away stabilizer (backing) is used. It provides additional stability to the fabric during sewing (afterwards the stabilizer is removed).
So what machine embroiderers should do with all the above-mentioned information?
Well, they should know that stabilizers and interfacings are not similar things but sometimes both categories can be of use in machine embroidery. As a rule, machine embroidery will require the use of stabilizers. Interfacings in machine embroidery are used only in special cases. The same goes for sewing, quilting and other types of fabric crafts. As we’re dealing with machine embroidery, in this post we’ll be dwelling on choosing stabilizers for machine embroidery only. We’ll describe how exactly different stabilizers are chosen for various embroidery projects and analyze factors of the projects that play a role in the choice-making.
To be able to choose the right stabilizer for the project, one needs to know more about the nature of these machine embroidery “helpers”. So, to put you in the know we’ve summed up all the possible classification of machine embroidery stabilizers. These classifications are based on various approaches to the notion of fabric stabilization. Such an all-inclusive layout of the issue helps create a comprehensive system of all types and kinds of stabilizers used in machine embroidery. And having a system always helps in choosing the right stabilizer for each particular embroidery project, don’t you agree? If yes, then, without further ado, let’s move further into the theme.
Machine embroidery stabilizers classifications:
Classification of stabilizers according to their placement: toppings and backings
Backings are applied to the back of the fabric. They are used to make the fabric stiffer, sturdier, less “fluid” and stretchy and more resilient to heavy stitching and multiple needle punching. Absolutely any type of machine embroidery stabilizers (sometimes also interfacings) can be used as backings. Choosing the right type of backing for each particular project will depend on properties of the fabric, design type (density of stitches, technique it’s done with, etc.) and the cut of the to-be-embroidered item itself.
Toppings are applied on the face side of the fabric
Toppings are applied on the face side of the fabric. They are used on delicate, textured and porous fabrics to prevent stitches from sinking into the “texture”. When choosing stabilizers for topping one needs to remember that the stabilizer will need to be completely removed from the fabric afterward. Thus, only soluble stabilizers are used as toppings.
Note: In some cases, the role of the topping can be expanded. For example, it can be used not only to prevent stitches from sinking into the fabric textured surface but also to enhance the colorization of the insufficient fill-stitching. Usually, such a thing happens when machine embroidery is done on patterned (not solid) fabrics and the design isn’t dense enough to cover the background. Thus a specialty type of stabilizer is used as a topping, like a Coverup by Hoop-it-all or similar. We’ll be talking about the case in detail in the section with stabilizers color classification.
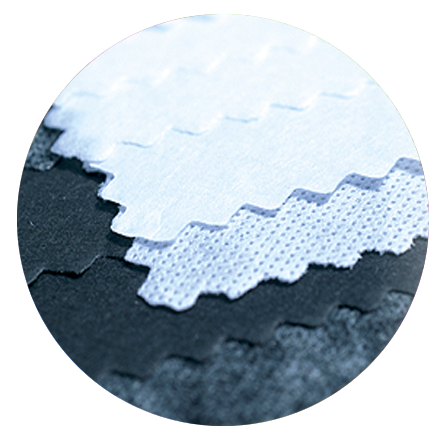
Classification of stabilizers according to their structure: woven and non-woven
Woven stabilizers for machine embroidery
In this category, we include woven interfacings of various levels of density and weight and some heat-away embroidery stabilizers (e.g. Madeira Termogarza, Gunold Thermogaze, etc.) Depending on the type of the weave of such stabilizers, they can stretch in two or more directions (vertically, horizontally, etc.)
Tip: When all you have on hands are such stretchy stabilizers and your embroidery project requires extra “stable” stabilization, you can use multiple layers of the available ones. When using them, however, arrange their layering so that their stretch directions would overlap each other in a crisscross manner. This way you will achieve maximum stability.
Note: More detailed information about what machine embroiderer should know about weave types is available in the second part of the series “Choosing a fabric for machine embroidery”.
Non-woven stabilizers for machine embroidery
This category includes all the rest types of stabilizers and its variety is really great. All tear-away stabilizers, wash-away, and heat-away films, vinyl films, some specialty stabilizers for making patches, puffy foams for 3D embroidery, fleece for embroidery in trapunto technique… All these are examples of non-woven machine embroidery stabilizers.
Classification of stabilizers according to their color (basic: black, white, transparent, semi-transparent, and multicolored)
All tear-away and cut-away machine embroidery stabilizers can be found in two basic colors (black and white). These two colors are used most of all. Wash-away and heat-away films represent the “transparent” or color-less category of stabilizers. The median “semi-transparent” category of stabilizers is represented by light-weight interfacings (e.g. Soft n’ Sheer by Gunold, No-show Polymesh by World Weidner, etc.) They are used when denser designs are embroidered on sheer or light-weight fabrics to help them withstand the toil of stitching without being visible or adding bulk to the fabric. Such interfacings can be found in semi-transparent black and white variations.

3D embroidery
The category of multicolored machine embroidery stabilizers is presented by various vinyl films and puffy foams for 3D embroidery (e.g. Puffy Foam by Sulky or Gunold etc.) Usually, all of the mentioned stabilizers are used on the top side of the fabric.
Example: Sometimes, when you machine embroider light-colored designs (e.g. white flowers) on a dark fabric, the background can remain “seeable” through the white fill-stitches of the design. It can happen not only with white but with all lights (yellow, beige, etc.) Thus, in order to achieve a nice color-coverage without making the design overly dense, an embroiderer can apply a white colored vinyl film on the dark fabric. Then embroidering will yield better results. One of such vinyl stabilizers is Coverup by Hoop-it-all. It’s quite a noteworthy novelty for every machine embroiderer there’s and if you want to learn more about it, you can click the link to read an entire article dedicated to it.
Besides vinyl stabilizers, however, there are also many colored sewing interfacings, interlinings and other “auxiliary” materials used by machine embroiderers in their work.
Example: We’ve already mentioned that sometimes, interfacings and interlinings (fusible ones) are used in machine embroidery on natural leather. So, sometimes, to give the backside of the leather a bit nicer look, colored variations of such materials are used. More info on how to machine embroider on natural leather is available in our article on non-woven fabrics (available here).
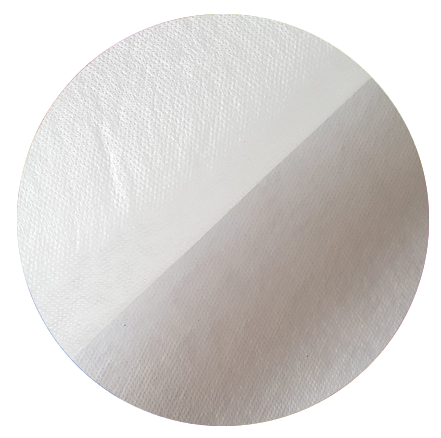
By auxiliary materials we mean various technical textiles used as machine embroidery stabilizers. One of the most common examples of such is spunbond – non-woven technical textile, used as lining for bags or bag mock-ups etc.
Note: Spunbond can’t always replace proper machine embroidery stabilizers. The material wasn’t created for the cause and only is used as an inexpensive substitute for the proper embroidery backing.
Classification of stabilizers according to the way they’ve adhered to the fabric: non-adhesive and adhesive (fusible and self-adhesive ones)
Let’s start with adhesive machine embroidery stabilizers. These types of stabilizers have a layer of the adhesive agent on one of their sides. The adhesive layer is either activated by heat (with fusible stabilizers) or is covered by protective paper (self-adhesive ones).
Fusible machine embroidery stabilizers can be of two types:
- tear-away backings with a layer of glue on one of their sides,
- “cover-the-stitch” fusible protective interfacings (e.g. Cover the Back by Gunold, Tender Touch Sulky, etc.)
The glue layer of such stabilizers either covers the surface of the fabric in a manner of thin-film or evenly spread dots. To activate the glue layer you’ll need to apply heat (a.k.a. iron the stabilizer to the back of the fabric). This is another name of stabilizers of the category – iron-on ones. Usually, iron-on stabilizers are used as backings for elastic fabrics as they prevent them from stretching during the hooping process.
Soft n Sheer Gunold
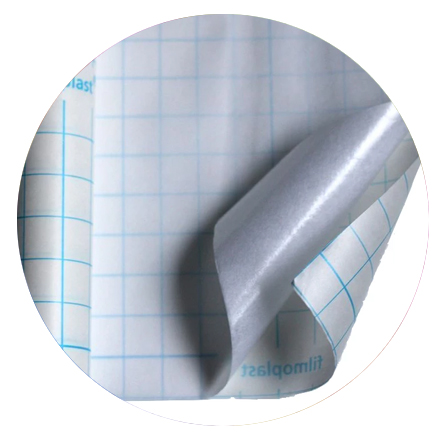
Self-adhesive machine embroidery stabilizers have their adhesive layer covered by protective paper (e.g. Filmoplast by Gunold, Filmoplast by H54 Vlieseline, Sulky Sticky by Sulky, Starlite sticky by Starlite etc.) When working with such stabilizers all you need to do is to remove their protective layer and smooth the fabric onto the revealed “sticky” surface. The revealed sticky base has structure and properties, similar to those of medium-weight tear-away stabilizers (which is basically non-woven cellulose-based fabric). That is why sometimes these self-adhesive stabilizers are also called “sticky papers”. They are really helpful for “floating” (in cases, when regular hooping can’t be applied either because the fabric is too delicate or thick, or just to save time).
What is “floating”? It’s a method of “avoiding” regular hooping when a fabric is bonded (with the help of various techniques: pins, sticky tape, basting, temporary spray adhesive, etc.) to a hooped stabilizer. Floating with self-adhesive stabilizers is recommended for items that can’t be hooped and also can’t be bonded otherwise.
Example: machine embroidery of a silk blouse. Silk is a really delicate fabric. It doesn’t like being hooped as its fibers might get damaged. Also, excessive needle punching isn’t advised because holes from the needles just won’t close. So, machine embroidery of a silk blouse will have you floating the garment on a self-adhesive type of stabilizers.
Note: With silk you might want to stay away from temporary spray adhesives as they could leave stains on the delicate fabric.
There’re several things that machine embroiderers should take into account when working with self-adhesive stabilizers:
- Some of them have such a “strong” adhesive agent, that after it’s bonded to the fabric, the stabilizer is really difficult to remove. Thus, test embroidery is always a good call.
- Read the label really carefully, as some of such stabilizers are also water-soluble (e.g. Soluflix by Vlieseline, Sulky Sticky Fabri Solvy, Madeira Avalon Fix etc.) If you work with wash-away ones, it’ll help you get a clean back-side result.
- Be mindful when using self-adhesive stabilizers for machine embroidery of dense designs. The sticky base of such stabilizers is similar (in its structure and properties) to a medium-weight tear-away stabilizer. Its weight is just about 1, 5 oz (40 г/м2). Thus such stabilizers might not provide enough support for the fabric. In such cases, another layer of backing should be applied on the back of the fabric (before attaching it to the self-adhesive stabilizer). Else, the additional backing can also be applied on the back of the self-adhesive stabilizer itself (after it’s been hooped). However, such “double” stabilization should be applied mindfully as in the end the embroidery result might acquire the so-called “cardboard” feel.
Gunold Filmoplast Self-Adhesive
Non-adhesive embroidery stabilizers are all the rest toppings and backings (both tear-away and cut-away). These stabilizers are adhered (bonded) to the fabric with the help of additional agents (hoops, pins, basting, temporary spray adhesive etc.)
Adhesive machine embroidery stabilizers vs. non-adhesive ones + temporary sprays
Just earlier we mentioned that non-adhesive stabilizers are frequently bonded to fabrics with the help of temporary spray adhesive. On that account, we think it’s important to point out all the pros and cons of the abovementioned pair (adhesive stabilizers vs. combo of non-adhesive ones and sticky sprays). Learning the fine points of working with the ether of them can help make better decisions on choosing stabilizers for machine embroidery.
Cons of working with adhesive stabilizers: The biggest advantage of such stabilizers is that their coat of glue is spread evenly throughout the surface. Such uniform glue coverage guaranties that each area of the stabilizers will bond to fabric equally well. In comparison, temporary spray adhesives, as they’re applied manually, might not provide adequate coverage throughout the entire area of their application.
Pros of working with adhesive stabilizers: Sometimes their adhesive agent gums up the needle and the bobbin case of embroidery machines.
Cons of a combination of non-adhesive stabilizers and temporary spray adhesives: One of the biggest cons is the sheer convenience and variety of uses such combos provide. One can of temporary spray adhesive lasts for a long time and can turn quite a lot of types of non-adhesive backings into adhesive ones. Think of working with stabilizers of various levels of weight, density, elasticity, etc.
Pros of the combo: We’ve mentioned it before – the manual application doesn’t always provide even coverage of the surface. Thus, it might happen so, that stabilizers, adhered to fabric with temporary spray, don’t bond well throughout.
As you can see either of the pair has its advantages and disadvantages in its use. Thus, when choosing a stabilizer for an embroidery project, one should take into account both the cons and pros of the pair.
Classification of stabilizers according the way they’re removed from the fabric (wash-away, heat-away, tear-away, cut-away)
1 – Cut-away stabilizers can be removed from the fabric only partially (by scissors). Thus, for obvious reasons, they’re used only as backings. They are the permanent, most solid and trust-worthy type of stabilizers, which usually yield top-most results. Cut-aways can be woven and non-woven in their fiber structure.
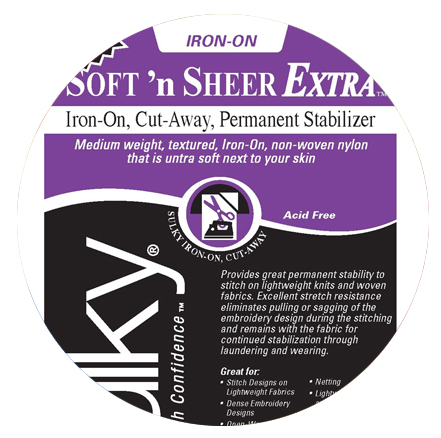
Sulky Soft ‘n Sheer Extra – Iron On, Cut Away Permanent Stabiliser
2 – Tear-away stabilizers are torn away after embroidery is applied. All tear-aways are non-woven materials. They resemble paper in their texture, thus sometimes there’s a strong tendency to swap the two things.
Note: if you’re looking for professional results, don’t let yourself be lured by the cheaper option. Despite the fact that both tear-away machine embroidery stabilizers and, say, printing paper is made from cellulose fibers, there’s a huge difference in the quality of their compositions. Composition of machine embroidery stabilizers includes (aside from cellulose) such extras as fibers of polyester and viscose. These additional components provide stabilizers with fabric-like flexibility (which helps to withstand pressure from hoops, stretching, etc.)
What’s more, the above mentioned additional fibers are shorter in length than those of regular paper. The shorter the fibers, the lesser the mess when they’ve torn away. Have you ever torn away your backing from the fabric and you’re just stuck there with stabilizer shreds in the embroidery stitches? Well, that’s because the fibers of the stabilizer are too long. They compensate for the poor, paper-like quality of the material. The high-quality tear-away machine embroidery stabilizers can be torn away in any direction because the fibers are short, flexible and properly arranged.
So, you see, proper machine embroidery tear-away stabilizers can both withstand the pressure and be easily removed.
Remember: When you work with tear-away stabilizers a lot, don’t forget to clean bobbin-case more often. Such stabilizers tend to shed cellulose fibers under the pressure of needle punching. Cellulose fibers infiltrate the bobbin case of your embroidery machine, clogging it. If not taken care of, the clogged bobbin case might cause your machine operational problems.
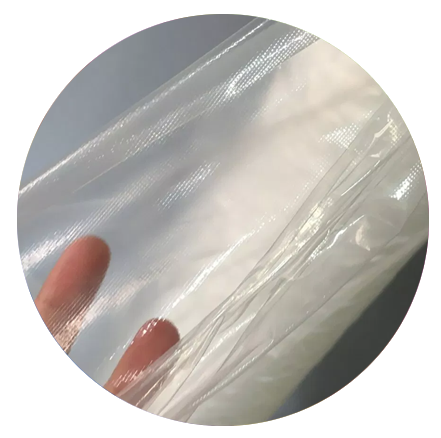
Water-soluble stabilizers
3 – Water-soluble stabilizers (wash-away stabilizers) can be of several types:
- water-soluble film,
- water-soluble net,
- water-soluble non-woven (paper-like) stabilizer,
- water-soluble self-adhesive non-woven (paper-like) stabilizer etc.
All of these stabilizers are temporary ones (i.e. are used only during the embroidery process). After the embroidery is done, they are removed by water. Temperature of water, on this matter, may vary. Usually, the warmer the water, the quicker the stabilizer dissolves.
Now how exactly do you remove wash-away stabilizers? That will depend on the sickness (weight) of the stabilizer. The lightest of them are removed with the help of wet cloth/sponge. No washing needed, just rub gently the wet sponge against the covered by stabilizer area. The heaviest of water-soluble stabilizers might need several washes to be completely removed. If you don’t wash it away completely, it will stick to the fabric. When wet, such fabric will have a characteristic “gelatinous” feel to it. When dry, such fabric will feel like it was starched. At times, depending on project, such “persistence” of a wash-away stabilizer is really a good thing.
Example 1: Machine embroidery of tutu-skirts will need water-soluble stabilizer of a heavier type for two reasons. First – such stabilizer will help the net hold the stitches of the design. Second – after the embroidery is done and the skirt is washed, the starchy effect will help the fabric hold it form.
Example 2: Machine embroidery of FSL Designs and water-soluble stabilizers of heavier types is a match made in heaven. This is especially true for designs which should hold their form (e.g. our Free Machine Embroidery Design Lace Angel). The residue that wash-away stabilizer leaves, will starch the design and make it more fixed.
Where water-soluble stabilizers are use? In general they are used in projects where stabilization should not be seen or is needed only for the duration of stitching. Basically there’re three major categories of such projects:
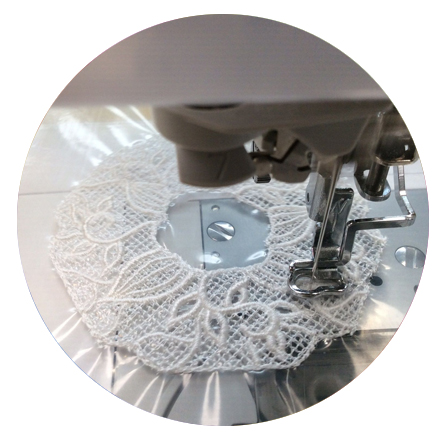
- Lace machine embroidery designs (FSL, Richelieu, etc.). Water-soluble stabilizers are used here as a base. Usually for such projects you’ll need one layer of a heavy-weight wash-away or several layers of a light-weight one.
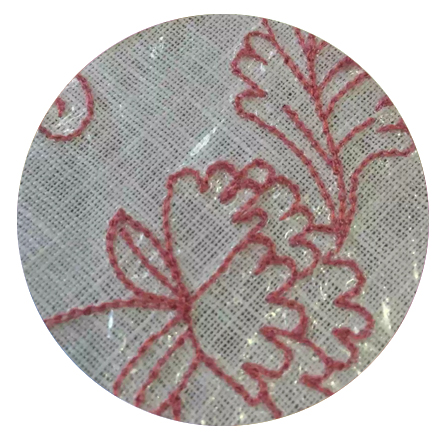
- Machine embroidery of textured fabrics. Water-soluble stabilizers are used as a topping. The more textured is the fabric, the heavier is the topping. Medium to light-weight wash-away film is what used in most cases. Heavy-weight wash-away is never used for the cause.
- Machine embroidery of transparent fabrics and projects, where the back side of the embroidery should be clean. Water-soluble stabilizer in both cases is used as a backing. When making your choice on the kind of the wash-away, take into account the density and type of the design and the fabric.
Example: What stabilizer is good for machine embroidery of tulle or Dress net fabrics? Let’s analyze… First of all here we want the back side of the embroidery to be clean. This means that either wash-away or heat-away backing is needed. Now let’s think about the fabric fiber composition. Polyester tulle doesn’t like ironing. This leaves us with a wash-away option. Tulle is quite stretchy, so it needs not only to be stabilized, but also to be fixed so that its fibers wouldn’t move under the pressure. Basting will not keep tulle still. This means that you will need other type of adhesion. Wit you can only use temporary spray adhesive with heavy-weight wash-away types (e.g. Sulky Ultra Solvy and the like). If you apply spray to lighter wash-aways they will dissolve. However, there’re self-adhesive wash-away stabilizers (e.g. Soluflix by Vlieseline, Sulky Sticky Fabri Solvy, Madeira Avalon Fix, etc.)
Machine embroidery on tulle, lace and other net-like fabrics may require two layers of water-soluble stabilizers: topping and backing.
Tip: Don’t throw away the left-over bits of your wash-away. Make use of the “starchy” effect that it leaves and create your own starch spray. Just dilute the bits in water and bottle it up. Then, when needed, spray the liquid on the fabric.
4 – Heat-away stabilizers provide temporary support (just like wash-away ones), but instead of water they are removed by heat (a.k.a ironing). Use: Heat-aways can be used both as toppings, backings and base (in exactly same with wash-aways projects). Main difference between the two is that heat-aways can be used with non-washable fabrics. When ironed, such stabilizers turn into ashes, which afterwards can be easily brushed away.
Note: You never use steam, when removing heat-away stabilizers.
There’re two main types of heat-aways: transparent films (Sulky Heat-Away Clear Film, Madeira Super Film, Gunold Thermofilm) and woven fabric-like material (Termogarza, Gunold Thermogaze).
Tip: When embroidering terry-cloth towels, especially those with the long nap, opt for wash-away toppings instead of heat-away ones. The reason for this is purely that of convenience. You see, the “ash” that sometimes heat-away leaves after it’s been ironed may be difficult to get rid of with all the long nap of the terry cloth. So, to avoid all the brushing, just opt for a wash-away film.
Classification of stabilizers according to their weight and sickness
You will need to know weight and sickness of stabilizers in order to match them to the needs of your project. Also, without knowing the numbers (yes, weight an sickness are measured in numbers), you won’t be able to purchase the right one in the first place.
So, let’s get our numbers straight. Weight of machine embroidery stabilizers is measured in ounces per square yard (just like with fabrics). Sickness of machine embroidery stabilizers is measured in microns. Weight (or density) is important for all non-film stabilizers (tear-away/cut-away). Sickness is important for films (wash-away/heat-away). Weight numbers for machine embroidery stabilizers will go from 1 – 3,6 oz (30 – 120 g/m2).
When we speak about stabilizers’ weight, we divide all of them into three main categories: light-weight, medium-weight and heavy-weight ones.
Note: Same weight number in stabilizers of different categories means different things. Thus, you can’t swap one type of backing for another just because they’re both of the same weight.
Further we’ll provide examples of stabilizers of different weights existing in the market. In this section of our post we speak exclusively about the category of stabilizers’ weight. That is why this classification won’t include any references to their adhesive abilities.
Light-weight machine embroidery stabilizers – 1-2 oz (30-60 g/m2)
Tear-away: Gunold Quick Tear 2015, 2018; Gunold Stiffy 1650,1751, Gunold Soft n’ Sheer 2040 etc.
Cut-away: Gunold Totally Stable 2075 etc.
Water-soluble (20 – 30 micron): Sulky Solvy, Gunold Solvy, Madeira Avalon Film, Madeira Avalon Fix, etc.
Also this category includes all stabilizers of the “over-the-back” types: Gunold Cover the Back, Sulky Tender Touch, Floriani etc. Weight of these backings is close to the upmost figure of the category, but they still count as light-weight. Same rule applies to Filmoplast.
Medium-weight machine embroidery stabilizers – 2-2,5 oz (60-80 g/m2)
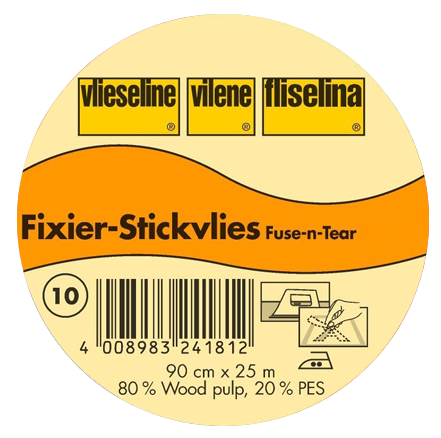
Tear-away: Gunold Quick Tear 2018, Gunold Stiffy 1640, 1860; Stickvlies/314 Stick-and-Tear/314 by Vliezeline, Soluvlies Vilene Vliezeline, etc.
Cut-away: Gunold Totally Stable 2085, Gunold AllStich 30, Sulky Cut-Away Plus, Sulky Soft n’ Sheer Extra, etc.
Water-soluble (40 micron): Solufix Vliezeline Vilene, Sulky Super Solvy, Sulky Fabri Solvy, Sulky Paper Solvy, Gunold Super Solvy, Gunold Fabri Solvy, Madeira Avalon Plus, etc.
Heavy-weight machine embroidery stabilizers – 2,5 – 3,6 oz (80-120 g/m2)
Tear-away: Gunold Quick Tear 2025, 9802; Gunold Stiffy 1995, etc.
Cut-away: Gunold Totally Stable 2095, Gunold AllStitch 30 HD, Sulky Fuse-n’-Stitch, etc.
Water-soluble (80 – 90 micron): Sulky Ultra Solvy, Gunold Ultra Solvy, Madeira Avalon Ultra etc.
All the above-mentioned examples illustrate their categories best. Besides them, however, there’re quite many other worthy representatives of the category. But, if you’ve just entered machine embroidery world and want to learn all the ropes from the beginning, start with the given lot and then move on to the ones that suit you more.
Tip: If you want to avoid spending a lot on the expensive brands, you can try the so-called “starter’s kits”. Almost all household names offer such kits so that new customer can get to know their products. Some of the names for you to look up ihn the Net are: Madeira Starter’s set, Floriani Fabulous Five, Gutterman Sulky Stabilizer starter set, Sulky Sulky stabilizer starter kit. The kits include sets of 5 to 12 most commonly used types of stabilizers. Get them, learn from them and then make up your mind on the rest.
Conclusion:
Toppings, backings, woven, non-woven, tear-away, heat-away… There’s a lot to take in, isn’t it? A beginner might get overwhelmed with all the new information. And what about its application in practice? Where should be each type used after all? How stabilizers of various types and weights behave in different projects? Is there any general rule that says which stabilizer should you choose each and every time? Questions, questions, questions… Want to know answers to them all? Well, then all you need to do is to read our next post on the topic “Choosing stabilizer for machine embroidery. Part 2”
You may also like
Choosing fabric for machine embroidery. Part 4

Author: Ludmila Konovalova
My name is Ludmila Konovalova, and I lead Royal Present Embroidery. Embroidery for me is more than a profession; it is a legacy of my Ukrainian and Bulgarian heritage, where every woman in my family was a virtuoso in cross-stitch and smooth stitching. This art, passed down through generations, is part of my soul and a symbol of national pride.
Date: 10.08.2019

 Get Sign-In Link
 Login with Google
 Login with Facebook
 Login with Amazon
 Login with Paypal