Stabilizers choosing algorithm
Few words before we begin…
The post is the second part of the series “Choosing stabilizers for machine embroidery.” So, if you’re interested in the information, given in the first part, please, follow the link.
“Choosing stabilizers for machine embroidery. Part 1” gives the main types of all the existing embroidery stabilizers. It also gives their main classifications. All of the ratings are based on stabilizers’ characteristics, most notable for their practical use.
- What is machine embroidery stabilizer weight?
- Can you swap one type of stabilizer for another?
What is best: adhesive stabilizers or non-adhesive stabilizers, paired with temporary adhesive sprays?
All of these issues (plus other important ones) are also discussed in the first part of the series. Knowing answers to such a question will help you apply the stabilizer choosing algorithm, we’ll be sharing with you in this post.
Thus, you see, it’s quite imperative that you read the first part before we start.
That being said, we think it’s ok to start now. We’ll be starting with the list of contents.
1 – General characterization of embroidery project
1.1. What type of item are you going to embroider?
1.2. How often is the embroidered thing going to be washed?
1.3. How long will the embroidered item be in use?
2 – Fabric characteristics to know for choosing machine embroidery stabilizers
2.1. – What fabric properties should be taken into account when selecting stabilizers for machine embroidery?
3 – Design characteristics and machine embroidery stabilizers
3.1. – What type of machine embroidery design are you working with? How does the design type influence stabilizer choice?
3.2. – How many elements does the machine embroidery design have? Why a number of the items and their size matter for choosing your stabilizers?
3.3. – Does design density influence the choice of stabilizers?
4 – Bonus tips for choosing stabilizers for machine embroidery.
5 – Conclusion
As you’ve probably noticed, the table of contents looks more like a list of questions. We’ve done it for a very practical reason, which we’re going to explain now.
So, at the beginning of the post, we’ve promised to share with you the machine embroidery stabilizer choosing algorithm. Well, the table of contents is the algorithm.
Answer the questions, given in each of the sections, and you’ll know which stabilizer suits your project best. Further, we’ll be elaborating on each part in a more detailed way to help you find the right answers easier. All you need to do is to follow along and imbibe the info.
So, are you ready? Let’s get started!
Choosing a stabilizer for machine embroidery. The algorithm explained:
1 – Analyze the nature of your embroidery project. Things to consider include the following:
1.1. What type of item are you going to embroider? Think embroidery of bedding sets, chevrons, patches, baby items, bags, accessories… The item is to be considered at first because its nature determines components to be used in the project.
Example 1: Choosing stabilizers for machine embroidery of baby-wear will have you think of the following: the technical part and the comfort. This (technical) part means the use of the correct stabilization, thread tension, etc. What’s more, you will have to think of how comfortable the piece will be after the décor’s been applied. This part is about fine-tuning the stabilizer’s choice according to comfort and durability requirements. With baby-wear, you’ll have to avoid using harsh materials. So think such cheap substitutions of proper backings as spunbond, is out at once. Another thing about extra comfort is the addition of “cover-the-back” backing.
Example 2: Choosing stabilizers for machine embroidery of napery sets (napkins, table cloths) and towels. Planning such projects will have you think of the “pretty” backside of the embroidery. “Pretty” backside means no cut-away stabilizers. Sometimes it will veto even the use of tear-away ones. What does such a turn of events leave you with? – Wash-away and heat-away backings. Let’s add a few more things about the towels, as you’ll have to think of their fabric texture too. Terry-cloth, waffle of microfiber will add another correction stabilization-wise. With such fabrics you will have to use some type of toppings, probably paired with extra adhesion. You see the weave of such fabrics isn’t too stable. Thus, backing/topping will need to bind the fibers so they won’t move under the pressure (of hoops, needles, etc.)
Example 3: Choosing stabilizers for machine embroidery of “unhoopable” or hard-to-hoop items (collars, napkins corners, etc.) Stabilization-wise you’ll have to think of extra adhesion: in form of either additional temporary sprays or adhesive backings.

Example 4: Choosing stabilizers for machine embroidery of patches and chevrons requires heavy-weight base/backing. The minimum that is to be used is 2,5 oz. weight cut-away backing. Also, there’re special types of chevron stabilizers (e.g. the ones with heat-activated adhesion, etc.), so if you’re into it professionally, do your research. If a patch is to be sewn onto something (a piece of clothing, bag, etc.) lower the weight of your backing. Adjust it according to the fabric the patch is to be sewn onto.
1.2. How often is the embroidered item going to be washed?
Washing durability is an essential aspect of every project, especially if you’re into machine embroidery professionally. If embroidered items are to be washed often, then temporary stabilization is out of the question. After a number of washes, stitches of the embroidery might get loose. Loose stitches will make the design look bad, which is never a good thing for an embroiderer’s reputation.
Thus, washable things require permanent stabilization. Usually, such support is provided by cut-away stabilizers or their textile substitutions. For instance, instead of choosing stabilizers for machine embroidery of terry-cloth towels, some opt for organza (as a topping).
So, we’ve spoken about stabilizers for embroidery projects that will be washed often. Now let’s talk about the opposite – non-washable cases.
When choosing stabilizers for machine embroidery that shouldn’t be washed afterward, the fiber composition of the fabric is of utmost importance.
Example: Choosing stabilizers for machine embroidery on natural fur. Machine embroidery of natural fur requires both topping and backing. The choice of the backing is set largely by the cut of the item and the to-be-embroidered design. The topping, on the other hand, is decided upon according to the length of the fur and its nature. Plus fur can’t be washed and ironed. So, what should you do? The answer is – use a wash-away topping.
Now let’s explain. First of all, fur and high temperatures are a bad combination. If you iron fur, you’ll ruin it. Thus heat-away, the topping is out of the question for sure.
So what about fur and water? Well, you can’t machine wash fur. However, nothing will happen to natural fur if you “wipe” it with a wet piece of cloth. We’ve already mentioned in the first part of the series “Choosing stabilizers for machine embroidery” that light-weight to medium-weight water-soluble stabilizers can be removed without actual washing.
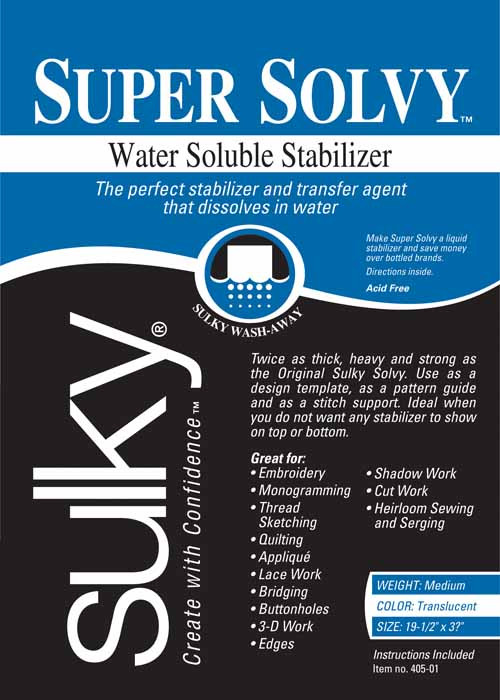
So, what you’ll need to do is to opt for the topping of the right weight and density (e.g., Sulky Solvy is ok, while Sulky Super Solvy is a major no-no) after you’ll finish stitching, tear-away the excess stabilizers and remove the remaining bits with a damp piece of cloth or sponge.
Tip: For more information on the weight and density of various stabilizers, please check with our post “Choosing stabilizers for machine embroidery. Part 1”.
1.3. How long will the embroidered item be in use?
f it’s going to be used a lot, then stabilizers of more permanent characters are a much better option. Such stabilizers will keep the look of the embroidery for a much longer time.
Amidst all the existing types of stabilizers, cut-away ones are undisputed champions with the support provided both during the work and afterward too. However, such their advantages come at a price: the stabilizer doesn’t offer the so-called “clean backside” as it remains there for good. If this is a problem, then adjust the choice of the backing accordingly.
Example: Choosing stabilizers for machine embroidery of towel and napkins. Clean backside for towels and napkins can be achieved either through the use of tear-away or wash-away backings. Otherwise, go for textile substitutions of regular stabilizers (e.g. organza).
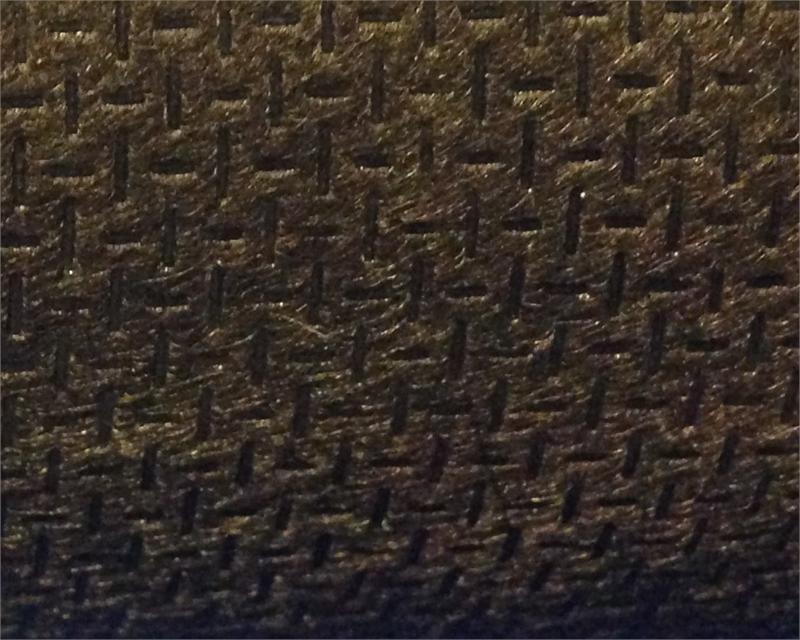
Black Fusible No-Show Poly-Mesh Plus Iron On Cut Away Embroidery Stabilizer Backing Roll
Also, sometimes the edges of the remaining cut-away backing might be visible through the fabric. Here, think of semi-transparent cut-away stabilizers (e.g. Soft n’ Sheer by Gunold, No-show Polymesh by World Weidner, etc.)
2 – Fabric characteristics to know for choosing machine embroidery stabilizers
What fabric properties should be taken into account when choosing stabilizers for machine embroidery?
Things, which you should take into account on that matter include:
- Fabric texture. Machine embroidery of textured fabrics requires both topping and backing.
- Fabric elasticity. Machine embroidery of stretchy fabrics requires adhesive backing.
- Fabric color/transparency. Machine embroidery of semi-transparent fabric might require the so-called “invisible” stabilization (i.e. one that won’t be seen through the fabric).
The “invisible” stabilizers category includes tear-away, all temporary stabilizers (wash-aways, heat-aways) and semi-transparent cut-away (like the ones, known as “cover-the-back”). Machine embroidery of multicolored fabrics (especially if designs don’t have dense stitching) might require specialty toppings (colored vinyl films. e.g. Coverup by Hoop-it-all or similar). These colored vinyl films prevent the background colors from being seen through the thin stitches of the designs.
- Fabric sickness. Machine embroidery of very sick fabrics might require the use of the “floating” technique (instead of the regular hooping). Floating means that you’ll be using either self-adhesive stabilizers or non-adhesive stabilizers paired with some adhesive agents (basting, temporary spray adhesives, pins, etc.)
- Fabric delicateness. Machine embroidery of delicate fabrics (natural leather, silk, etc.) means that you can’t use pins for extra fixation (if needed). So, if your project, involving such fabrics, will require extra fixation (for stabilization during floating) you will have to use adhesive stabilizers or non-adhesive ones, paired with temporary spray adhesives.
Note: Temporary spray adhesives should be used with caution when working with silk, as there’s a chance of them leaving stains on the fabric.
These are only a few general examples, illustrating the process of fabric analysis. If you’re interested in a more detailed description of all fabric properties, influencing stabilizer choice for machine embroidery, please read our series “Choosing a fabric for machine embroidery”.
3 – Design characteristics and machine embroidery stabilizers
For the analysis of the design you’ll need to answer the following questions:
3.1. – What type of machine embroidery design are you working with? How does the design type influence stabilizer choice?
Some machine embroidery designs influence the choice of stabilization, others – don’t. Further, we’ll give examples of both categories, explaining how exactly they determine the choice.
- Choosing stabilizers for Machine embroidery of lace, Richelieu and FSL designs. Such projects require temporary stabilizers (the ones that later can be completely removed).
Usually, you’ll be using medium to heavy-weight wash-away and heat-away films and paper-like stabilizers. The lesser the fabric is involved in the project, the bigger the role of the stabilization.
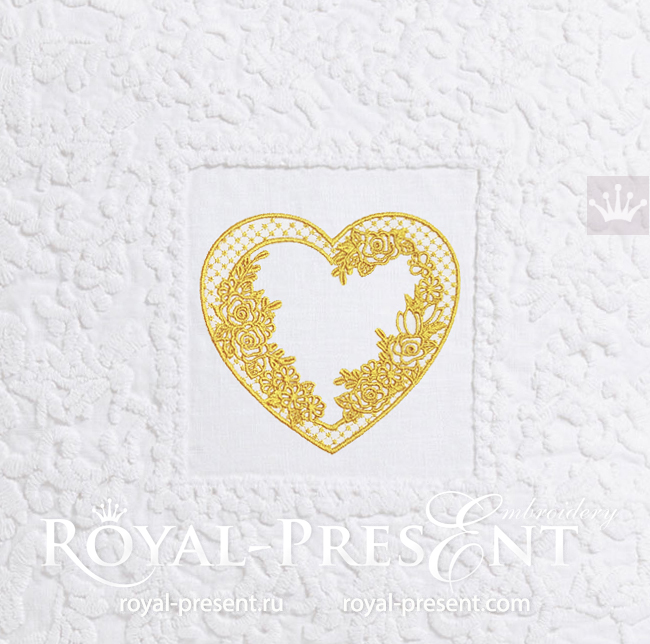
Tracery Heart Monogram Frame embroidery design
Example: When working with Tracery Heart Monogram Frame embroidery design you’ll choose your stabilizers according to the demands of the fabric.
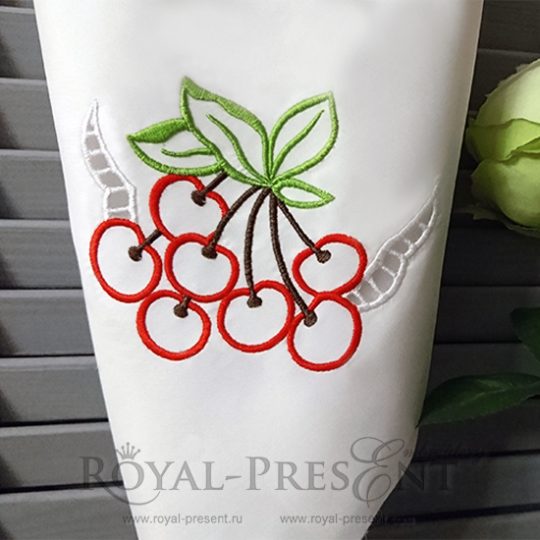
Cutwork Machine embroidery design Cherries
Lace designs, like Cutwork Machine embroidery design Cherries, require water-soluble backing of medium weight. Christmas Motifs Free Standing Lace Embroidery designs will require medium to heavy-weight water-soluble or heat-away stabilizers.
Now a few things about lacy machine embroidery designs and water-soluble stabilizers…
We’ve already mentioned that the residue, that some heavier wash-away stabilizers leave, add stiffness to the embroidered item. Some projects welcome the additional “solidity”, while others – don’t. That’s why, when choosing stabilizers for machine embroidery of lace designs, make sure you know what “side effects” you’ll get.
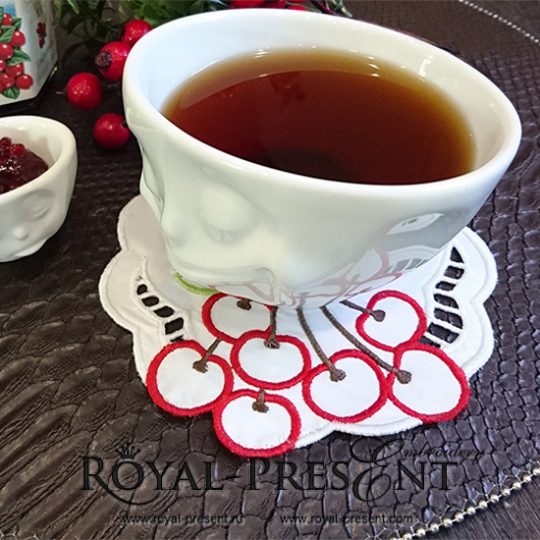
Cutwork Machine Embroidery Design Cherries napkin
Example: Cutwork Machine Embroidery Design Cherries napkin is very similar (in style) to the Cutwork machine embroidery design Cherries, we described earlier. However, for the present design, you might want to consider using not medium-weight wash-away stabilizers, but their heavier variations.
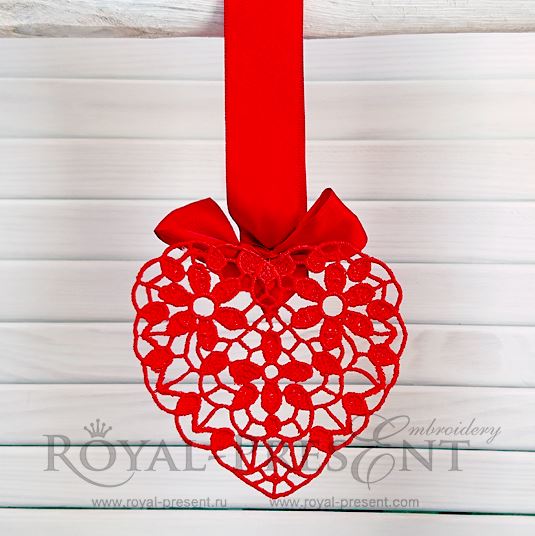
Machine Embroidery Design Red Lace Heart
The starchy effect that is left by heavier stabilizers will only add to the finished result. A starched Cherries napkin can be used as a coaster or a placemat, i.e. items that require a bit more “fixedness”. The same goes for Machine Embroidery Design Red Lace Heart. The design is an iconic FSL pattern, which, when completed, is to be hung as an accessory. So, as a starched effect here is more than just welcome, opt for heavy-weight wash-away stabilizers (both films and paper-like ones).
Note: Lace designs vary in their structure. Thus, it’s imperative that you check the lace design structure before opting for stabilizers for each particular project. What you should take into account, in particular, is the way elements are connected between each other.
The rule of thumb in the case goes like this: If the elements are interconnected (i.e. they sort of overlap each other), temporary stabilizers can be used. If the elements aren’t overlapping each other, permanent stabilization (usually organza or tulle, due to their transparency) is used.
Why is it so? Well, because, if you use temporary stabilizer (either wash-away or heat-away), after it’s removed, the stitches of the design will simply fall apart as there’ll be nothing to give them support.
If you can’t make sense of such technical details yet, make sure to ask such information from the design “manufacturers”.
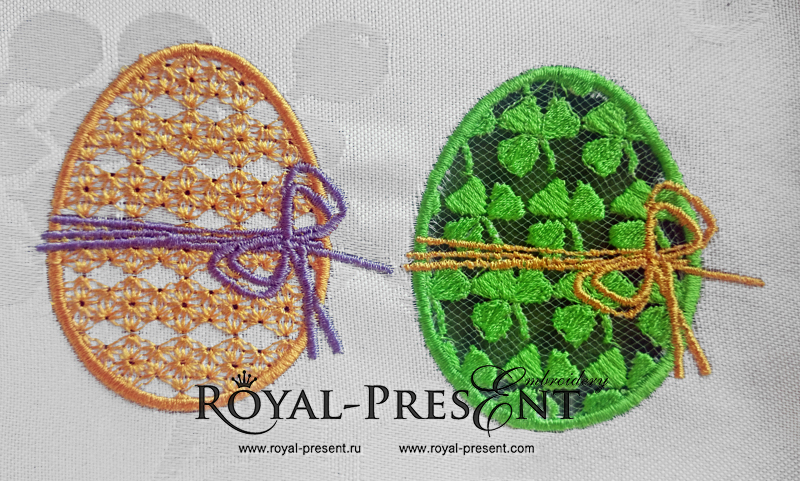
Easter eggs Cutwork Machine Embroidery Design
Example: Let’s compare two machine embroidery designs: Easter eggs Cutwork Machine Embroidery Design on tulle and FSL Machine Embroidery Design Blank Monogram. Blank Monogram requires a water-soluble stabilizer (i.e. temporary stabilization) as its base. Easter eggs, however, need to be embroidered on a permanent base, which, as we said, is usually of textile nature (transparent organza, tulle, etc.)
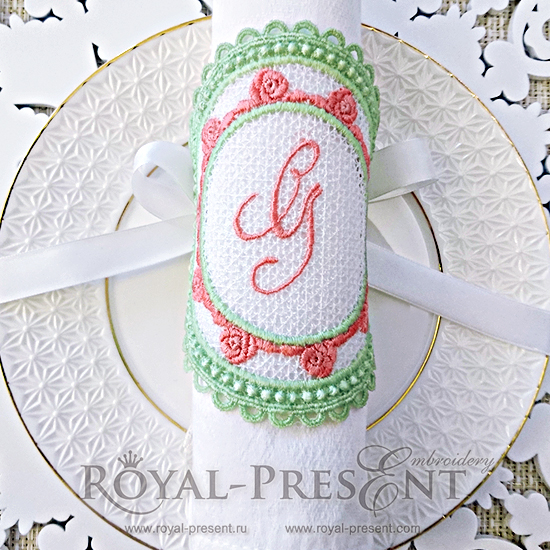
FSL Machine Embroidery Design Blank Monogram
Transparent textile doesn’t interfere with the look of the finished project while providing all the necessary support to the stitches. Such type of stabilization is an important component for the successful completion of the project, so it must be taken into account. For that reason, Royal Present Embroidery allotted a special category to designs of the kind (Lace tulle collection).
Choosing stabilizers for machine embroidery of linear designs (Red Work and similar).
Such projects don’t require some special adjustments stabilization-wise. Stitch arrangement of such designs is light, so when choosing stabilizers for machine embroidery of the kind, focus on the fabric properties.
Choosing stabilizers for machine embroidery of cross-stitch designs.
Stabilizers for such projects vary a lot like the nature of projects is never the same. To make the right choice of stabilization, each project will have you analyze such components as the size of the stitches, stitch density, size of the threads, fabric properties, item cut, etc.
Further, we’ll give some examples of how stabilizers for machine embroidery of cross-stitch designs are chosen.
Example 1: Machine embroidery of light cross-stitch designs. Such patterns are usually used on kitchen towels or handkerchiefs. Light cross-stitch designs can be done with the use of a wash-away backing. Why? Because cross-stitch designs for kitchen towels and handkerchiefs are not dense. Thus temporary stabilization, provided by medium-weight wash-away backing, could be enough. Also, the backside of the to-be-embroidered item should be clean.
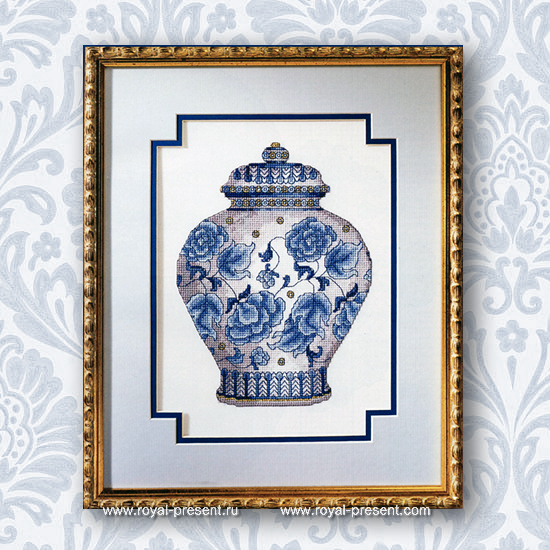
Baroque Style Cross-Stitch Digital Pattern – 4 sizes
Note: The given choice of stabilization should be adjusted if the light cross-stitch design is to be embroidery on a waffle-weave kitchen towel. The weave of the fabric is quite demanding so it requires a different (more solid) way of stabilization. Learn more about choosing stabilizers for machine embroidery on waffle-weave in our post “Choosing a fabric for machine embroidery. Part 2. Woven and knit fabrics explained”.
Example 2: Machine embroidery of dense cross-stitch designs (e.g. sceneries, cross stitch designs of large sizes, etc.) Working with such large designs usually means that there’s a lot of alignment involved. Also, the stitching of such designs is one of the densest of all. All these peculiarities mean that there should be quite solid stabilization – medium-weight cut-away backing in the least. Lesser solid stabilization (e.g. tear-aways or temporary options) might not be able to withstand the multiple needle-punching of dense cross-stitch designs.
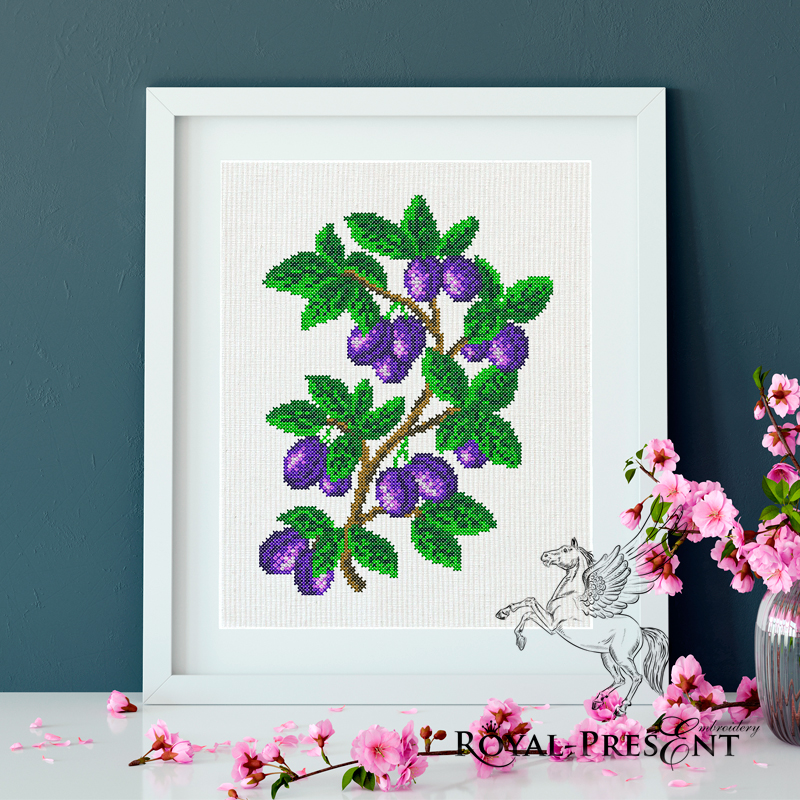
Plum Cross-stitch Machine Embroidery Design
Another thing to consider with large cross-stitch designs is the factor of the hoop. You see, with all the alignment involved, some might want to avoid all the fuss and switch to the largest hoop possible. However, large hoops don’t provide the same level of tension throughout the entire embroidery area. The further the center of the area is from the bands, the looser the tension. This means that in the center of the embroidery there’s a big room for possible mishaps (loose stitches and threads, misalignment, etc.) Thus, when choosing a hoop for a large cross-stitch design, don’t just opt for the largest size.
Example 3: Machine embroidery of cross-stitch designs on clothes requires taking into account the draping property of the item. Retaining the drape and comfort in wear is just as important as the successful application of embroidery itself. So, in order for the item to keep all of the abovementioned properties, light-weight adhesive tear-away backing is very helpful indeed. Examples of such are Soft n’ Sheer by Gunold, No-show Polymesh by World Weidner, etc. If the design isn’t dense, try temporary stabilizing options, like Solufix by Vlieseline, Sulky Sticky Fabri Solvy, Madeira Avalon Fix, etc.
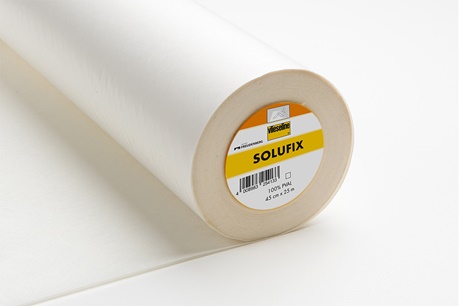
Solufix
Example 4: There’re machine embroidery cross-stitch designs, which don’t influence the way stabilization is chosen (e.g. Norwegian Snowflake Cross-stitch Machine Embroidery Design).

Norwegian Snowflake Cross-stitch Machine Embroidery Design
Their programs are created in such a way, that when they’ve been applied, fabric properties aren’t changed. Thus, when choosing stabilizers for machine embroidery of such designs, take into account only the fabric properties (demands of the designs on that matter aren’t important).
– Choosing stabilizers for machine embroidery or appliqué designs.
Appliqué is another category of projects where all types of stabilizers are used. Usually, however, appliqué embroidery designs are done with the help of some kind of tear-away. However, as always, there’re many exceptions. To get them into a line, you need to analyze all fabrics to be used in the set-up of each particular project. Then you need to pinpoint the most demanding fabric of the lot as stabilizer choice will depend on this fabric mostly.
Example 1: Let’s say, an appliqué design involves the use of a transparent non-stretchy fabric. So, when choosing stabilizers for machine embroidery projects, transparency of the fabric is the most demanding property. Thus, to achieve a clean look at the finished product, you’ll need to opt for temporary stabilization (wash-away/heat-away).
Example 2: Let’s say, an appliqué design involves the use of stretchy fabrics. In this case elasticity of the fabric is the property to be taken into account. This means that the stabilization of the fabric should provide additional fixation of the fibers. The aim is achieved with the help of a cut-away backing with some sort of adhesion.
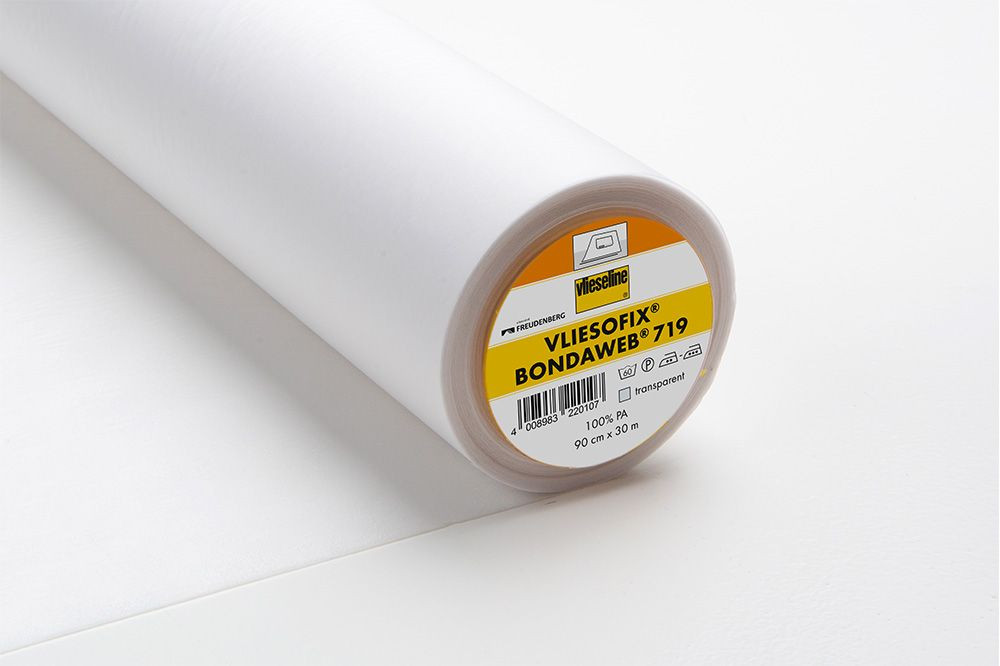
Vliesofix by Vlieseline Vilene
Tip: To make working with appliqué machine embroidery designs easier, use sewing self-adhesive stabilizer (like Vliesofix by Vlieseline Vilene or similar). The material keeps appliqué elements from shifting while arranging and stitching.
- Choosing stabilizers for machine embroidery of Photo stitch designs.
As such designs are famously dense, they require maximum stabilization. This means that not only the stabilizers are to be solid (medium-weight cut-away), but also fixation in the hoops should be flawless. To help the backing in the provision of the support, you’re more than just welcome to use extra adhesion.
- Choosing stabilizers for machine embroidery of Sfumato designs.
The method of choosing stabilization for such projects is similar to one of the Photo-stitch designs. Hence, medium-weight cut-away backing with additional adhesion is a safe choice with such project.
- Choosing stabilizers for machine embroidery of Trapunto (Raised satin) designs. ““
Maine’s focus on the projects of the kind is the “raised/puffy” effect of the décor. To achieve the “raised effect” various stabilizers are used. Here’re several examples of such:
Non-woven textiles of various density, weight, and sickness (felt, high or low batting (depending on your preference e.g. Aurora, FiberCo, Freudenberg, etc.) easily found in all quilting shops)
Specialty Trapunto stabilizers (e.g. Style-Vil by Vliezeline Freudenberg, etc.)
Tip: All stabilizers for Trapunto machine embroidery should be accompanied by some sort of adhesion (temporary sprays, adhesive/fusible layers, etc.). This extra measure makes it easier to work with large embroidery areas (that such designs usually are all about).
Note: Depending on the fabric that you’re using, besides the specialty loft stabilizers (interlinings) an additional layer of regular machine embroidery backing might be required. Usually, light-weight tear-away backings provide all the necessary stabilization. Try avoiding using anything of a higher density because multiple layering could take its toll on the embroidery machine.
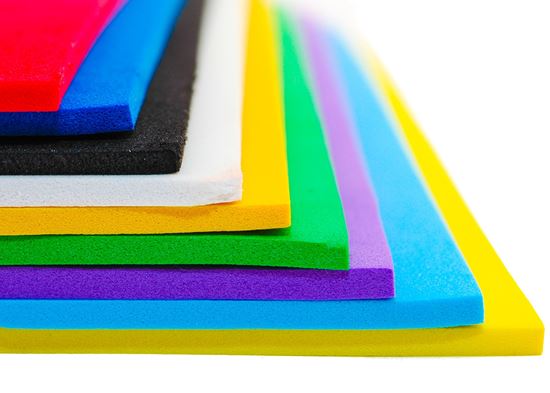
Puffy Foam by Sulky
Choosing stabilizers for machine embroidery of 3D designs (lettering, numbers, etc.) 3D embroidery requires specialty toppings, the so-called puffy foams. The most commonly used ones are Puffy Foam by Sulky, Puffy Foam by Gunold, etc.
3.2. – How many elements does the machine embroidery design have? Why a number of the elements and their size matter for choosing your stabilizers?
The visual aspect is not the only thing to be taken into account when sizing up a to-be-embroidered design. Larger designs (both solid and consisting of several elements) usually take bigger toll on the fabric than smaller ones. What’s more, large designs consisting of several elements in that regard are even more drastic. They change the fabric properties, (affecting the position of fibers, altering drape quality, etc.) in a much more pronounced way. So in order to avoid the unwanted change correct stabilization is crucial. To make the picture clearer we’re providing the following example.
Example: Let’s say you’re working with machine embroidery of design, containing large letters not connected between each other (a several-elements design). Fabric, the design is to be embroidered, is a regular T-shirt jersey knit one. This is how you should approach the process of choosing stabilizers for machine embroidery of the kind:
Firstly, the fabric is relatively light, stretchy and thus is quite demanding. This means that good stabilization is needed (think medium-weight cut-away/tear-away paired with temporary spray adhesive).
Secondly, T-shirts get to be used, washed and stretched quite a lot. It means that not only the fabric but also the embroidered design will be stretched and otherwise affected. A solid design (consisting of one element) withstands the damage better than those, consisting of several separate elements.
Why is it so? Well, because the embroidered and unembroidered areas are affected by stress in different ways. Jersey knit fibers not bonded by the design stitches react to stress quicker. Jersey knit fibers, bonded by the embroidery stitches, on the other hand, tend to be less stretched after multiple items of washing. So, in time due to the wear-and-tear, the embroidery might become crooked. The letters (elements), not being connected, might get shifted away from each other. Thus, as you see, designs, consisting of letters connected to each other, are less susceptible to tear and wear than designs with unconnected letters.
So, to prolong the integrity of the embroidered décor, the stabilization of multiple-elements designs should provide permanent support throughout the entire area of the décor.
This means that such designs should be embroidered with help of cut-away backings. What’s more, the size of the stabilizer should cover the entire design (not each letter separately). It should provide “the invisible” or “backside” connection to the separated letters.
Thirdly, some jersey knits are quite thin, almost transparent. If you’re working with such fabric, a regular cut-away stabilizer might be seen through the fabric. Thus, to avoid the unwanted visual disadvantage without compromising the quality of the support, opt for a semi-transparent type of cut-away backing (e.g. Soft n’ Sheer by Gunold, No-show Polymesh by World Weidner, etc.)
The described above option is not the only possible one. Instead of Soft n’ Sheer, No-show Polymesh and the like, you can also use the combination of tear-away and “cover-the-back” backings. Tear-away will provide support to the stitches. “Cover-the-back” will enhance the support, binding the embroidered and unembroidered area, preventing them from being stretched. Stabilization with the two layers will go in the following way:
- Tear-away is applied to the fabric with the help of a temporary adhesive spray.
- The backing and the fabric are hooped together.
- After the design is stitched onto the fabric, the excess of the backing is removed.
- After that “Cover-the-back” backing is ironed onto the backside of the embroidery.
The example above describes the stabilization of several-elements designs. One-element or solid designs are usually less demanding stabilization-wise. Tear-and-wear affects the whole area of the décor in an approximately similar way, so its integrity could be preserved for a longer period of time with the help of tear-away backing only.
3.3. – Does design density influence the choice of stabilizers?
Another aspect of the design structure that can influence the choice of stabilization is the stitch density used in the program. The main thing to remember on this wise is the denser the design stitching, the more solid stabilization should be used. Cut-away backings, for once, is the optimum choice for even the densest of the designs.
Such backings can withstand multiple punching, while still providing support to the fibers of the fabric. In cases when cut-away stabilizers can be used (e.g. with transparent fabrics) textile substitutions could help. Transparent organza, tulle or similar “invisible” fabrics are champions for such projects as they’re durable and not expensive.
The second best option is wash-away and heat-away backings. They’re also invisible; however, the support that they provide is temporary. Thus, after a few washes, the embroidery might lose its neat look. Stitches might get loose, the design’s shape might get crooked because of stretching, etc.
As you see choosing stabilizers for machine embroidery is all about answering questions. Answers to questions about the designs, the fabrics and the way the items are to be used make up the ground for the final decision. Get the answers, sum them all up together and you’ll know what type of stabilizers is best for your project. Mind, the summed up resume is what counts so it doesn’t really matter which of the questions you tackle first. That being said, we could almost call it a day.
However, there’re still a few extra helpful points and tips to be shared. Make sure to take them into account when making your call on the choice of machine embroidery stabilizers.
Bonus tips for choosing stabilizers for machine embroidery:
1 – Make sure to always pre-wash and then iron fabric before you choose stabilizers.
2 – Make sure to make test embroidery to see if the stabilizer you’ve chosen suits the demands of the project.
3 – Try to avoid using “household” substitutes instead of proper stabilizers. We speak about all those gelatin, starch, plastic bags, and printing paper know-hows. Such alternatives might help you achieve good embroidery results; however, the toll it takes on the machine is not worth it. Printing paper and starch clog the bobbing compartment. Gelatin spray might leave stains on fabrics or leave more permanent damage (case fibers breakage etc.) Taking your machine to the service is never a fun ride. Ruining the project is always sad. So, be cautious when turning to such “desperate measures”.
4 – Do your research before using a new type of stabilizer. It always helps to check for extra tips with the manufacturer’s official site. Many brands provide detailed information on the subject.
For example, Gunold’s official site shares info on the number of stitches their stabilizers can withstand. Gutterman’s official site gives practical tips and examples on which of their stabilizers can be used in various projects. The official internet site of Sulky helps you match stabilizers to various types of fabrics and designs.
Conclusion
Now that the final tips have been shared, we think it’s safe to say that all questions on the topic of choosing stabilizers for machine embroidery are covered. The only thing that is left for us is to wish you keep practicing your machine embroidery skills, as only practice makes perfect. Royal Present Embroidery, as always, is here to help you make embroidery practice an easier and as enjoyable experience as possible. Keep an eye open for our upcoming posts to learn more about machine embroidery. For now, that’s all, till next post!
You may also like
Choosing stabilizers for machine embroidery

Author: Ludmila Konovalova
My name is Ludmila Konovalova, and I lead Royal Present Embroidery. Embroidery for me is more than a profession; it is a legacy of my Ukrainian and Bulgarian heritage, where every woman in my family was a virtuoso in cross-stitch and smooth stitching. This art, passed down through generations, is part of my soul and a symbol of national pride.
Date: 09.09.2019

 Get Sign-In Link
 Login with Google
 Login with Facebook
 Login with Amazon
 Login with Paypal