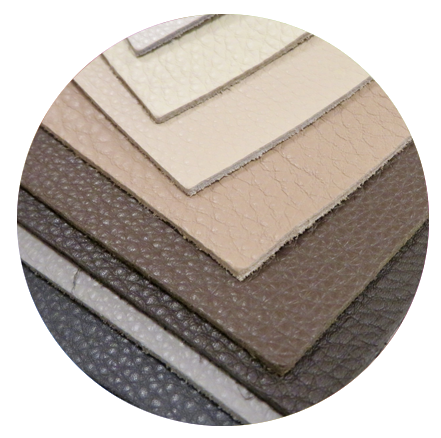
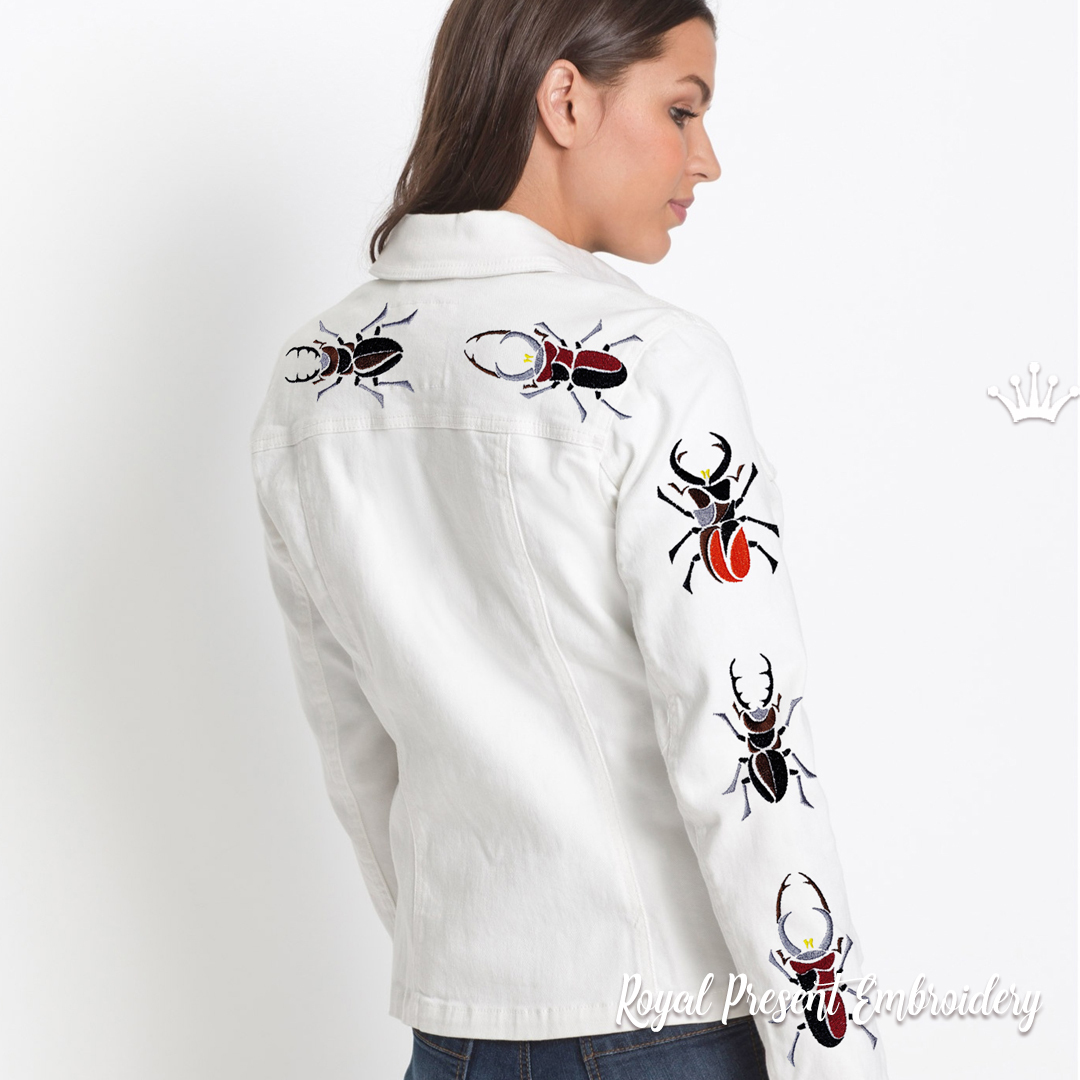
Non-woven fabrics: Felt (craft felt, eco-friendly felt, wool blend felt, wool felt), natural leather (various types, including nubuck, suede etc.), faux leather, natural fur, sheepskin (shearling), neoprene, laminated fabrics (oilcloth, vinyl), PVC transparent plastic film (clear vinyl), paper.
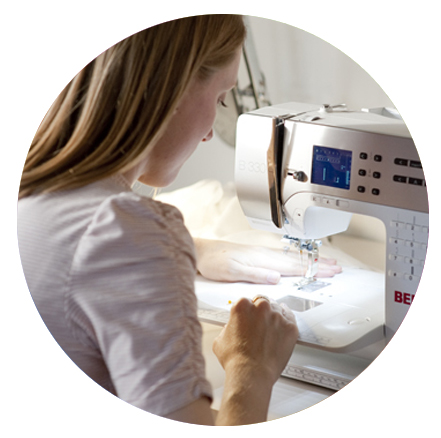
Instead of introduction
Quick reminder for those, who has just joined in…
Present article is the fourth and final installment to the series “Choosing fabric for machine embroidery”. So, if you’ve only just now entered the theme, to get better understanding of it, we strongly suggest you read its previous three parts. The first article (Choosing fabric for machine embroidery. Part 1 – available here) introduces the theme and its main notions. It dwells on general principles (or rules) which embroiderers should follow when assembling embroidery projects. The second article (Choosing fabric for machine embroidery. Part 2) shows how those rules are applied on fabrics with different structures: woven and knitted ones. The third article (Choosing fabric for machine embroidery. Part 3) speaks of fabric properties which should be taken into account when choosing fabrics for machine embroidery.
That being cleared out, let’s draw a general picture of what to expect from the final part of the theme. The article dwells on characteristics of non-woven fabrics. We won’t get into detail about the structure of such fabrics, stating only the most important for machine embroidery aspects. Properties of non-woven textiles and how they influence the way we’re choosing fabrics for machine embroidery, however, we’ll be discussed at length.
After that, we’ll move on to speaking of other factors that can affect your fabric choice for various embroidery projects. Designs, available stabilizers, capacity of your machine… Do such things play any role when you need to choose fabric for your next embroidery project? Do you know that answer (or better say “answers”) to the question is usually shaped by the practical experience that an embroiderer has? What to know more? Ok, then, let’s begin!
Content:
Part 1
1. Non-woven fabric and their characteristics
Part 2
2. Choosing fabric for machine embroidery: the role of designs
3. Choosing fabric for machine embroidery: the role of embroiderer’s experience
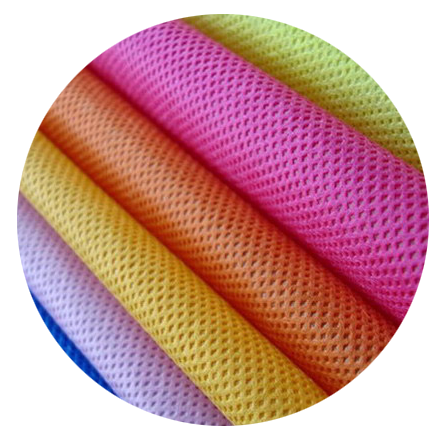
Non-woven fabrics and their characteristics
In the first part of the series “Choosing fabric for machine embroidery”, we stated that non-woven fabrics differ from knitted or woven ones. Main difference between the three groups is their structure. Woven and knitted fabrics are constructed of yarns (threads), arranged in a certain pattern. Knitted fabrics have their yarns arranged in rows of loops, while yarns of woven fabrics are intertwined in various weaves. Construction of components of non-woven fabrics, on the other hand, is based not on a pre-arranged pattern, but on some type of bonding means (glue, heat, felting etc.) Such distinction between their structures means that properties of non-woven fabrics will differ from those of woven and knitted fabrics too. Thus, you’ll require approaching such fabrics differently not only when choosing them for machine embroidery, but at other stages of the work too.
Example:
Some non-woven fabrics (felt), don’t have yarns (threads) in their structure. This means that they don’t fray. This characteristic is very useful in you’re looking for fabrics for appliqués or in-the-hoop machine embroidery designs. Other non-woven fabrics don’t shrink (neoprene), which is great for most machine embroidery projects.
Examples that we’ve described above, show pros of non-woven fabrics for machine embroidery. However, besides pros such fabrics have their cons too. Further we’ll speak about some of the most frequently used in machine embroidery non-woven fabrics.
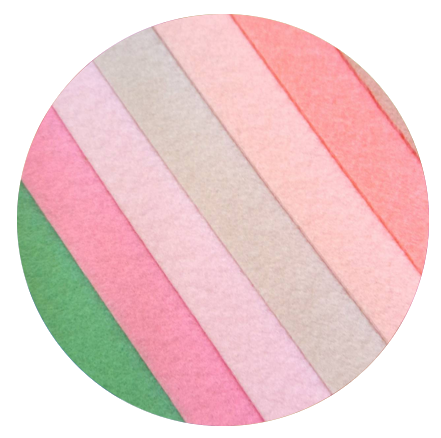
Felt: Craft felt, Eco-friendly felt, wool blend felt, wool felt.
We all know what felt is: a soft, sturdy fabric of various thicknesses. Structure of all types of felt is similar: soft fibers, either synthetic or natural pressed (mated) to form a smooth, soft, pliable type of fabric. All types of felt, mentioned above, differ from each other in their fiber content. Craft felt is synthetic. Eco-friendly felt is either rayon or also synthetic (but made from recycled materials). Wool blend (obviously) is a blend of wool and synthetic fibers, while wool felt is 100% wool. Further we’ll speak about details of choosing felt for various embroidery projects.
What an embroiderer should take into account when working with felt:
Fiber content. Anything that is synthetic is obviously not good for making garments and personal accessories. So, craft felt is a nice choice for making in-the-hoop tags and ornaments, patches etc., but not, say decorative pillow for nursery. Also, felts tend to shrink, some of it types shrink more than other. Wool felts shrink more, thus when machine embroidering wool-blend felts, make sure you pre-shrink the fabric.
Note: Some felts can’t be machine-washed. Thus, if in doubt, pre-shrink the one that you’re working with, by gently hand-washing it.
- Dimension of the fabric (its thickness). There are several categories of felt thickness. Thin felt (1.2 – 2 mm) is perfect for appliqués and in-the-hoop projects. Felt of medium thickness (2 – 3 mm) is good for interior accessories, bags etc. Such felts can withstand quite dense stitching so it’s really great for making all those Christmas stockings and trees skirts decorations. Felt that is thicker than 5 mm is seldom used for machine embroidery. Such thickness is really hard for any home embroidery machine to put its needle through. Thus, only choose to use such felt for your projects is you have an industrial embroidery machine (or a cross-over).
- Design of the embroidered-to-be felt item will affect the choice of stabilizers. As felt can be used in a really wide variety of embroidery projects, stabilizers for working with felt will vary. Further we’ll give few examples of how to match felts, used in various types of projects with the correct stabilizers.
Example 1: Machine embroidery of patches using medium thickness felt (of any fiber content). Stabilizer: light to medium-weight tear-away backing. Hooping: the pre-cut felt pieces are basted or adhered with temporary “sticky spray” on the hooped stabilizer.
Example 2: Machine embroidery of a Christmas stocking made of soft felt of medium thickness. If your felt is soft, embroidery stitches will “sink” into its surface. Thus such felts should be treated just like, say, terry cloth, waffle weave or any other textured textile. This means, that a backing (light to medium-weight tear-away one) and a topping (light to medium-weight wash-away film) should be used when machine embroidering soft felt.
Example 3: Machine embroidery of an appliqué design using felt. Choice of stabilizers in this case will depend on the main fabric. If it’s stretchy or too light, then under the fabric light to medium-weight tear-away backings paired with temporary spray adhesive are used. If the fabric is quite stable, no stabilizer is used. Before sewing, the felt pieces can also be adhered with temporary spray adhesive.
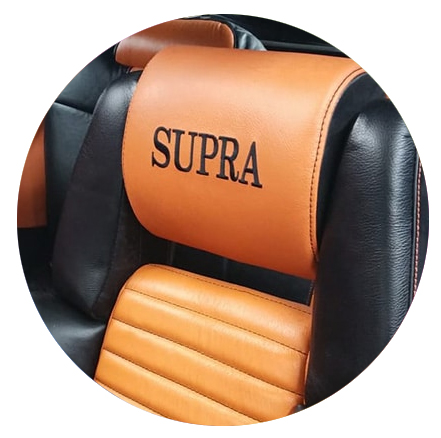
Natural leather (nubuck, suede etc – all types)
Natural leather (nubuck, suede etc – all types) are one of those non-woven fabrics, which actually are difficult to machine embroider. Natural leather is demanding during all stages of work: choice of the variables (stabilizers, needles, designs), hooping method, machine settings (speed, thread tensions) etc. In order for projects, featuring leather to come out well, machine embroiderers should take into account, the following leather characteristics:
- Thickness and weight of natural leather. Leather can be as thin as 1/64 inches (0.4mm) or as thick as 5/32 inches (7.5mm).
For comparison: clutches and bags are usually made of leather with thickness of up to 3/64 inches (1.2 mm). Leather for wallets can come up to 5/64 inches (2.0mm). These are items that can still be machine embroidered at home. The Knife holsters are made of really thick leather (1/8 inches or 6.0mm). Such leather, if at all, can only be embroidered on industrial embroidery machines.
Why is thickness so important? Well, because not all embroidery machines can to sew through thick leather. Home embroidery machines, for once, will go only as high as 6/64 inches (2.4 mm). Anything that is thicker (and usually heavier too) is best left for industrial units. Also the thicker the leather the more difficult it’s to stabilize it in the hoops. As you NEVER HOOP NATURAL LEATHER (it gets burned by the hoop) you “glue” it onto the hooped stabilizer. Also, natural leather can’t be basted to the stabilizer as holes, left from the needles, will be seen afterwards. Thus, as you can imagine, thick and heavy material won’t be easy to settle with just a “whiff” of a temporary spray adhesive. And without proper fixation on the hoops, you’ll never get good quality embroidery. So, think twice before starting a project with thick leather.
- Softness of leather. We won’t bother you with technical terms on this one. It is more practical if on this wise you’ll just treat leather as any other type of fabric. In particular: Soft leather should be pliable (fold it between your fingers and see if it bends well). You should be confident that your machine’s needle will punch through it without difficulty (make test embroidery if possible). Also, the softer the leather, the more tempting it’s to hoop it, but just don’t, as it’s actually more unforgiving to hoop burns.
Note: Embroiderers with a lot of experience in working with natural leather suggest using Fast Frames for hooping natural leather. Though it’s actually possible, still, we would caution any beginners against using the advice. Leather can withstand some pressure for a certain period of time. So, experienced embroiderers plan very carefully their work, thinking through all the details, including the time needed for the design to be sewn. Knowing the time, they manage to finish all the work and “un-hoop” the leather before it gets irrevocably “burned”. If your project must be hooped, at least try hooping it for a short period of time to see if it gets damaged. Even if the item withstands hoop pressure well, still, when hooping leather a longer period of time put “protective” pieces of soft fabric between the hoops and the leather.
Elasticity and level of dryness of leather. These two characteristics are often connected. If the leather you’re embroidering is cracked and dry, it won’t stretch. Unlike with woven and knitted fabrics, with leather this property is actually required (up to a point of course). If leather is dry and doesn’t stretch, needle punches will break it surface and the holes won’t close. That’s why some embroiderers apply some silicon lubricant (or soap) on leather even if it’s not dry. Such lubrication helps (again up to a point) the leather to withstand sewing pressure. Be careful though with any lubricants, as some of them might stain both leather and embroidery threads. Mind, that nubuck, suede and other “buffed” types of leather are never lubricated.
- Backing of the leather. As we said leather is really unforgiving when it comes to needle punching. That is why special types of needles and designs settings are used when working with leather. When choosing fabric for machine embroidery amidst “leather family” it’s important to check if it has some type of textile backing. If your leather is bonded to a textile backing, it will be easier to sew as the fabric helps the leather to withstand the toil of needle punching it receives. If there’s no backing, you’ll have to apply it (a.k.a. adhere woven stabilizer or interfacing).
Note: Such backings (leather interfacings) usually have heat-activating glue layer. The glue of such interfacings is activated at low temperatures, so that heat won’t damage the leather. Thus try to find such specialty materials for your work. If, however, you use a non-adhesive type of backing (or just any fabric interfacing) use special adhesive glues or sprays. Don’t use any “craft” types of glue as they might stain or otherwise damage the leather.
Variables to be used in embroidery projects featuring leather:
- Needles – sharp, regular embroidery needles. The size of the needles should be determined by the type of leather you use. If the leather is soft and thin, thick needles will leave holes. Never use leather needles (wedge point needles) when embroidering leather (they are for sewing only).
- Designs – Toil, Vintage, Red-Work and other light, not very dense designs. Run stitches are the best for machine embroidering on leather. Satin stitches might be a too heavy burden for such a demanding material. However, when digitized correctly (the density, the underlay type etc.) not only designs with satin, but also tatami fill-stitch are possible to sew on leather.
Note: When working with natural leather, design plays very important role. So, if you’re in doubt about design setting, always make test embroidery and adjust the density of the design. If you can’t do it on your own, Royal Present Embroidery offers the service of the kind. Send us an email and we will help.
- Embroidery machine settings – Speed should be always slow, thread tension should be adjusted according to the properties of the fabric.
- Stabilizers – The woven backing (or interfacing) that we’ve mentioned before isn’t counted as proper stabilizer for machine embroidery on leather. Even with them, you still should use some type of embroidery backing to support stitches of the design. The backing can be either a tear-away one (for lighter designs) or a cut-away one (for denser designs).

Faux leather
Faux leather (nubuck, suede etc) should be treated by embroiderers almost like natural leathers. The difference between the natural and the faux leather (at least from an embroiderer’s point of view) is that faux leathers should be ironed with extreme care. That’s why not all heat-activated textile interfacing can be used with faux leather. That is the only downside of working with faux leather. On all the other points of work (design and hooping method), it definitely wins over its “natural” counterpart. The choice of designs for machine embroidery on faux leather is really impressive. You can embroider whatever you’ll like, be it Red Work, Satin monograms, Cross-stitch folk flowers etc. The only limitation design-wise would be the draping quality of the fabric and the cut of the item itself. Faux leathers can be hooped, which makes working with them a lot easier. Just like with natural leather, sometimes you’ll have to use interfacing and only then choose stabilizers.
Note: Some types of faux (artificial) leathers are actually woven textiles, covered with synthetic materials (imitating leather look). Such faux leathers don’t need additional interfacing.
Also, you never use leather needle when machine embroidering faux leather of all types.
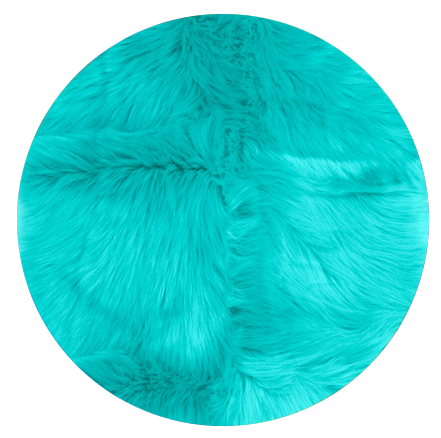
Natural fur
Natural fur should be treated by machine embroiderers almost in the same way as faux fur.
Tip: Details on machine embroidery of faux fur can be found in the second article of the series “Choosing fabric for machine embroidery” available here. In short the requirements will be: stabilizers (backing and topping), floating instead of proper hooping, dense designs, machine embroidery settings adjustment.
The general outline of embroidery project assemblage is given. Now let’s point out particular things that make natural fur differ from its artificial counterpart.
1 – Different base. As we’ve said in our previous article the base of faux fur is woven textile. Natural fur’s base is non-woven material, a hide (a.k.a. leather). This detail will determine the difference in the way natural fur behaves during machine embroidery. Just like natural leather, fur (its hide) is quite unforgiving to excessive needle punching. So any needlework with natural fur should be done carefully.
Example: If, instead of temporary spray adhesive, you choose basting fur onto the hooped stabilizer (when floating), then don’t use short stitches. Likewise, too dense designs should get very “hefty” support. This means that usually, in such cases
Cut-away types of stabilizers are used for the backing. If, a self-adhesive tear-away stabilizer (e.g. Filmoplast etc.) is used in the hoop, then a second layer of backing is required. Usually, this second layer is applied under the hooped stabilizer.
2 – No ironing for natural fur. Thus when choosing stabilizer (topping) for machine embroidery on natural fur, no heat-way ones should be used. So, this leaves us with water-soluble toppings only. Also, as you never wash natural fur, water-soluble stabilizer should be removed not by actual washing. After the embroidery is over, tear away the excessive stabilizer. The bits that will remain are removed by a wet piece of cloth or a sponge.
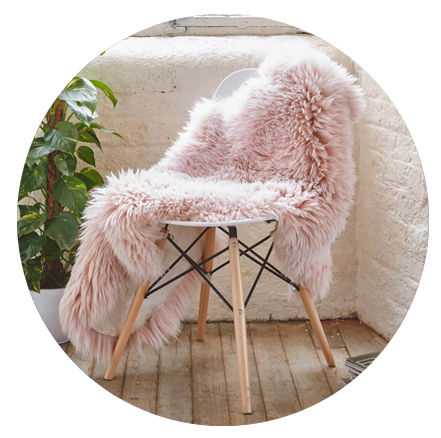
Sheepskin
Sheepskin (shearling) is basically reversed natural fur or leather with fur on the inside. Such combinations just can’t be unfashionable. And anything that is in fashion and can be decorated is directly connected to machine embroidery. So, what things should an embroiderer take into account when working with sheepskin? The answer is – thickness of the material (and thus its weight), its softness and length of the inner fur. We’ve decided that it’d be easier to convey meaning of these characteristics through description of sheepskin machine embroidery process itself.
Machine embroidery of sheepskin:
1 – Design choice. There’re no strict restrictions on this wise. However, the cut of the to-be-embroidered item can influence the choice of the pattern.
Example: There’re could be problems in embroidering large designs on, say, sheepskin jackets if parts of the design come over overlaying seams of the garment. The layers of the fabric on those seams will be too thick for the machine to sew through. What can be done in this case? Make an appliqué or a patch and sew it onto the item (garment). Best materials of such appliqués and patches are: faux leather (for designs with dense stitching) and organza (for open-work patterns).
2 – Stabilizer choice and hooping. If sheepskin is too thick and can’t be hooped, it’s floated on the hooped tear-away stabilizer. Sheepskin is bonded to the hooped stabilizer with help of temporary spray adhesive or a double-sided sticky tape. The tape should be positioned outside of the embroidery are, otherwise the glue from the tape might gum the needle. If the stabilizer that you’re using already has adhesive layer (e.g. Filmoplast etc.) no extra adhesion is needed.
Note: Mind that because of fur of some sheepskins isn’t even (in some areas it could be shorter, longer, thicker, thinner), temporary spray adhesive won’t always keep the fabric firm and steady. This, in its turn, will cause shifting of the “fabric” under the foot of the embroidery machine. On this wise, self-adhesive stabilizers are provide better crevice than the sprays.
Sheepskin is never basted to the hooped stabilizer as needle punches will leave holes in the hide.
Tip: Sometimes basting of sheepskin is possible. However, it’s either is done along the already existing hem stitching. If, for example you’re embroidering a sheepskin jacket, it usually has quite a lot of seams on its front sides. So, you can baste the jacket onto the hooped stabilizer, running the stitches along those seams. Another possibility for basting is running the stitches in the area, which is later to be covered by the embroidery.
3 – Machine embroidery of sheepskin – the sewing. The problem with sewing on sheepskin, the feet of the machine might “drag” the fabric as it goes. Such thing happens with sheepskin, the wool (the layer of fur) of which is too long. So, because it’s long, it doesn’t keep the hide “fixed” enough and the feet of the machine drags it along. What can you do? Just lift the feet up a bit.
Other embroidery machine settings that should be adjusted are: speed (should be lowered), thread tension (should be loosened). Needles for sheepskin are same as for leather.
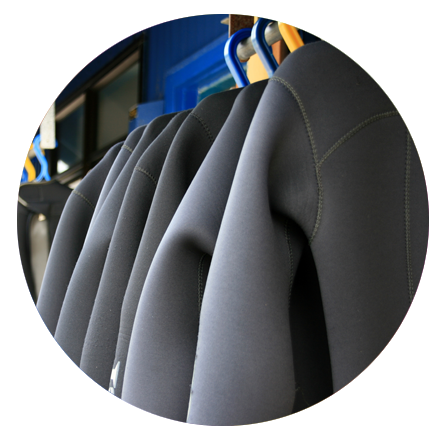
Neoprene
Neoprene is a really resilient non-woven material made of rubber and thus it’s quite elastic. There’re types of neoprene which have textile interfacing on one or even both of its sides. The textile interfacing can be both woven and knitted fabric. Characteristics of neoprene, important for machine embroidery are thickness of the material, its type and elasticity.
1 – Elasticity of neoprene and why it’s important for machine embroidery. As by now we’ve spoke about stretchy fabrics quite a lot, you already know that stretchy fabrics require good stabilization. In case with neoprene (which can be stretch in every direction) it means that in most of the cases you’ll need to use light to medium-weight cut-away backings paired with temporary spray adhesive. Tear-away stabilizer can be used in cases when back of the embroidery should be presentable. However, if you’re working with an extremely elastic tape of neoprene, try to stick to cut-away stabilizers only.
2 – Thickness of neoprene and why it’s important for machine embroidery. Thick fabrics simply can’t be hooped. Thus, if you’re embroidering a thick, foam-type of neoprene, you’ll have to float it on hooped stabilizers. Also, with neoprene of foam-types you’ll probably want to adjust both needle and bobbin thread tension. If you don’t, the stitches will still look ok, but they will probably sink a little in the surface of the fabric.
3 – Type of neoprene and which ones are best for machine embroidery. Most will probably know neoprene by the rubber scuba-suits, foamy mouse pads, laptop sleeves etc. Such types of neoprene are usually more than 2-2.5 mm thick. Besides them, however, there’re other “thinner”, more fashion-appropriate types of neoprene. Those “textile” types of neoprene come under “grading” of LS and S. Items, made of LS and S types of neoprene, are skirts, sweatshirts, sportswear etc. All types of neoprene are really easy to embroider as the fabric in general is quite resilient to any type of stress.
Designs for machine embroidery on neoprene can be of any type, size and composition. The fabric resilience can provide enough support both for dense fill-stitch designs and most delicate open-work.
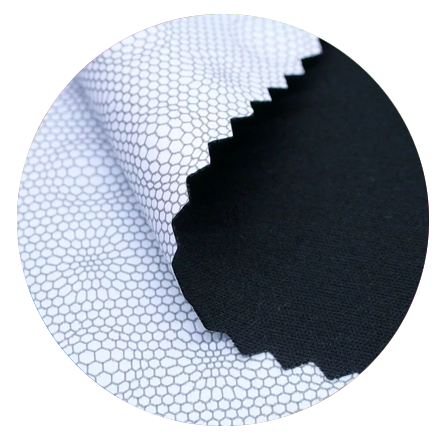
Laminated fabrics
Laminated fabrics (oilcloth, vinyl) are fabrics (both woven and non-woven), which are, yes you guessed it, laminated with a layer of synthetic material (PVC, PU). We’ve included laminated fabrics into the non-woven category as their surface is of such nature.
There’re many different styles of laminated fabrics. Table oilcloth, vinyl and faux leather are all laminated fabrics. Some types of vinyl and oilcloth, on that matter, also come without the textile backing. We’ve already covered the faux leather category so you have a general idea about how such fabrics behave during machine embroidery. Oilcloth and vinyl are to be discussed separately from faux leather because they have different fabric properties. They have a more distinct plastic feel and look and are not as pliable and soft as faux leathers.
So how to machine embroider vinyl and oilcloth? Further we’ll give you some tips:
Choosing fabric for machine embroidery: when working with oilcloth, try to opt for the types, with textile interfacing. Not that you can’t work with the other type, but it’d be easier to embroider on the “backed” oilcloths.
Hooping oilcloth and vinyl: Generally these fabrics are quite durable and resilient. This means that they can easily withstand stress from the hoops. However, as some vinyl fabrics are elastic (usually they have a two-way stretch), hooping should be done very carefully.
Stabilizers: Cut-away backings are used in all cases. These types of stabilizers provide the necessary support for stitches of the embroidery during the work and afterwards.
Needles and threads: Neither oilcloth, nor nylon fabrics like unnecessary needle-perforation. They can support relatively dense stitching, but the holes that the needle leaves during color-change jumps or basting might remain unclosed. If you want to avoid it, use thin and sharp needles. Also, if it’s possible, reduce the number of stitch-jumps in the design.
Design choice: Designs of light to medium stitch density (e.g. open-work ornaments and monograms) can be embroidered on oilcloth and nylon.
PVC transparent plastic film
PVC transparent plastic film is a type of clear vinyl (PVC transparent material) that is often used for packaging, cosmetic bags, shower curtains etc. It’s not the usual type of textile, used for machine embroidery. It’s, however, used as part of appliqué machine embroidery designs with various “glass” elements. It’s the so-called “butterflies in a jar”, “fish in a tank”, “funny face with glasses” machine embroidery designs that need PVC film inclusion.
PVC film is still a type of vinyl, so why do we speak about it separately from the rest of vinyl section? The thing is that very often the designs that we mentioned above are used on garments or items which undergo washing. So, taking into account that little issue, you need to mind the following vinyl properties when choosing fabric for machine embroidery of the kind:
- Clear vinyl thickness. The film for “glass” machine embroidery designs should be quite thick but still soft enough for a needle to punch through it with ease. Vinyl of 6 to 8 gauge is a nice number to look for, when choosing fabric for machine embroidery of the kind. “Gauge” is the measurement of vinyl thickness that is used universally. However, if you prefer to measure in inches, millimeters or microns, you can consult one of many free online “plastic gauge thickness calculators” or charts to convert to your favorite measurement.
Tip: A thrifty way to find the right type of clear vinyl film for “glass” machine embroidery appliqués is to use zipper bag (package, wrapping) for linen, blankets etc.
- Clear vinyl stabilizers. As we speak about using vinyl for machine embroidery appliqué, we need to mention ways of its stabilization on the main fabric. As the vinyl in question is transparent, neither spray adhesive nor other type of glue can be used. What does it leave us with? The answer is – low tack sticky tape (like painter’s tape or something similar). Such tapes have just enough adhesive medium to keep the vinyl in place without leaving sticky residue on it.
- Clear vinyl needles. Machine embroidery of vinyl requires sharp needles. The size of the needles will be determined by the thickness of the material.
Paper of any type (cardboard crafts, postcards, toilet paper) is machine embroidered only for specialty uses (souvenirs, decoration etc.) Thus, when working with such materials, the tear-and-wear factor is not an issue. Main issues here are always about the process of sewing itself. Further we’ll discuss each stage of the working process in detail:
- Design choice. Regular paper of any thickness (the one we’re writing on) is a really fragile material to embroider on at it can withstand only so many needle punches. Thus, only the lightest of designs (Red Work, Toile etc.) can be machine embroidered on it. Toilet paper, non-woven types of stabilizers (like most of tear-away ones), because they’re more pliable and fabric-like, can withstand a larger amount of stitches. So with such paper designs of denser quality can be used.
- Stabilizer choice. Depending on the demands of the project and density of the used designs, cut-away or tear-away stabilizers are used. Cut-away backings are always preferable, as only they can provide the needed support during embroidery.
- Hooping method. Paper is never hooped. To machine embroider paper, you’ll need to float it on the hooped stabilizer. The bonding agent can be either temporary spray adhesive or the adhesive layer of the stabilizer itself.
Word of caution: When working with paper an embroider should clear the bobbin and bobbin case more often than when working with other materials. The thing is that paper (and cellulose-based stabilizers) is quite fragile. Thus, needle punches its surface, some cellulose fibers get torn away. During work, with all the shifting and moving, these cellulose fibers infiltrate bobbin cases of embroidery machines and clog them. This, in its turn, might cause various problems with the machine work. Thus, if you work with paper in any of its form, don’t forget to clean your machine afterwards.
Choosing fabric for machine embroidery: the role of designs
As you remember, in the first article of the series, we mentioned that when choosing fabric for machine embroidery, one should take into account many things. Fabric structure, fabric properties, available stabilizers, to-be-embroidered designs, embroidery machine capacity, working experience… The whole list included all the important components of any embroidery project. As of now, we’re happy to say that the half of it, connected to fabric characteristics, is officially covered. Now, it’s time we moved onto the next portion of our discussion: role of designs, stabilizers etc.
So, how exactly do designs affect fabric choice for various embroidery projects? What factors should a beginner take into account when matching fabric to certain designs? Can any design be embroidered on any fabric or there are some “no-no’s” in their pairing? The following keynotes will answer the questions in the most efficient way:
1. Design type (its density, composition of its stitching) should match fabric structure and properties.
As you recall, description of each fabric type, given in the previous portions, included information on their compatibility with various designs. In short, the info can be summed up like this:
- Linework machine embroidery designs (e.g. Red Work, Blue Work, Toile, Vintage etc.) and designs, consisting of outline stitching, can only be sewn on flat fabrics (quilter’s cotton, denim, leather etc.) Run stitches of such designs, when applied to fabric with texture (waffle weave, terry fabrics, velvet, furs etc.) will sink into the textured surface. Also, such “light” types of designs can’t be sewn on too porous fabrics (e.g. dress netting, tulle, lace etc.) as stitches don’t have enough “base” to hold on to.
- Richelieu and other cutwork machine embroidery designs can’t be sewn on elastic fabrics (knits, Spandex etc.) Structure of such fabrics isn’t stable enough to support the particular patterns of such designs (the breeds, the holes etc.)
- Cross-stitch machine embroidery designs (especially those with large elements) shouldn’t be sewn on overly lightweight or elastic fabrics. With lightweights there’s a big possibility of fabric puckering. With elastic fabrics the draping quality of the embroidered areas will be compromised.
- Designs with dense fill-stitch or multiply layered stitching shouldn’t be embroidered on lightweight, stretchy and loosely woven or knitted fabrics. Such fabrics won’t be able to support dense stitching and most likely pucker. Also, such designs can’t be embroidered on fabrics, which can’t withstand multiple needle perforation (e.g. natural leather, thin nylon, oilcloth without fabric backing, thin natural fur etc.) With such “delicates”, the densely embroidered area will get so many perforations that it might bust out of the fabric. Before sewing designs on such delicate textiles, embroiderers should check stitch composition (length of stitches, type of the underlay etc.). Too many short stitches, too dense underlay and sometimes even the jumps of the needle should be edited according to the demands of the fabric.
- Choosing fabric for machine embroidery appliqué projects try find one properties of which are similar to those of the base fabric. Such measure will keep drape of the base fabric as close to the original state as possible. This is especially important in projects, featuring children’s wear.
Example: If you are sewing your appliqué on a jersey knit onesie, use jersey knits or other lightweight, fluid fabrics for the appliqué.
- Machine embroidery designs of patches should be done on very sturdy, non-stretchy fabrics (gabardine, felt etc.) or specialty stabilizer for patches.
- FSL machine embroidery designs, besides water-soluble stabilizers, can be embroidered on sturdy, transparent, non-stretchy fabrics (e.g. organza, tulle etc.)
2. Machine embroidery designs should be used only from certified sources.
Machine embroidery designs make up a really big part of the success of every embroidery project. Thus, it’s quite important to use only high quality designs.
How do you know that a design is of high quality?
Well, here is where the experience plays its part. You can either learn the art of digitizing yourself (which is useful, but also really time consuming). Another option is always to check the source that you get your designs from. The most trustworthy sources are: manufacturers of embroidery machines, machine embroidery design shops (both on-land and on-line) with long operational time and digitizing professionals. Among all of them it’s the latter (professional digitizers) that are most difficult to find. Online forums (where design sharing is quite common) and other free design downloading sites are the most untrustworthy quality-wise. Now, we know, that the last sentence might arouse quite an argument amidst funs of free downloads and sharing. But let us explain why it’s so and what issues such unreliable sources bring into the craft.
Let’s start with the quality of a design.
An impeccably digitized machine embroidery design is always created according to the demands of a particular fabric (its structure and properties). In general, when digitizing designs for sale, professionals use the so-to-say “neutral” fabric demands (flat surface, non-stretchy, medium weight etc.) When a design is downloaded and opened (on, say, a home computer) with a particular embroidery software, the settings might get changed. For example, various programs read designs’ arrangement of stitching differently (they change them according to their operational preferences). These changes are usually minor and don’t affect the quality of the final embroidery result in a major way. However, an embroiderer might want to further alter the design’s setting to suite its particular project. So the design gets another layer of changes. At this stage the final embroidery result is sound.
Now, so far so good, but imagine that this altered design gets uploaded on a forum for public use. Those who’ll download it will probably convert it to their machines’ formats, open in different programs etc. After such multiple changing the design simply can’t be good, because its stitching structure’s gotten really off. But yet another embroiderer, who downloads the corrupted design, doesn’t know it. Now experienced embroiderers and those who have some digitizing skills could revive the design and still make their project work. New-comers, however, will probably get their project ruined by such bad embroidery design.
Bottom line: For embroidery project to turn out well, it’s important to use a good quality design and it’d better come from a sound source too. As fabric can be adapted to the demands of the project only up to some point (i.e. as far as stabilizers can go), while the design that gets to be changed according to the fabric. And only a good quality design can provide the needed editing “freedom”. Thus, it’s important to remember that downloading designs from dubious sources seldom result in getting good quality designs. So, especially if you’re a beginner, try to use only “certified” designs and always make test embroidery to see if they suit the fabric of your project.
Choosing fabric for machine embroidery: the role of embroiderer’s experience
Before we begin, let’s speak of what made us include this section in the article…
We bet you’ve come across such situations, when in search of “embroidery wisdom” you get more puzzled then enlightened. Be it at online embroidery forums, in a chat with an embroiderer friend or during a consultation with an embroidery shop assistant, admit it, such things happen… You ask a question: “How to choose designs according to demands of the fabric?” Or else: “How different stabilizers “help” the fabric withstand needle punches and dense stitching?” Or even: “When is it possible to use tear-away backing instead of a cut-away one?” And all of these questions (depending on who you’re asking) get at least half a dozen different answers. Which of the answer will you take as the definitive one? Well, it’ll depend on your own level of embroidery experience.
The thing with multiple answers of the searched-for “embroidery wisdom” is that all of them could be correct. However, they could be correct only for those people who give them. Why? Well, because their embroidery skills, their knowledge of programs and capacity of their embroidery machines make it so. For others, who don’t have same skills or even embroidery machine, the “wisdom” might ruin the project.
Example: In most cases beginners should use cut-away stabilizers for most of embroidery projects. Cut-away stabilizers is the safest choice as they provide good support both for dense stitches of the designs, and help the fabric endure multiple needle punching. Experienced embroiderers, however, can afford switching to other types of stabilizers and in some cases even don’t use them at all. Why? Well, because they will probably also edit design to better fit the fabric and adjust machine embroidery settings. So, if a beginner will follow professionals, cutting their way to get to the end of the project, their results might vary.
So, what does this leave us with? How should an embroiderer apply all the “outside” advice to choosing fabric for their embroidery projects? Will it be helpful if we just enumerated all the possible tips for every embroidery project there’s? Will it be helpful if we described all the possible ways of choosing fabric for embroidery project? Well it could be, but it’d make this post enormously long. So, instead, we’ve opted to point out major things that embroiderer should avoid when choosing fabric for embroidery project. And the list consist of the following:
1. When choosing fabric for machine embroidery, always consider capacity of your embroidery machine. This means that heavy, thick and overly sturdy fabrics (like heavy-duty canvas, fur, thick types of leather etc.) should be embroidered on industrial units only. Why is it so? Let’s elaborate on that:
– Heavy fabrics. Hoops of home embroidery machines won’t be able to move under the weight of heavy fabrics. Thus you’ll never get good quality embroidery result.
– Thick fabrics. Unlike industrial or cross-over units, home embroidery machines simply aren’t powerful enough to punch their needles through overly thick fabrics. Also, thick fabrics are usually heavy too. So, if you decide to feed your machine such fabric, it might manage to finish the task, but either the stitching will be off or the machine will get overheated. Experience of such kind might cost quite a lot, because problems with machinery are usually the most expensive ones.
2. When choosing fabric for machine embroidery, always take into account available to you variables (stabilizers, needles etc.) Don’t switch good-quality stabilizers for various home-made know-how’s in chase of the chipper options. One of such tricks is stabilization with the help of some “kitchen stuff” (starch or gelatin solutions). Another such gem is using printer’s paper instead of proper stabilizers.
We’ve spoken about these know-how’s a lot in our previous posts. However, because there’re just too many examples of such “embroidery wisdom” shared around, we think we need to explain why some “can” use it while the others should not.
- Why do people use gelatin and starch solutions in machine embroidery? Theoretically such solutions (when prepared correctly) can make a lightweight fabric be more agreeable for machine embroidery.
- Why shouldn’t they use such household tricks? Firstly, gelatin and starch solutions, when prepared incorrectly, can turn fabric into paper. Such brittle fabric will simply break in the hoops. Secondly, such solutions may leave stains on the fabric. Thirdly, when such solutions dry out, particles of their ingredients (gelatin and starch) will break from the fabric and permeate the bobbin case of the machine. Such “pollution” will surely either lessen the quality of the embroidery, or lead to constant thread breakage or even problems with the machinery. Thus working with gelatin or starch instead of proper stabilizers can cost you and your machine extra trips to the service center.
So, why do some still use gelatin or starch? Well, yes, some, even experienced embroiderers, still do use gelatin and starch. But, they do it because they know their machinery inside out and, should the need be, they can manage the service on their own.
Same rules apply to the use of printing paper or stabilizers of lesser quality instead of proper, good-quality stabilizers. Paper, when punched by the needle, shed particles of cellulose. These particles, just like gelatin, clog the bobbin case of an embroidery machine. Sometimes, cellulose infiltrates other inner parts of the machine, which is a sure ticket to the service center.
Thus choosing fabric for machine embroidery should never be based on variables of lesser quality. Chip substitutes of proper stabilizers, wrong thread or machinery lubricants, expired spray adhesives and even incorrectly chosen or dull needles will never yield good results.
Another example of how experience affects choice of fabric is based not on the quality of the variables, but on their proper use.
3. Machine embroidery of natural leather: which needle to use? As you remember, we’ve spoken about particularities of machine embroidery on natural leather in the according section of this article. So, we’ve make it our point to note that natural leather is never embroidered with needles for leather. Such needles have a wedge point (thus their name – wedge point needles) and their type denotes by the letter “P”. The particular “cutting” point of such needles will cut through leather, rather than punch through it. Thus, if a design is dense, multiple needle cutting will bust the embroidered area out of the rest of the fabric.
So, why do some artists still insist on embroidering leather with wedge point needles? Those, who work with natural leather a lot, know all the minutes of various leather characteristics. They know how various leather types behave during cutting, sewing, stretching, embroidering and other manipulation of the kind. Some leathers, it’s true, are really agreeable and resilient to any type of work, applied to them. Such leathers can withstand wedge needle punching (cutting) with ease. However, only experienced in the area embroiderers will know the difference between leathers of different types. So, for beginners in the trade wedge needles for leather is a big “NO”.
Embroidery machines, stabilizers, needles…
As you see, these factors are really important when one is choosing fabric for machine embroidery. What’s more, when they’re combined with personal experienced of every embroiderer, the choice of fabric might change drastically. Experience can make magic happen even in most difficult cases.
Example: Machine embroidery of a light fill-stitch design (snowflake, letter, openwork frame for a monogram) on a faux fur pillowcase. Is it possible or not? Embroidery beginner will say “No” and chose another fabric or different décor. An experienced embroiderer will consider his or her choices:
- Cutting fur in the area where the embroidery will be placed might make the fabric more agreeable.
- Using transparent organza as a topping for the embroidery might do the trick.
- Embroidering the pattern on a different type of fabric (organza, tulle etc.) and then sewing onto the fur is yet another way out.
- Application of extra underlay layer (large then the embroidery size) will “flatten” the fur and make the stitching of the design visible.
As you see experienced embroiderers can suggest at least four ways out of such a conundrum without changing the type of fabric. Beginners and those who’ve only just entered the field of machine embroidery will change the fabric. Examples of such kind are quite numerous indeed and we hope that with the knowledge, acquired from the article that we post, your road to gaining experience will be less bumpy.
Conclusion
Congratulations on graduating from quite a long, but really informative, series “Choosing fabric for machine embroidery”. Fabric structures, fabric properties, design-fabric paring – all major aspects of embroidering textiles are covered and through. You’ve made it to the end and now your knowledge base is surely much richer! We won’t bother you with a long conclusion as we’re sure you need time to rest and “digest” all the new info. Just don’t take too long, as we’re already preparing more informative posts on stabilizers and other machine embroidery tricks. So, keep an eye on our updates and see you soon and happy stitching!
You may also like
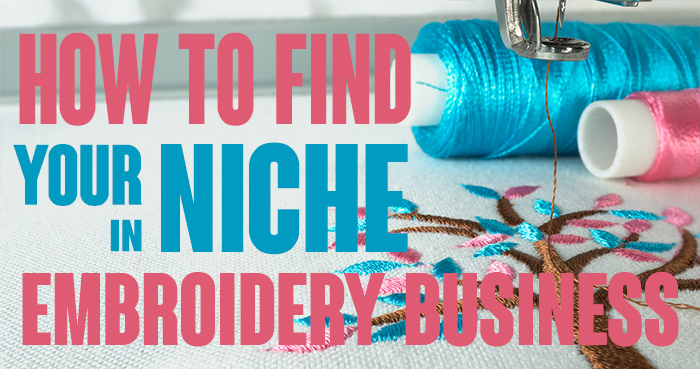
How to find your niche in embroidery business?

Author: Ludmila Konovalova
My name is Ludmila Konovalova, and I lead Royal Present Embroidery. Embroidery for me is more than a profession; it is a legacy of my Ukrainian and Bulgarian heritage, where every woman in my family was a virtuoso in cross-stitch and smooth stitching. This art, passed down through generations, is part of my soul and a symbol of national pride.
Date: 18.05.2024

 Get Sign-In Link
 Login with Google
 Login with Facebook
 Login with Amazon
 Login with Paypal