Woven fabrics:
~ Chiffon, Chambray, Taffeta, Crepe de Chine, Batiste, Handkerchief fabric, Calico, Percale, Chintz, Quilter’s (Quilting) Cotton, Poplin and Broadcloth fabric, Burlap, Lawn, Canvas;
~ Silk Satin, Cotton Satin, Charmeuse, Dutchess, Lucent, Antique;
~ Gabardine, Twill Flannel, Tweed, Herringbone and Twill, Denim;
~ Oxford, Corduroy, Bedford Cord, Stretch Needle Cord Fabric, Velvet, Velveteen, Velour, Faux Fur, Terry Fabric, Waffle (Honeycomb) fabric, Aida cloth, Tulle, Dress net fabric, Mesh, Lace.
Knitted fabrics:
~ Jersey knit fabrics, Burnout jersey, Interlock, Pique (Lacost fabric), Rib knit fabrics,
~ Fleece, Minky fabric, Sherpa, French terry knit fabric (stretch, jersey terry)
~ Elastan, Spandex,
~ Velour, stretch velour, stretch velvet.

Few words before we start…
Today’s article is the second installment to the series, called “Choosing fabric for machine embroidery”. If you’re starting with this portion of the series, then we suggest you read the previous article first. The first article will help you easier transition into today’s information. The piece is available here. Now, that being said, let’s move onto the present article, which dwells on machine embroidery of woven and knitted fabrics.
Content:
1 – Fabric structure and its role in machine embroidery. Difference between knitted and woven fabrics.
2 – Woven fabrics: aspects to be taken into account when choosing fabric for machine embroidery.
~ fabric weight,
~ fabric density,
~ fabric thread count,
~ fabric weave
3 – Knitted fabrics. Main characteristics:
~ knit density,
~ knit stitch varieties,
~ knit thickness and weight
4 – Conclusion.
Fabric structure and its role in machine embroidery. Difference between knitted and woven fabrics.
First of all, let’s make it clear that we won’t dwell too much into details, explaining all the fabric structure minutes. What we want is to highlight main features or aspects of fabrics, which are of practical value to machine embroiderers.
So, that being cleared as well, we finally can begin, starting with the basics…
What is fabric structure?
Fabric structure is “how a certain type of fabric is built”. Some types of fabrics are made of threads (yarns) intertwined in a certain pattern, others are not. The ones which don’t have an arranged thread pattern or even threads whatsoever are called non-woven textiles. For now let’s keep with the first type, which include woven and knitted fabrics. Arrangements of threads (yarns) in these fabrics differ. In woven fabrics yarns are intertwined in a strictly perpendicular to each other manner. Simply put they form a weave of vertical and horizontal threads. In a knitted fabric a thread (or threads) runs in the interconnected chains of loops.
Why is it so important to tell the difference between knitted and woven fabrics in machine embroidery?
It’s important, because various thread (yarn) arrangements have different properties. Simply put, they behave differently under the stress of needle puncture, embroidery stitch coverage, etc. Here’re few main differences between knits and woven fabrics:
~ Different stretch factor. In general knitted fabrics have more elasticity as there’s more space for the threads (yarns) in the loops. Woven fabrics are less elastic than knitted ones, unless, there’re fibers of elastic quality in their thread composition. There’re certain designs, that can’t be applied on a too stretchy type of fabric. Hence it’s important that an embroiderer knows how to tell the difference.
~ Different reaction to stress. The base for the loops (stitches) in the knitted fabrics is basically one thread. In woven fabrics there’re two base threads (vertical and horizontal). One-thread basis doesn’t provide as much stability to the fabric as a two-thread one. So, when cut, knits are prone to unraveling while woven fabrics aren’t. For an embroiderer it’s important on many levels. One of them (the most obvious one) is when a wrong type of needle is used with the knits. The needle cuts through the yarn of the knit casing those ugly runs.
~ Different wrinkle reaction. Knits are more resilient to this, while woven fabrics tend to crease. This factor, though, might be less pronounced with woven fabrics, which have elastic fibers in their composition. For machine embroidery this factor is important in terms of design and thread choice.
~ Different shrinkage. In general, knitted fabrics tend to shrink more than woven ones. That is why choosing fabric fro machine embroidery from knit category will mean one will always need to pre-shrink it before working with it.
The list of such factors is not nearly through. We, however, feel that the info is enough for you to get the idea that it’s important to differentiate between knits and woven fabrics. If you agree, let’s move onto the detailed analysis of both of them.
Woven fabrics: aspects to be taken into account when choosing fabric for machine embroidery.
Woven fabrics: thread count
Fabric thread count denotes how many threads were used to make a certain cut of a material (square inch, square yard, square meter). The more threads were used, the more stable is the “body” of a fabric. High thread count fabrics are less prone stretching and yarn distortion. For machine embroidery is means an easier hooping, lesser complex stabilization, more freedom in design choice, etc. Thread count is applied as a measurement mainly for fabrics, which are used for bedding and shirts (sateen, percale, poplin etc.)
Jacquard fabric
Example: Batiste – 20-30 thread count (very light weight), Popline – 65-80 thread count (light weight), Satin, Perсale – 85-120 thread count (medium weight), Jacquard – 130-280 (medium to heavy weight).
Batiste fabric
You see now, that there’s a fine line that separates fabrics according to their thread count and while their weight (or mass) can be different. How is it important to a machine embroiderer? Well, when buying nice bedding sets for embroidering, you’d generally look up the measurements to make sure that the fabric can handle the design you’re going to sew.
Woven fabrics: weight
Fabric weight is measured in oz/yd2 (g/m2). For an embroiderer fabric weight is important because we usually coordinate weights of stabilizers and fabrics.
There’re three levels of fabric weight measuring:
1 – Light weight fabrics – less than 4oz/yd2 ,
2 – Medium weight fabrics – between 4oz/yd2 and 6 oz/yd2,
3 – Heavy weight fabrics – more than 6oz/yd2.
Woven fabrics: density
Just like the thread count aspect, density measurement is used not with all types of fabrics. Usually we speak about density when we work with heavier fabrics (e.g. upholstery etc.) because their thread count doesn’t explain their character much. Density determines how sturdy and thick a certain fabric is. And those characteristics are important for choosing the hooping method, type of stabilizers, designs etc. Fabric density is basically weight of a fabric divided by its thread count. Don’t worry; you won’t have to do the math in real life. However, it’s good to know fabric density is when buying another yard of fabric or even a blank for your next embroidery project.
Woven fabrics: weave types
With woven fabrics there’re 4 types of weave, according to machine embroidery needs.
1 – Plain weave,
2 – Satin weave,
3 – Twill weave,
4 – Derivatives (all kinds of artistic deviations and mixes of the three weaves above).
Plain weave fabrics
This type of weave is the easiest one to embroider on. Plain weave resembles a chessboard pattern, where vertical and horizontal threads are interwoven one after another. Such thread arrangement is the most stable one as threads give each other even support. Plain weave fabrics almost don’t stretch in any directions or distorts in any way. Thus, such fabrics are easy to hoop and generally can endure needle punching really well. The only exception from the rule is when there are some really demanding fibers in the fabrics’ composition.
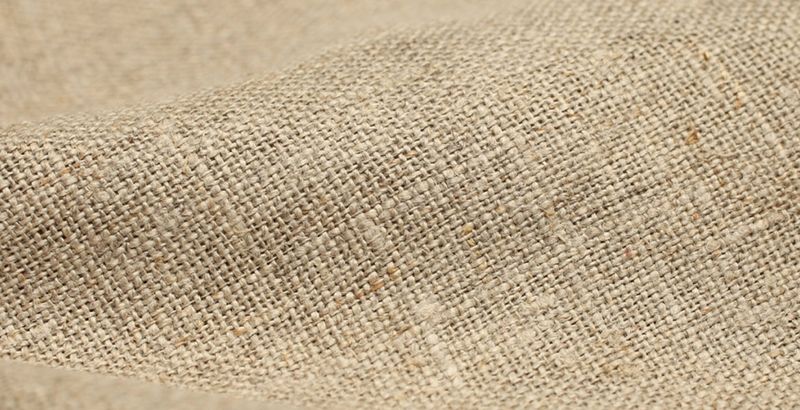
Flax fabric
Example 1: If there’re wool fibers in threads of plain weave fabrics, then, chances are they might shrink after wash. Shrinkage is an important factor for machine embroidery as it influences the whole working process. In particular you can’t just embroider on such fabric, first you need to pre-shrink it (wash and then iron it).
Example 2: If there’re elastic fibers in the fabric’s content, then you’ll need to make take care of the following aspects of the project:
~ design selection (not all designs will do well on stretchy materials),
~ stabilizer selection (generally it’s an adhesive cut-away type that is used for stretchy fabrics, however, alternations are possible),
~ hooping method (really stable hooping with extra reinforcement of either temporary adhesive, run stitch, pins, etc.)
~ needle selection (generally ball-point types of needles are used),
Further we’ll give examples of most commonly used plain weave fabrics. Each example will be accompanied with description of how the fabric behaves in various embroidery projects. We think that with the examples choosing fabric for machine embroidery from this particular category would be much easier. So, shall we begin?
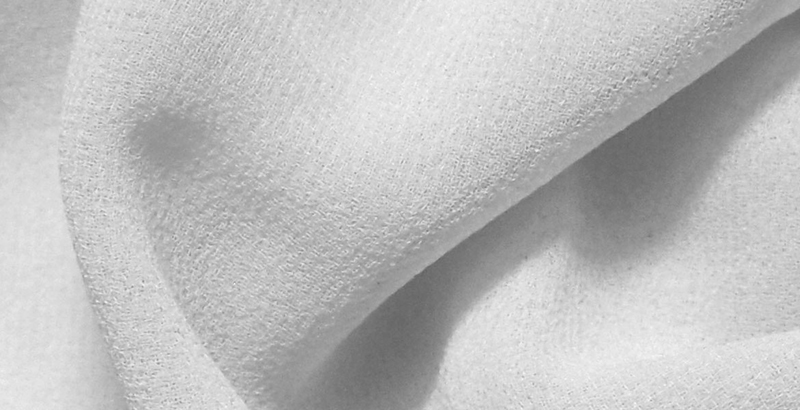
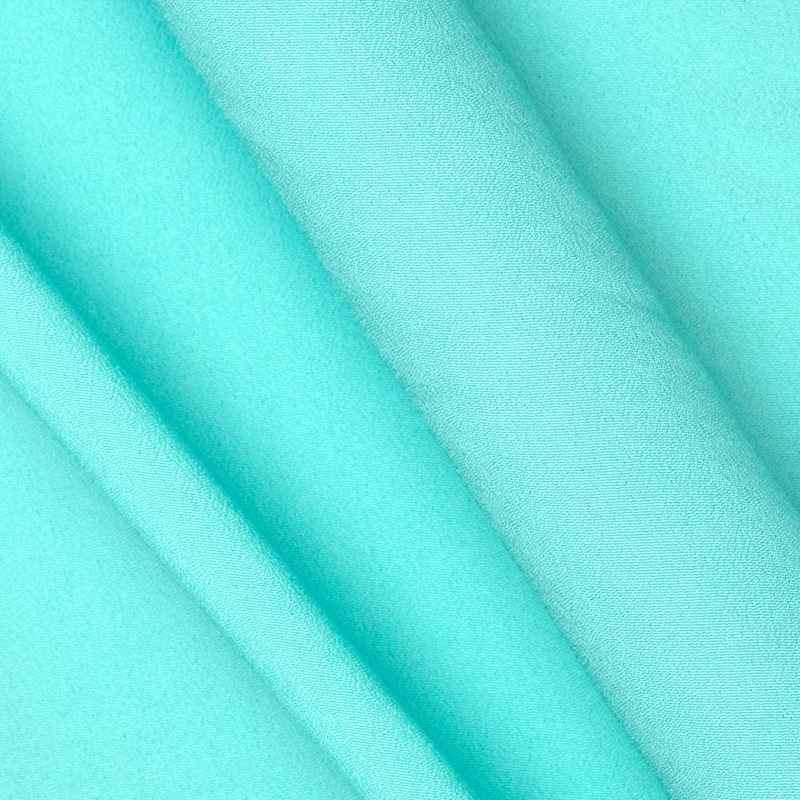
Chiffon fabric
Chiffon is a lightweight, sheer plain weave fabric with no stretch at all. Sheer fabrics require “invisible” types of stabilizer. This means that the stabilizer should provide all the necessary support for the fabric during the sewing. However, you should be able to remove it completely after the embroidery is over. So, it leaves us with water-soluble backings of medium weight. If the type of chiffon that you’re embroidering on is too “slippery”, use self-adhesive water-soluble backing. Needles for embroidering on chiffon should be sharp and thin. Threads – any, really. However, due to the light weight of the fabric, metallic threads might stress it too much. Thus, if possible, try not to work with metallic on chiffon. Designs should be light and open; otherwise the draping quality of the fabric will be changed.
Tip: With some projects (when dense designs have to be involved) water-soluble backings might not give the necessary support. So, instead you can try swapping them for a piece of transparent organza. Another solution would be using semi-transparent, lightweight backing, like Floriani No Show Mesh or Gunold Soft n’ Sheer, etc.
Broadcloth fabric
Batiste, Handkerchief fabric, Calico, Percale, Chintz, Quilter’s (Quilting) Cotton, Poplin and Broadcloth fabric all have almost identical characteristics. They all flat, pretty stable “bed-linen-like” textiles. The only difference between them is their density and weight (Batiste being the lightest one and Broadcloth – the heaviest of the set). Stabilizers that you can use with these fabrics are – medium weight tear-away backings. When the wrong (back side of the item) matters (like, say, in actual handkerchiefs) medium water-soluble stabilizer will do perfectly well.
Chambray fabric
Chambray is a lightweight cousin of Denim fabric (which, however, belongs to the Twill weave fabric family). Despite its lightweight Chambray has same durability as any other type of Denim. Thus it’s very easy to embroider on. Hoop it together with a tear-away stabilizer and you’re good to go for the majority of embroidery projects.
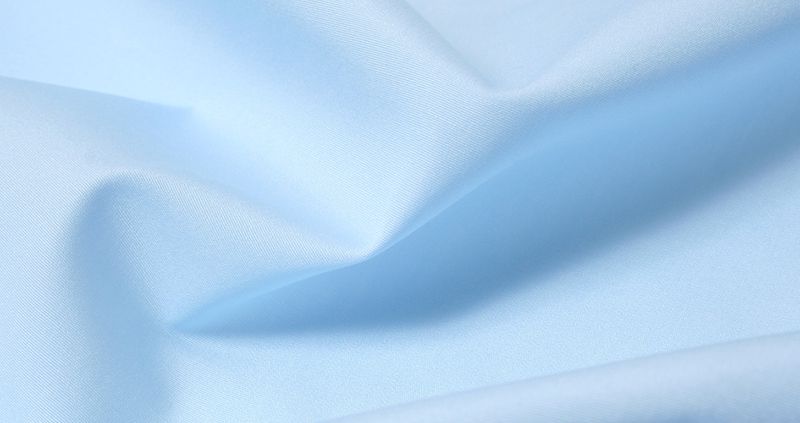
Taffeta fabric
Taffeta is a medium weight fabric, which you can embroider with the help of a medium weight tear-away or cut-away stabilizer. A tear-away backing is used for light designs and a cut-away – for more dense ones. When choosing Taffeta for machine embroidery projects, make sure you know the fiber composition. Synthetic taffeta differ from silk one in their hooping methods. You can’t hoop silk taffeta so you attach it with the help of temporary spray adhesive onto a hooped stabilizer. You can also hoop a self-adhesive stabilizer (which are usually tear-away’s) and attach silk taffeta on it. If this is your method of preference, make sure you applied additional layer of backing under the hooped stabilizer for embroidering of dense designs.
Crepe de Chine fabric
Crepe de Chine is a lightweight but durable fabric with a matt texture. Machine embroidery of Crepe de Chine requires a tear-away backing. Also, the fabric is extremely fluid, so before hooping, it needs to be “fortified”. For this you can use either the so-called solution of water-soluble stabilizer and water or a starch spray. After that you can hoop the “fortified” Crepe de chine together with the stabilizer.
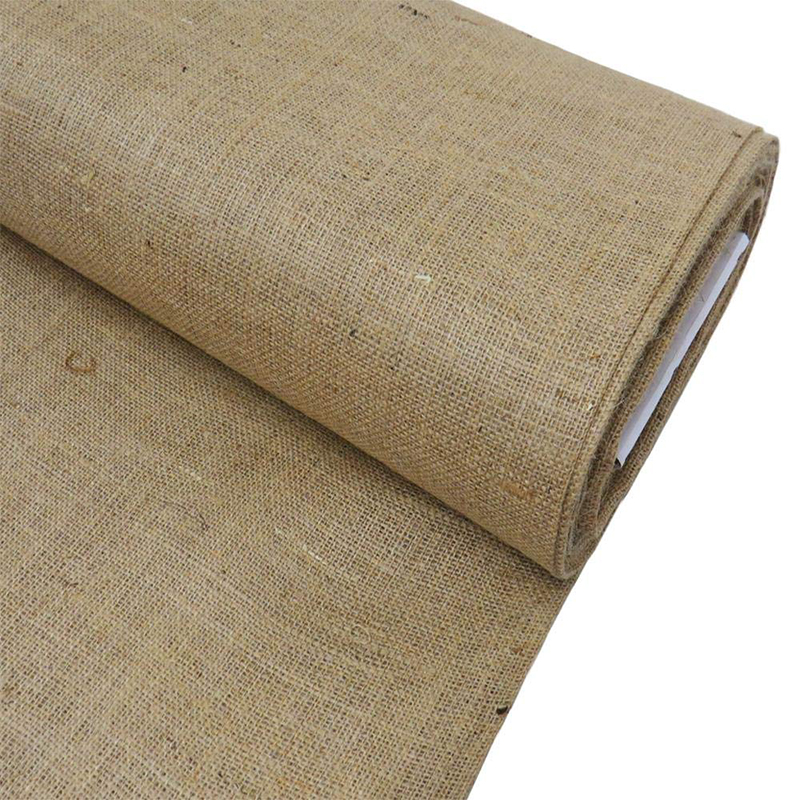
Burlap fabric
Burlap is an iconic plain weave fabric with a very low thread count and a really pronounced coarse texture. When choosing burlap for machine embroidery pay attention to its weight. The higher the number, the tighter the weave and the easier it’s to embroider. The most refined type of burlap is Sultana (11 oz), then goes Shalimar (8,5 oz) and then the usual rice sack burlaps (5-10 oz).
For machine embroidery on burlap two layers of stabilizers are used: toping (heat-away one) and backing. Choosing backing for embroidering on burlap will depend on the density of the weave, the cut (design) of the item and the embroidery design. Loose weave gives the fabric a “stretchy” quality, which makes it difficult to be hooped. So, in order to stabilize the fabric an adhesive backing is used. If the design is somewhat dense, a cut-away stabilizer will be a better choice. If the wrong side of embroidered burlap will be seen, use medium or heavy weight wash-away or heat-away one. Mind, though, that some types of burlap (usually those with a very loose weave) don’t wash well. When wet they tend to stretch and distort. If they do, it might affect embroidery, so be very careful when washing embroidered burlap.
Lawn fabric
Lawn is a relatively sheer fabric, which could be called a more “luxurious” variation of burlap. It’s soft, but durable due to its fine weave. Unlike burlap, Lawn is used for making garments or less often for small accessories, like handkerchiefs. Thus, summing all up, we can say, that machine embroidery of Lawn will require the following sets of stabilizers:
~ Lawn handkerchiefs – wash-away baking and light, low stitch designs;
~ Lawn garments – with light designs you can use medium weight tear-away + temporary spray adhesive or self-adhesive backing (e.g. Filmoplast etc.);
~ Lawn garments – with heavy designs you’ll definitely require a lightweight cut-away backing (e.g. Soft n’ Sheer by Gunold, No-show Polymesh by World Weidner etc.) paired with temporary spray adhesive.
Sailcloth
Canvas (sailcloth) is an extremely sturdy and sometimes even thick fabric. When choosing fabric for machine embroidery from “canvas” family, one needs to pay attention to its weight. Its weight varies from 4 oz/yd2 -12 oz/yd2. With the lighter canvases you might need light to medium weight tear away backings. With the heaviest types you generally won’t need any stabilizer at all. Mind, thought, that not all embroidery machines can sew through such “almost industrial” density. Don’t “make” your machine sew through heavy canvas unless it’s an industrial or at least cross-over one. Want to learn more about differences between industrial, cross-over and home embroidery machines? Check out our article on “How to choose an embroidery machine for a home-run business”.
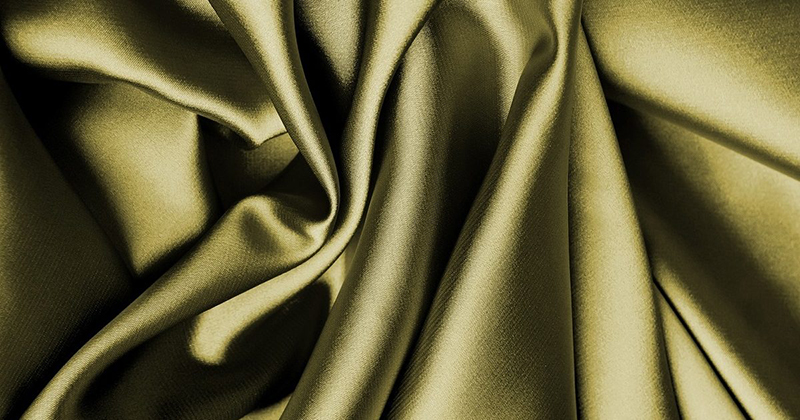
Satin weave fabrics
Satin weave threads are interlaced in a “floating” manner, where either horizontal threads “float” over several vertical ones or vice versa. This “floating” is what makes Satin weave fabrics so silky and “slippery”. Also, as some threads are being “floated” over, they’re not interlaced properly. Thus under pressure (of a hoop, of too many needle punches or embroidery threads) fabric yarns might disengage from each other. Simply put there’ll be a hole in the fabric. This makes the weave pattern be less “stable” than that of a plain weave. Also, as these fabrics are slippery, they tend to shift during the hooping. This may cause such problems as distortion of the fabric in the hoop, which in its turn leads to misalignment of stitching and pure thread coverage.
Satin weave fabrics
Thus, main issues of concern when choosing fabrics for machine embroidery from this group are: stabilization and hooping method.
Main examples of fabrics with satin weave are Silk Satin, Cotton Satin, Charmeuse, Dutchess (used in bridal wear), Lucent (bag and clothes lining), Antique, etc.
Stabilization of satin weave fabrics is almost always handled with the help of additional adhesive. It can be either temporary spray adhesive or an adhesive layer on the stabilizer itself. Generally medium weight tear-away and cut-away backings are used for machine embroidery on satin fabrics. However, the exact type of the stabilizer should be determined not so much by the weight of the fabric, but by the cut (design) of the embroidered to be item.
Example: Antique can be used for interior decoration: decorative pillows, upholstery, curtains. To embroider on Antique curtains, you’ll want to use water-soluble backing as the wrong side of the embroidery should look good too. With pillows and furniture covers, on the other hand, wrong side of the embroidery is not an issue. So, medium cut-away backing will be the best choice for such projects.
Hooping method for such fabrics is almost always about “floating” the textile as it rarely can be hooped. Sometimes, when “floating” isn’t recommended, the fabric is hooped. However, in such cases a protective layer of soft fabric is positioned between the hoop and the embroidered-to-be item. This protective measure helps to avoid hoop burns or other possible fabric damage.
Also, when machine embroidering on satin fabrics one need to prepare the needles. Needles for satin weave fabrics should always be sharp and NEW. The only exception is when there’re elastic fibers in the fabric composition. In this case such fabrics are treated as knits and when knits you use only ball-point or light ball-point needles. Designs for such fabrics should have neither dense fill stitch, no large filled fragments.
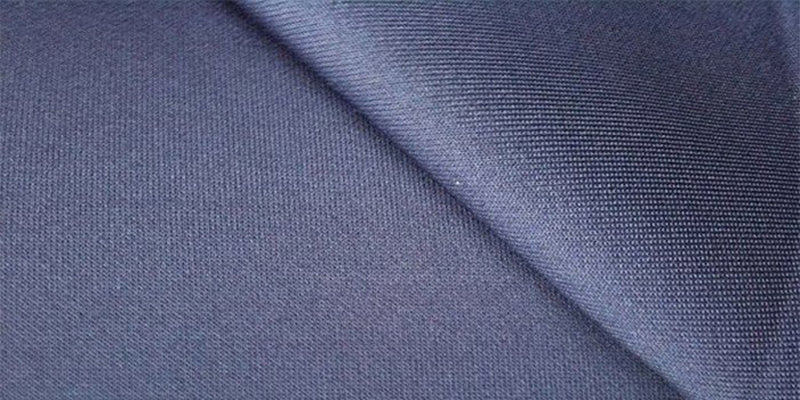
Twill weave fabrics
Twill weave is very much similar to the plain weave in its demands during machine embroidery. Technically, however, there’re many differences between the two weave types. The one that matter for machine embroidery is that Twill weave fabrics tend to stretch diagonally. It happens due to a somewhat diagonal arrangement of the woven pattern (diagonal rib). This peculiarity of twill fabrics will affect choice of stabilizers and hooping method. Examples of twill fabrics are:

Twill weave fabrics
Gabardine is a twill fabric with a characteristic diagonal rib.When choosing fabric for machine embroidery from the gabardine group, pay attention to two factors:
1 – Gabardine fiber composition.
2 – Gabardine ribbed texture.
What’s with the fiber composition? With wool gabardines you need to be careful as the fabrics generally can’t be washed. No washing might set off limits the use of water-soluble stabilizers. Also wool gabardines should be ironed at a particular temperature, which might also ban heat-away stabilizers.
Side note: The use of water-soluble stabilizer isn’t always limited by the dry-cleaning preferences of the fabric. To learn more about how to choose stabilizers for machine embroidery read our series of articles on the theme.
Most agreeable gabardines for machine embroidery are synthetic ones. They’re durable and can be used for making chevrons, patches, accessories (purses and bags), tapestries (with cross stitch, Fotostitch images, portrait designs) etc.
What’s with the gabardine ribbed texture? It affects the choice of stabilizers, design characteristics and sometimes the hooping method too. If the ribs are very pronounced, you’ll need to use toppings. The designs should be digitized for the texture of such gabardines particularly. Also, before hooping the fabric, make sure it can recover from hoop burns. If it can’t, don’t hoop the fabric but rather “float” it when embroidering.
Twill Flannel
Twill Flannel is quite a stable and generally agreeable fabric for machine embroidery. Because of its stability sometimes its weave is confused with the plain one. Flannel doesn’t need special treatment in any way whatsoever. Choosing stabilizer for embroidery on Flannel will depend on complexity of a design. If a design is too dense, a light to medium weight cut-away backing might be required. Otherwise, use a medium tear-away one.
Note: Flannel is often used for children’s wear or “cozy” items which are worn against skin (pajamas, onesies etc.). With such garments, stitches of the embroidery on the wrong side of the fabric could probably be an issue. Thus, in order to keep the piece comfortable, after the embroidery is over, apply a “cover the stitch” interlining (like “Cover the Back” by Gunold, “Tender Touch” by Sulky etc.) on the back side of the stitched area.
Denim
Denim is probably the most iconic example of twill weave fabrics. It’s durable and really easy to embroider on. The only difficulty in choosing fabric for machine embroidery out of all the existing Denim types boils down to their thickness and elasticity level. Thick denims, on that matter, could be embroidered without stabilizers. Lightweight denims will require tear-away backings. Elastic denims should be embroidered on adhesive stabilizers (either self adhesive, like Filmoplast, or iron-on ones).
Twill fabrics
Tweed, Herringbone and Twill fabrics are all based on slightly different variations of twill weave. Main difference (the one that matters to machine embroiderers anyway) is their fiber content and their weight. These factors will influence hooping methods and stabilizers choice. The heavier these fabrics are, the thicker are their dimensions. The heaviest of them are used for outer wear (coats, jackets etc.) and usually can’t be hooped. This means that if you want to machine embroider tweed coat, you’ll have to “float” it. Also, you’ll have to “help” your embroidery machine move the hoop for the un-hooped piece of the coat will weigh it down. How will you help? For once, you can hold the un-hooped piece in your hands.
Now what with the fiber content of tweed and twill fabrics… Delicate fibers, like wool, might limit your choice of stabilizers, excluding wash-away and heat-away ones. Also, before embroidering wool tweed fabrics, you need to pre-shrink it with heat and moisture. This means that you’ll need to iron the item through moist piece of soft fabric.
Tip: When embroidering on heavyweight tweed or Herringbone, make sure you coordinate embroidery threads with the fabrics. Rayon and acrylic threads, on this matter, match these fabrics better than polyester ones.
Derivative types of weave
This group includes fabrics, woven in patterns that are comprised of slightly altered variations of the main 3 weave types or their combinations. Again, we won’t get too technical with the names of these weave types – it’d be too boring. What we’d say, though, is why we gathered all those fabrics in this category. The reasons are two (at least main ones):
1 – Texture. All fabrics of this group have a more or less pronounced texture. You see, when you try to be creative with weave it only has one aim – to get new effects, new decorative value. Thus, you get naps of all kinds, waffle-like looks even fur-like effects. You see now that the fabric texture is very important for machine embroidery as stabilizer choice, hooping method and designs will depend on them.
2 – Stability. Another thing that should be taken into account with these fabrics is that their weaves are always just a little bit less stable than the 3 main ones. For machine embroidery it means that in most cases you’ll need to be very careful with choices of stabilizers and designs for all of such fabrics.
Examples of such fabrics are:
Oxford fabric
Oxford fabric – the famous shirt fabric is actually really easy to embroider. It doesn’t have a really pronounced texture and generally is really agreeable when machine embroidered. Use medium weight tear-away backing with Oxford and you’ll be good to go.
Corduroy (Bedford Cord, Corded Velveteen, Cords) has these characteristic parallel vertical ribs and it’s quite sturdy and stable. There’re many kinds of Corduroy. Some Corduroys have very thin ridges, other – quite wide. Fiber content varies from natural (usually cotton) to blends to purely synthetic. When choosing fabric for machine embroidery among all Corduroys there’re one needs to take into account the following:
~ Fiber content as it will influence the choice of stabilizers. If, due to delicate composition, you can’t iron the fabric, no heat-away stabilizer should be used. Also fiber content will tell you if the fabric will shrink or not after washing/ironing/dry cleaning. Natural fibers are more delicate in that matter. Thus you’ll need to make sure you pre-shrink your Corduroy before embroidering it.
~ Rib dimensions determine types of designs, which can be sewn on the fabric. The more pronounced those ribs are (depth, width etc.) the less open designs you can use.
Example: Pin Corduroy has really delicate ribs, so almost any types of designs can be used on it. Bedford Cord, on the other hand, has a more pronounced texture, so you’ll never sew on it designs like Toil, Vintage, Red Work etc.
Rib dimensions also determine density (weight) of toppings that you’ll be using. The more pronounced the dimensions are the heavier topping you’ll be using.
Elasticity will influence the choice of stabilizers and hooping methods. We spoke about stabilizing and hooping of elastic fabric before (Remember, they are treated like knits. Embroider them with adhesive cut-away backing to prevent distortion of the fabric threads during the hooping process.) You can find elastic Corduroy under the general name of Stretch Needle Cord Fabric.
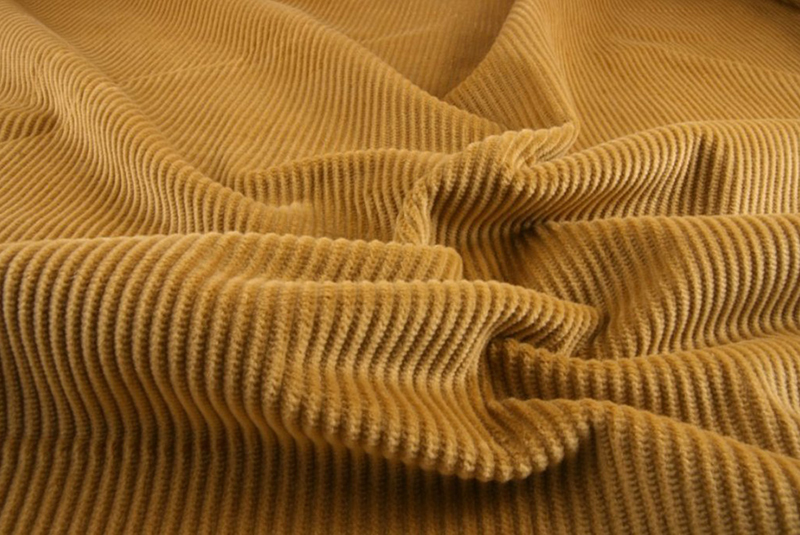
Corduroy
Now machine embroidery on Corduroy in general will require two layers of stabilizers: topping (heat-away or wash-away depending on fiber content) and backing (medium weight tear-away one). It’s always better to use cut-away type of backings, but due to the sturdy structure of Corduroys tear-away ones will do just fine. However, if you’re in doubt, always make test embroidery before turning onto the main project.
Velvet, Velveteen, Velour, Faux Fur (all fabrics with nap or pile) – are treated by embroiderers almost like Corduroy. The only difference is that, unlike Corduroy, these fabrics can be really soft and stretchy. That is why items that are made of such fabrics are more varied in character and design. Examples of such could be anything from interior accessories to gloves, handbags to gowns to coats). Such variety of designs (cuts) has its own “say” on the way your embroidery project is assembled. So, what to take into account on this wise:
~ Stabilizers. Whenever possible prefer cut-away backing with temporary spray adhesive when embroidering on nap. Topping should be picked very carefully as some fabrics with naps (like cotton velvet etc.) can’t be washed. “No washing” means “no” to water-soluble stabilizers (at least not the heavy weight ones). Light and medium ones (only films, not paper-like ones) can be applied with caution. Remove such toppings by tearing the most part away. The remnants (if there’s any) are removed with the help of a wet q-tip.
~ Hooping method. In general nap fabrics are never hooped as the hoop burns the nap. The only exception could be faux furs with low pile. In any case (either for floating or for proper hooping) the fabric should be adhered to the stabilizer (with sticky spray or basting).
~ Shrinkage factor. Always pre-shrink nap fabric before machine embroidery. This is especially important if you work not on the ready-made garment but on a piece of fabric, intended to later sewn into a garment. Check with the fiber content of the fabric that you’ve picked and pre-shrink it according to the fiber demands.
~ Design choice. As with Corduroys, open designs (Red Work, Toil some cross-stitched techniques) shouldn’t be used on nap fabrics. With embroidering designs of monograms, letters and numbers on nap fabrics you need to be careful too. Sizes of their columns should be digitized or adapted to the length of the pile.
~ Nap or pile length. Mostly this last factor concerns machine embroidery on Faux furs. Sometimes, when pile is too high, it’s preferable to trim it in the areas where the design will be sewn on. Such measure will allow stitches to cover the fabric in amore even fashion.
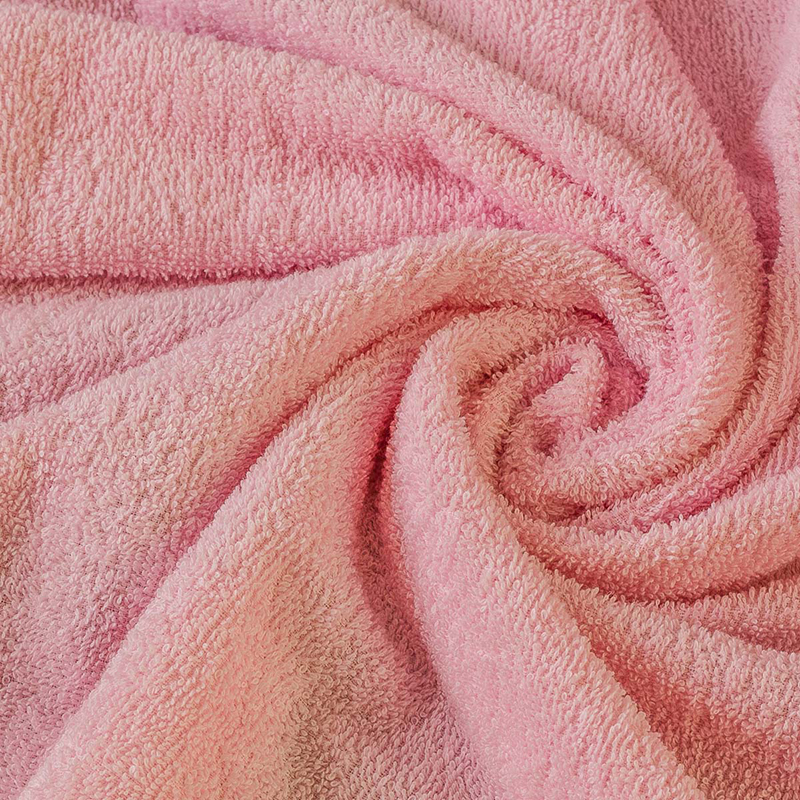
Terry fabrics
Terry fabrics are treated in a similar to nap fabrics way (two layers of stabilizers, no openwork designs etc.) There’re, however, few important differences:
Terry fabrics can be hooped. Burns, left by the hoops, disappear easily.
Terry fabrics can be ironed (through a layer of soft fabric). This means heat-away stabilizers can be used on terry fabrics. In fact in many cases it’s even preferable as it saves times and effort.
Example: When you have an order on embroidery of several towel sets intended to be presented as gifts, heat-away topping is the only way to work.
Unlike faux furs, nap on terry fabrics can’t be trimmed (cut). Due to the structure of the weave of terry fabrics, their nap has is made of loops. If you cut loops, the integrity of the material will be ruined.
French Terry fabric
French Terry fabric doesn’t belong in this category of textiles as it’s not a woven but knitted type of fabric. We’ll be speaking about French Terry in the Knitted fabric section.
Waffle fabrics (honeycomb fabrics) are famous for their resemblance to waffles. Just like with the nap, terry and other textured textiles, waffle fabrics vary from almost flat to really textured. That is why, when choosing fabric for machine embroidery from this particular category, an embroiderer should first of all check its texture and only then its weight and elasticity. In the whole, when machine embroidering Waffle fabrics, one should mind the following
Stabilizers for machine embroidery on waffle fabrics: topping + backing with temporary spray adhesive. Texture of the waffle requires some kind of topping (wash-away or heat-away) to be applied so that stitches won’t sink into the “honeycombs”. Weight of the topping will depend on the texture: the more pronounced it’s the heavier is the topping. Due to the relative looseness of the waffle weave it can be as elastic as any regular knit fabric. This means, that the perfect backing for machine embroidery on waffle fabrics is cut-away with temporary spray adhesive. In cases, when elasticity is minimal and designs aren’t super dense, a medium tear-away stabilizer will do.
Shrinkage. Waffle fabrics tend to shrink a lot, so make sure you pre-shrink and iron the fabric before you work with it.
Designs for machine embroidery on waffle fabrics shouldn’t be too light. Vintage and Red Work might only be used on a really flat waffle weave. If texture is really pronounced, use only design with nice fill stitch.
Threads. It’s only a preference, but still. As waffle items (towels, napkins etc.) are frequently washed, it’s preferable to use polyester threads for machine embroidery on waffle. Polyester will keep its color and shine for a much longer period than, say, rayon, cotton or acrylic threads.
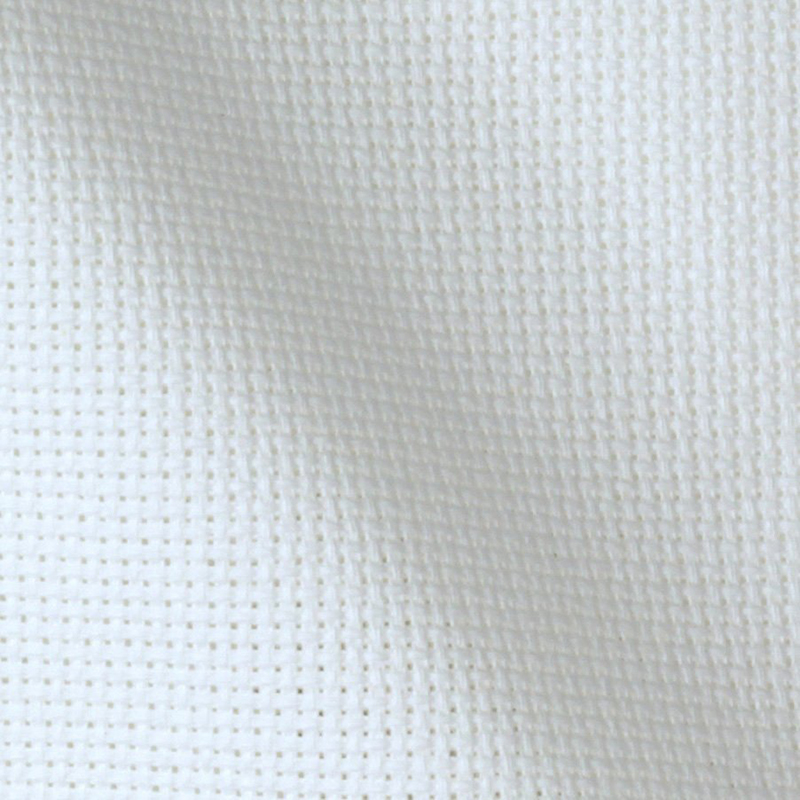
Aida cloth
Aida cloth is the fabric used for Cross-stitch embroidery (both in hand and machine variations). Main issues when machine embroidering on Aida cloth will be: the choice of designs, the correct hooping, the choice of proper stabilizers and sometimes the size of embroidery threads.
Designs for machine embroidery on Aida cloth should be picked according to dimensions of the weave (a.k.a. the size of the squares). Aida fabrics with high thread count have fine weave and can “accommodate” anything from Red Work to Fotostitch designs. Designs for loosely woven Aida fabrics shouldn’t have too short stitches or be overly open and light. “Weave dimensions” of Aida cloth will influence the choice of embroidery threads too. If you use too thick threads, they’ll make the squares of the weave look like holes around the edge of the embroidered designs.
Stabilizers for machine embroidery on Aida cloth will vary. Loosely woven fabrics will require a topping (light to medium weight water-soluble one) and a backing. The choice of the backing will depend on the density of the design. Dense designs will require cut-away stabilizer (usually from light to medium weight). Light designs could be embroidered on tear-away one.
Hooping Aida clothes for machine embroidery, especially when working with cross-stitch designs, should be quite precise. In order for cross-stitch designs to look well on such a fabric their stitches should be sewn as close to the arrangement of the weave as possible. That is why Aida fabric should be aligned in the hoop pretty accurately. The easiest way to do so is to align lines of the weave with the marks on the hoop. When at it, make sure you’ve turned and aligned the design on the screen of your embroidery machine too.

Tulle
Tulle, Dress net fabric, Mesh, Lace and other types of net-like loosely woven fabrics are really tricky to work with. Things that an embroiderer should take into account when choosing fabric for machine embroidery from this net-like category:
~ density (is measured in HPI – holes per inch),
~ crispness,
~ elasticity
~ distance between interwoven threads.
Stabilizers for machine embroidery on Tulle. First of all these types of fabrics are embroidered both with a topping and a backing. Density and crispness of net-like fabrics will influence choice of stabilizers. Usually, due to its sheerness, in both cases wash-away or heat-away stabilizers are used. Check with the fiber content before settling down to heat-away ones, as if fibers are delicate they can’t be ironed. This means that wash-away stabilizers are the safest choice when machine embroidering tulle, mesh, lace etc.
Density of wash-away stabilizers is determined by the demands of each and every embroidery project separately. In order to make the right choice, first take into account the density of stitches in the design. Dense designs will only be sewn well on medium to heavy weight wash-away backings. Toppings are usually light to medium weight ones. When choosing heavy wash-away topping, mind that they tend to leave residue on the fabric. This residue, when dries, gives the fabric certain stiffness. In some project such stiffness is welcome, in others – not.
Hooping of Tulle. Now, as net-like weave is always unstable, fabrics of such weave stretch in all directions. This means, that when hooping such fabrics for machine embroidery, they can be easily overstretched and even torn. In order to avoid such mishaps, the fabric is adhered to a solid base (backing of some sort). The adhesion should come either in the form of a sticky spray or a sticky layer on the stabilizer itself. Basting and pins won’t give the necessary stability to the threads of the fabric. Also, if tulle is too elastic, it’s treated as knitted fabric, and is embroidered with ball-point needles.
Designs for machine embroidery on Tulle. Distance between interwoven threads (or simply put – holes or eyelets of the fabric) will determine the type of designs that could be embroidered on such fabrics. Before anything else, make sure the smallest stitches of the design are larger than the size of the eyelet. If they aren’t, the stitches won’t have anything to grab on, and the embroidery will break up after the stabilizer is removed. Types of designs that can be sewn on tulle and other net-like fabrics are those which have relatively large elements with solid fill stitch. Don’t sew Red Work, Toile, Vintage and other linear techniques on tulle and lace.
Knit fabrics: aspects to be taken into account when choosing fabric for machine embroidery
Knitted fabrics. Main characteristics:
knit thickness and weight
knit and stitch varieties,
level of elasticity
Knitted fabrics: thickness and weight
In general this characteristic of knits is same to that of woven fabrics. Again, just like with woven textiles, weight of knits will partly influence choice of stabilizers. However, due to the fact that, as a rule, yarns, used for knits are thicker and heavier, their actual measurements will slightly differ:
Light weight knitted fabrics – under 6-7oz/yd2 (100-150gr/m2),
Medium weight knitted fabrics – 8-10 oz/yd2 (150-200gr/m2),
Heavy knitted fabrics are above – 10 oz/yd2 (200-400gr/m2).
Knitted fabrics: knit varieties.
This category is an analogue to weave type in woven fabrics. There’re several main varieties of knits, basing on arrangement of stitches (peals and knits):
Note: we won’t get into details about knit stitch variations as it’d be of little use for machine embroidery. Main thing one need to keep in mind is that a pearl stitch, well, looks like a pearl. It’s usually arranged horizontally. A knit stitch is the reverse side of a pearl stitch and it looks like a “V” section of a braid. It’s usually arranged vertically.
~ Jersey knit (T-shirt jerseys, fleece, knitted velour, French or knitted terry etc). Jersey knits have two sides: one with knit stitches, the other with pearls. They stretch both vertically and horizontally.
~ Rib knit (Double knits, Interlock etc.) Rib knits have same sides, both with vertical ribs. Rib knits stretch horizontally more than vertically.
~ Pearl Knit (both sides are reversible but each of them has horizontal rows of pearls stitches and knit stitches). Pearl knits stretch crosswise (like jersey knits), but in general they are less elastic than them.
~ Tricot is a really delicate and elastic material. It’s stretches in all directions. It resembles jersey knits a lot, but its stitches don’t unravel as much.
~ Rachel is a more lacey variation of Tricot and thus it’s less stable. Rachel has almost same characteristics as those of Tricot. The only difference is it’s more diverse in its patterns (with more open spaces and textures).
Knitted fabrics: level of elasticity
So there’re two issues with elasticity of knits: direction of stretch and its level. These characteristics are important because the entire embroidery project will actually depend on them. You’ll choose designs, type of stabilizers, hooping method and even needle types (ball-point, light ball-point etc.) according to elasticity of the knit.
In the above section we’ve spoken about how knitted fabric stretch (lengthwise and crosswise). Now let’s talk about “how much” they stretch in numbers. Why would you need those numbers? Well, we’re discussing the topic of choosing fabric for machine embroidery. Thus, if you’re to choose in the market, you’ll need to somehow identify the object of your choice. Some shops (both online and on-land ones) provide actual tables with elasticity percentage of fabrics. Checking up with those tables, customers can get the fabric that they need. We, too, will give few basic examples of various levels of elasticity. If, however, the knit, you’re dealing with isn’t there, you can determine the number on your own. For this you’ll need to search for “how to determine stretch percentage of knits” and act accordingly.
Some sweatshirt fleeces and quilt knits go as far as 10% of their width (practically woven fabric stability),
Some stable Interlocks can increase 20% of their length (pretty stable for knits),
Pique knits, Scuba knits, Stretch Velvet will go up to 25%,
Nylon mesh knits, cotton jersey knits, light pique knits, some stretch velvets and velour knits will go up to 50%,
Spandex, Stretch lace, lightweight sweater knits and other light porous knits will stretch 75% of their width and even more!
Now, that we’ve discussed main characteristics of knits, let’s speak in detail about the actual fabrics.

Jersey knit fabrics
Jersey knit fabrics havea wrong and a right side. One of the sides will have vertical chains of “rows”, the other – horizontal chains of “pearls”. There’re a lot of types of jersey knits and all of them vary in their characteristics (weight, density, elasticity etc). What to take into account when choosing fabric for machine embroidery from all of the existing types of jersey knits will include:
Weight of jersey knits will vary from 5 oz. (very light weight) to 12 oz. (heavy). Weight of the material will influence choice of stabilizers, hooping and designs. It’s really easy to machine embroider on jersey knits with weight above 8 oz. Everything that is lighter, should be treated with care (a.k.a. with a bit more complex set of stabilizers, careful hooping etc.)
Stretch of jersey knits is usually 2-way. However, if there’s Elastane in the fiber content of jersey knits, it’ll stretch in all directions. Stretch of the material will influence hooping, stabilizer choice, designs choice and their placement.
Taking all that into account, we’ve created a quick step-by-step instruction of how to machine embroider jersey knits. We’ve picked a T-shirt as a hero for the example, as it’s the most common piece of garment used in machine embroidery. The instruction will show you the so-to-say practical approach to organization of the entire process of work.
Machine embroidery of a jersey knit T-shirt
1 – Analyze the design that you want to sew on the jersey knit T-shirt. If it’s a dense fill stitch design (e.g. Pocket Husky Machine Embroidery Design) you’ll need a cut-away backing (from light to medium weight). If it’s a light design (e.g. one of the butterflies from Set of Machine Embroidery designs Five Butterflies) a medium tear-away backing will do.
2 – Analyze weight of the jersey. If it’s light and sheer (like Burnout jersey knits), usual cut-away backings won’t do, as they’ll be visible through the fabric. With sheer jersey you’ll need cut-away semi-transparent mesh backing (e.g. Soft n’ Sheer by Gunold, No-show Polymesh by World Weidner etc.) Also, if the jersey is too light, additional use of light to medium weight water-soluble topping will be required.
3 – Whatever stabilizer you’ve chosen, cover it with temporary spray adhesive. Knits in general should be embroidered with adhesive stabilizers as the “glue” makes them less “stretchy” and hence more agreeable to sewing.
4 – Hooping of jersey knits should be done with caution. If the fabric is too unstable (too light, shifty etc.) don’t hoop it, as it’ll simply break the loops of the threads. Instead apply the “floating” technique. In other cases jersey knits are hooped together with the topping and backing.
5 – Think of how the T-shirt will be worn. If it’ll be stretched in the area where you’ll be positioning your design, stretch slightly the fabric when hooping it. This way when in use, the fabric and the design will keep their form without distortion.
6 – Don’t forget about the needle – only ball-point one will do for the job.
Interlock is more forgiving than most of the knit fabrics as it’s quite stable and doesn’t stretch much. Interlock, unlike most of knitted fabrics, have same stitch pattern on both sides. Because of this, interlock can almost be compared to a woven fabric in its characteristics. So much so, that when machine embroidering Interlock garments (sportswear, sweatshirts, jackets), no complex stabilizing or hooping is needed. Usually a tear-away backing of a medium weight is all what interlock wants.
Pique (Lacoste knit fabric) is the fabric the famous Polo T-shirts are made of. Its weave is a derivative from Interlock weave, thus they share almost same characteristics. In machine embroidery Pique is treated just like any regular Interlock fabric.
Rib knit fabric is a double-faced fabric with characteristic vertical ribs. It’s extremely elastic along its width that is why it’s often used as trimming (cuffs, neckbands, waistbands etc). Also all beanies, scarves, sweater socks, turtlenecks and tight, closely fit sweaters are usually made of rib knit fabrics. Because of the number of stitches (loops) in the vertical ribs between them it can be called 1 x 2 rib knit, 2 x 2 rib knit, etc.
Now what should embroiderers take into account when choosing such fabric for their next embroidery project? The answer is: elasticity level and texture of the ribs (which usually depends on the size of the yards in the knit). Weight of rib knit fabric will matter only if it’s extremely light, which is usually the case with the see-through pieces of garments. Super light rib knits are embroidered just like Burnout jersey knits both stabilizers and hooping method-wise. The rest, and especially those heavy rib knits, which are used for various trimmings, are embroidered with cut-away backings. When hooping such fabrics, one should take into account the cut of the item and the positioning of the design.
Example: Let’s compare three cases: machine embroidery of a rib knit scarf, a rib knit beanie and a rib knit sweater.
1 – The scarf will require water-soluble topping and backing as its wrong side should look good. Weight of the topping will depend on the texture of the ribs. If they’re really pronounced, use medium weight one. With the backing, due to the high level of stretch you’ll want to use temporary spray adhesive to make sure yarns of the weave don’t move during embroidery. This means that if you choose to work with water-soluble backings, they should have an adhesive layer of their own (e.g. Soluflix by Vlieseline, Sulky Sticky Fabri by Solvy, Madeira Avalon Fix etc.) As scarves aren’t stretched much when they’re worn, you hoop yours as it is together with the topping and backing you’ve picked.
2 – Machine embroidery of the beanie will differ in two things. Firstly, it’s stretched quite a lot when it’s worn. This means, when hooping, you’ll need to stretch it too so that the stitches could lay well. If you don’t, then, when the fabric of the beanie stretches, it would distort the embroidery. Secondly, as the inside of the beanie isn’t seen, you have more freedom in picking your backing, taking that the topping stays the same. Mind, thought, that the backing should be fairly soft, because otherwise it’d be uncomfortable against the forehead (if the design is positioned on the front). Oh, and don’t forget about the spray adhesive.
3 – Machine embroidery of rib knit turtle necks, on this wise, will differ. If the design is to be sewn on the chest area (which stretches when worn), “the beanie method” is applied. If the design is to be sewn on, say, lower front part of the garment, the embroidered fabric won’t be stretched quite as much. This means that the fabric shouldn’t be stretched much during hooping. The ideal stabilizer choice in this case would be: topping – medium to light wash-away film, backing – light to medium cut-away with temporary spray adhesive. After the embroidery will be done, additional interlining (Gunold Cover the Back, Sulky Tender Touch or any other of the type) should be applied.
Spandex
Elastane, Spandex – is a light to medium weight elastic fabric which can be stretched in literally every direction. Its elasticity (which is often above 100%) is the main concern when it comes to machine embroidery. Choosing such a super-stretchy fabric for machine embroidery means that one need to mind the following:
The cut of the to-be-embroidered item. Spandex leotards for gymnasts are made to closely fit the figure of those who wear them. The cut and the size of the garment will “dictate” the choice of designs, stabilizers and hooping method. Usually it’s a custom made job (with particularly digitized designs), as parameters for various body shapes differ. This means that an embroiderer should “predict” how stitches of the embroidery will react to the stretching. Swimming suits made of spandex will differ slightly on this matter, especially those with interlining or some shape-keeping backing. Such garments are more or less “stable” and pose less difficulty for embroiderers.
Type of design that you want to sew on spandex. As spandex clothes are made to closely fit our figures, the stitched decorations should never interfere with such their characteristic. This means that designs that are to be sewn on spandex should be quite open. When possible, it’s best to use textile patches or appliqués instead of densely fill-stitched designs.
Stabilizers for machine embroidery on Spandex (and other highly elastic fabrics) should prevent them from stretching. This means that whenever possible you should use cut-away backings (at least the lightest of them, like, say PolyMesh or other of the kind) paired with some temporary spray adhesive. If for some reason cut-away stabilizers isn’t an option, use medium weight wash-away topping and backing, paired with temporary spray adhesive. The wash-away should have paper-like texture and not be like film.
Hooping of Spandex garments for machine embroidery will depend on the cut of the garments. Garments, which are stretched when being worn, should be stretched when hooped too.
Example: Spandex leotards for gymnasts are stretched in the hoop. This way, when embroidery is sewn on the stretched fabric, it’ll look good when the piece is being worn. Tops of swimming suits (especially those with interlining) can be “floated”.
Fleece, Minky fabric, Sherpa, French terry knit fabric (stretch, jersey terry) are technically different types of knit fabrics. However, in terms of their characteristics important for machine embroidery, they belong in same category. All these textiles are thick, stretchy fabrics with a nap (pile). What does it mean machine embroidery-wise? Well, first of all they all are embroidered with the help of a backing and a topping. Further we’ll give some examples on how to choose stabilizers for knits with naps.
Backings: When the back side of the embroidered-to-be item matters (minky blankets, fleece blankets), use water-soluble stabilizer of medium density (thickness). When designs are dense, use heavy backing. When the back side of the item isn’t seen (minky toys, Sherpa pillowcases), use medium cut-away backing. As it’s the rule with all knits, temporary spray adhesive is a must.
Toppings: Light to medium weight Water-soluble stabilizers should act as toppings. Heat-away ones might not work well for some types of knit fabrics with a pile as some of them actually should be ironed only at low temperatures.
Hooping: If possible (if the fabric isn’t too thick) hoop all the layers together. The pile, in general, is pretty resilient to the hoop burns. If the fabric is too thick for hooping, use floating technique.
Designs on such textured knits, just like with textured woven fabrics, should be fairly dense. No Red Work or other run-stitch designs will work in this case.
Velour
Velour, stretch velour, stretch velvet. These fabrics should be treated by machine embroiderers as lighter, thinner and more luxurious variations of fleece and French terry fabrics. What this means in particular is that such fabrics are embroidered almost like fleece and French terry fabrics.
Stabilizers for stretch velvet are similar to those, used for French terry fabrics. In general, it’s the usual knit fabric set: water-soluble topping of various density and cut-away backings with spray adhesive.
Hooping is generally out of the question because of the delicate pile. So, instead of hooping such fabrics you’ll have to float them on hooped “sticky” stabilizers (like Filmoplast or others of same kind).
Designs. Choosing such fabric for machine embroidery will mean that, again just like with French terry, no Red Work designs could be used. Now, when very dense designs are being sewn on stretch velvet, sometimes backings like Filmoplast or other self-adhering stabilizer won’t provide the necessary support for the stitches. In this case, another layer of a light or medium weight tear-away stabilizer is adhered on the back of the hooped “sticky” paper.
Embroidery machine settings. Another thing that machine embroider should take into account when sewing on stretch velour is machine settings adjustments. Tension of both threads will matter especially. As the fabrics of the type are generally quite light and unstable, they tend to pucker around stiffly sewn stitches of embroidery. In order to avoid such a mishap, test the design on the fabric with the stabilizers while adjusting the tension of both threads.
Conclusion
Wow, you have managed to read the entire thing to the end! Congrats, that’s quite an achievement! We won’t bother you any longer as after such a huge piece of information, you definitely need to rest. So, go sleep on it, but don’t forget to come back to our third and fourth parts of the “choosing fabric for machine embroidery” series. There’re still some pretty interesting pieces of information to be discovered: non-woven fabrics, some tips on stabilizers and design choice. Interested? We thought so! So, see you in the next articles then!
You may also like
Choosing fabric for machine embroidery

Author: Ludmila Konovalova
My name is Ludmila Konovalova, and I lead Royal Present Embroidery. Embroidery for me is more than a profession; it is a legacy of my Ukrainian and Bulgarian heritage, where every woman in my family was a virtuoso in cross-stitch and smooth stitching. This art, passed down through generations, is part of my soul and a symbol of national pride.
Date: 18.05.2024

 Get Sign-In Link
 Login with Google
 Login with Facebook
 Login with Amazon
 Login with Paypal