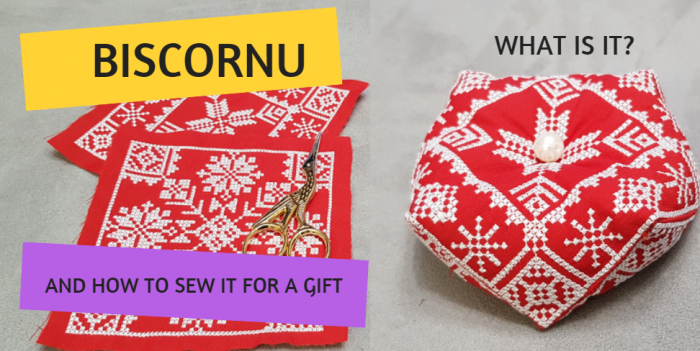
A biscornu is a small eight-sided stuffed cushion made from two equal fabric squares. The embroidery machine creates the decorative motifs, while the unusual shape is assembled by hand: one corner of the first square is joined to the midpoint of one side of the second square. The finished project can be used as a pincushion, Christmas ornament, scented sachet or small handmade gift.
You do not need a special in-the-hoop file for your first biscornu. A square machine embroidery design with a centered motif and an accurate assembly outline will work. Snowflakes, Norwegian ornaments and machine cross-stitch blocks are especially effective because their symmetry emphasizes the eight-point shape.
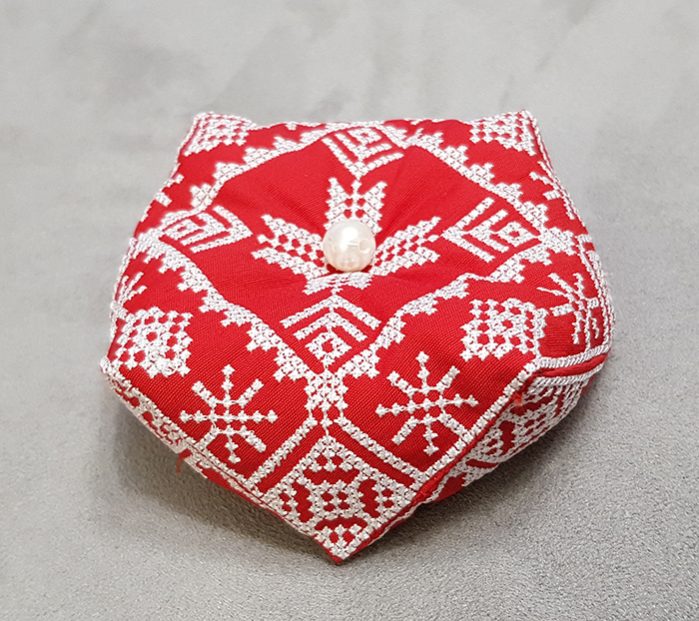
A finished biscornu made from two red-and-white embroidered squares with a button-tufted center.
The essential construction rule: both pieces must have exactly the same square seam outline. The front and back motifs may be different, but the four sides of their assembly outlines must match.
A Christmas Gift to Make with an Embroidery Machine
A biscornu looks more complicated than it is. The embroidery machine completes the detailed decorative work, and the remaining hand assembly can be finished as a compact holiday project. The size and finishing details determine how the gift will be used.
- Pincushion for a stitcher. Add quality needles, small embroidery scissors or a spool of decorative thread to make a useful gift set.
- Christmas tree ornament. Choose a compact square design, insert a ribbon before closing the seam and finish one point with a tassel or bell.
- Scented sachet. Place dried lavender or spices inside a separate thin fabric pouch, then surround it with polyester filling. Keeping dried material away from the back of the embroidery reduces the risk of stains.
- Personal keepsake. Add a small year charm or attach the recipient's name to the hanging ribbon.
Designs measuring 74–94 mm / 2.91–3.70 in are practical for gifts: they fit a 100 × 100 mm / 4 × 4 in embroidery field and produce a compact pincushion or ornament rather than a large decorative cushion.
How to Choose a Machine Embroidery Design for a Biscornu
A square-looking picture is not automatically suitable for this construction. Check these five points before stitching.
- Equal finished outlines. The front and back may use different motifs, but their square seam outlines must have exactly the same side length.
- A centered composition. The middle of the design will be pulled inward when the buttons are attached. A central snowflake, star, flower or geometric ornament handles this better than a face or a small narrative scene.
- A clear outer border. The easiest method is to join matching stitches in an embroidered square frame. If the design has no frame, or its outer dimensions are not a perfect square, sew a separate square assembly line around the motif before trimming the fabric.
- The machine's actual embroidery field. Compare the file dimensions with the usable field, not only the commercial hoop name. A 97.9 × 97.9 mm / 3.85 × 3.85 in design fits a 100 × 100 mm / 4 × 4 in field with only 2.1 mm / 0.08 in total clearance, approximately 1.05 mm / 0.04 in on each side.
- A prepared design size. Do not reduce machine cross-stitch with the machine's ordinary scaling control. Resizing can change the shape and overlap of the crosses. Select a size already included in the download.
| Project | Embroidered block | Minimum practical hoop | Best use |
|---|---|---|---|
| Small biscornu | 74–94 mm 2.91–3.70 in |
100 × 100 mm 4 × 4 in |
First project, pincushion, ornament or sachet |
| Classic biscornu | about 98 mm 3.86 in |
100 × 100 mm / 4 × 4 in with precise centering | A statement pincushion with one large snowflake |
| Medium or large biscornu | from 103 mm from 4.06 in |
130 × 180 mm / 5 × 7 in or larger | Decorative cushion or larger keepsake |
Can You Make a Machine-Embroidered Biscornu without Aida Cloth?
Yes. Hand-counted cross-stitch needs an evenly spaced grid because the embroiderer counts the fabric threads. In a machine embroidery file, the position of every cross is already encoded. You can therefore stitch the design on stable woven linen or cotton instead of Aida cloth.
This does not mean that any fabric will work without preparation. Hoop the woven fabric with a suitable stabilizer, keep it on grain and test the complete design before using the final fabric. The two finished blocks must remain true squares. Stretch knit, loosely woven linen and heavily textured fabric are poor first choices because the small crosses may sink, shift or distort.
Materials for a Machine-Embroidered Biscornu
- two pieces of medium-weight, nonstretch linen or cotton;
- tear-away stabilizer; a useful starting weight is approximately one-third of the fabric weight, followed by a full test stitch;
- temporary spray adhesive if the fabric shifts against the stabilizer;
- 40 wt machine embroidery thread and compatible bobbin thread;
- a new 75/11 embroidery needle;
- a strong hand-sewing needle and durable thread matching the outer frame;
- polyester fiberfill;
- two buttons or beads for the center tuft;
- ribbon, tassel, beads or a charm, if desired.
A water-soluble topper is usually unnecessary on smooth linen or cotton. Test it on loosely woven, textured or raised fabric because small machine-stitched crosses can sink between the fibers.
How to Sew a Biscornu: Step-by-Step Machine Embroidery Tutorial
1. Prepare and embroider two squares
Prewash or steam-shrink fabric that may contract. Mark the lengthwise grain, crosswise grain and center of each piece. Hoop the fabric with stabilizer without stretching it, then embroider two files in the same prepared size. You can use two different ornaments or repeat one motif in a second color palette.
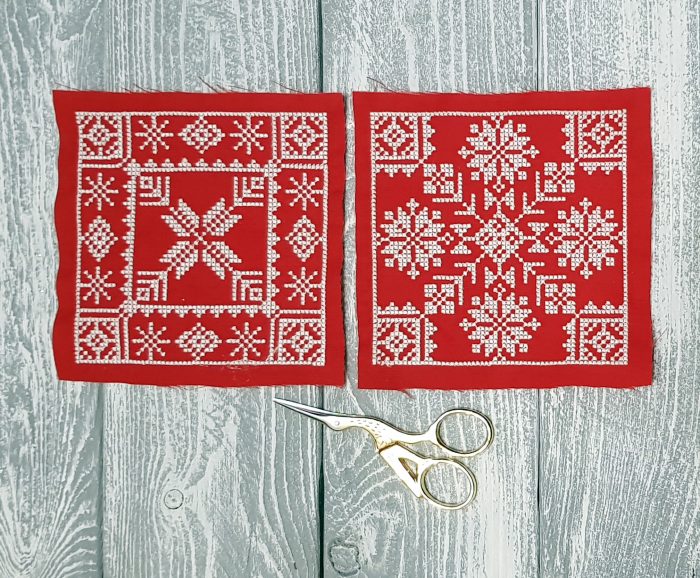
The two embroidered blocks need identical outer square outlines.
Before removing excess stabilizer, measure all four sides and both diagonals. If the embroidery has pulled the square out of shape, correct the stabilization and tension on another test. Do not stretch a distorted block back into shape with the iron.
2. Mark the seam outline and allowances
If the design contains an accurate square border, use it as the hand-assembly line. If there is no border, mark identical squares around both motifs and sew each outline with a straight stitch approximately 2–2.5 mm long. Mark the midpoint of all eight sides.
Trim the fabric, leaving a 10–12 mm / 3/8–1/2 in allowance outside the seam outline. Turn the allowances to the wrong side and press carefully through a pressing cloth. Avoid crushing raised embroidery.
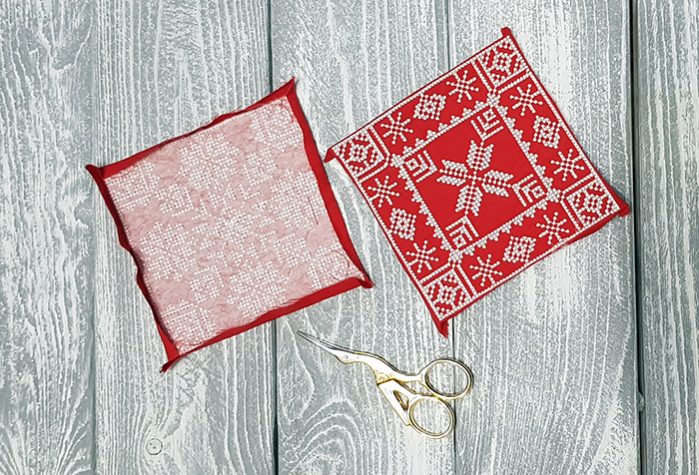
The seam allowances are folded along identical square outlines.
3. Match one corner to the midpoint of one side
Place the pieces with their wrong sides together. Align one corner of the top square with the marked midpoint of one side of the bottom square. This offset creates the eight characteristic points. Do not match the two squares corner to corner.
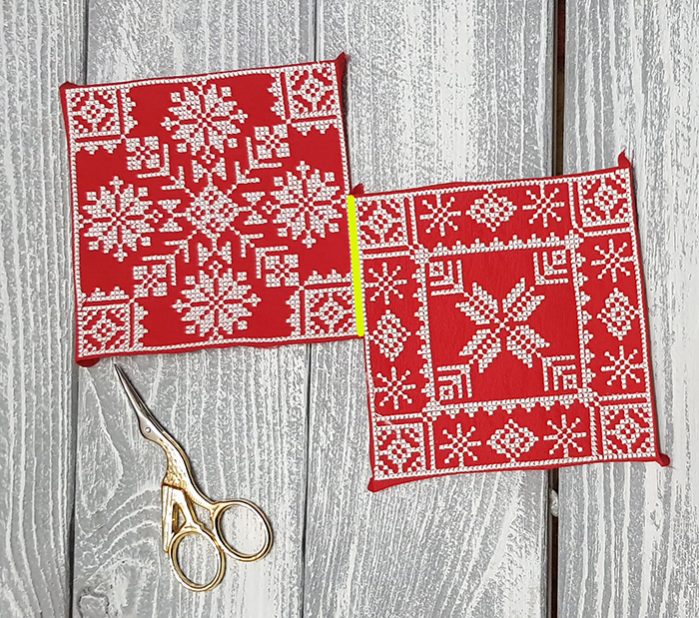
Starting position: one corner meets the midpoint of the second square's side.
4. Hand-sew the two outlines together
Hide the starting knot inside the folded allowance. Whip-stitch the pieces together by catching one corresponding border stitch from each square. Avoid piercing the fabric itself when a machine-stitched frame is available; working through matching frame stitches makes the spacing easier to control and reduces distortion.
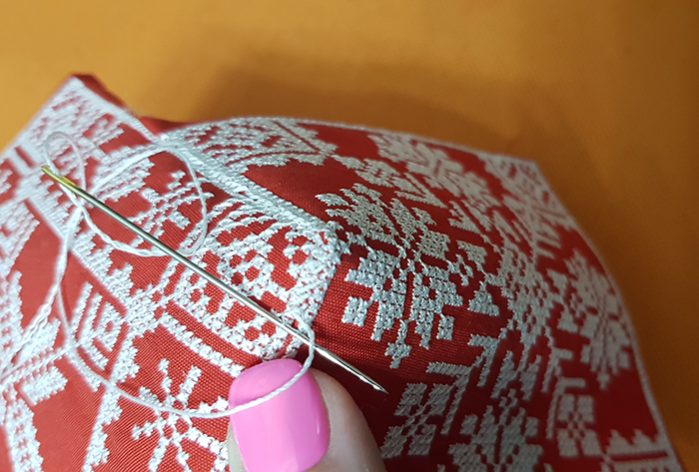
Catch one corresponding border stitch from each piece.
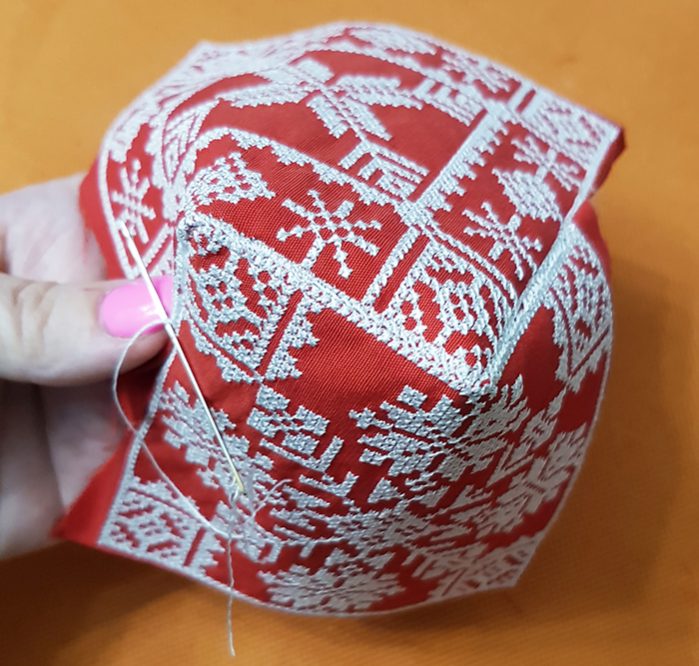
The eight-point shape appears as the first sections are joined.
To decorate the seam with beads, add one bead before every joining stitch or every second stitch. Make an extra securing stitch at each point. Insert a hanging ribbon or corner tassel before closing the relevant section.
5. Continue around the perimeter
Each full side of the first square joins half of one side and half of the next side on the second square. Continue in order around the entire perimeter. Keep the thread firm enough for the outlines to meet, but do not pull so tightly that the border gathers.
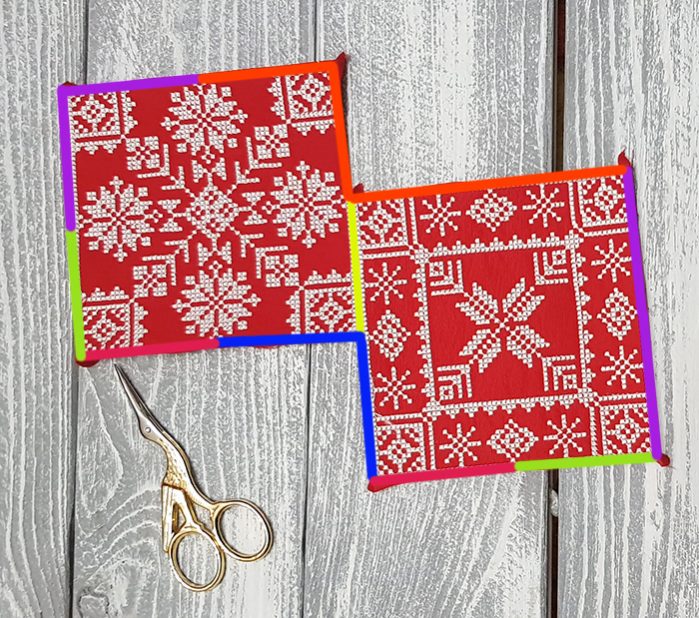
The colored marks show which sections of the two square outlines are joined.
6. Leave an opening and add the filling
Stop when the final 4–6 cm / 1.5–2.5 in section remains open. Add fiberfill in small amounts, filling the eight points first and the center last. The biscornu should hold its shape without becoming rigid. Overfilling makes the center tuft difficult and places unnecessary strain on the seams.
7. Close the opening
Continue the same joining stitch to the starting point. Secure the thread with several small stitches inside the seam, bring the needle out 2–3 cm / about 1 in away, then cut the thread under light tension so the end retracts into the filling.
8. Add the center buttons
Thread a long, strong needle with doubled sewing thread. Locate the center of both embroidered faces and pass through the biscornu. Add a button or bead, return through the center and tighten gradually until the characteristic indentation forms. Secure the second button on the reverse.
Do not pull the center tight in one movement. Make several passes and increase the tension gradually. This protects the thread, prevents the button from crushing the embroidery and keeps all eight points balanced.
Why a Biscornu Becomes Distorted
- The two outlines are different sizes. Even a small difference must be eased around the full perimeter and can make one edge ripple.
- The side midpoints were not marked. An inaccurate starting position shifts all eight points.
- The raw fabric edge was used instead of an exact seam outline. A cut edge does not provide a stable, repeatable side length.
- The assembly thread is too tight. Excess tension gathers the frame before the project is filled.
- There is too much filling. The seams spread and the center requires excessive force to tuft.
- Heavy stabilizer remains in the allowances. Remove excess stiff stabilizer from the folded edges without cutting away support directly beneath dense embroidery.
Machine Embroidery Designs for Biscornu Pincushions
These Royal Present square snowflakes and Norwegian cross-stitch ornaments are structurally suitable for this tutorial. They are digital files for embroidery machines; no finished biscornu, fabric or thread will be shipped.
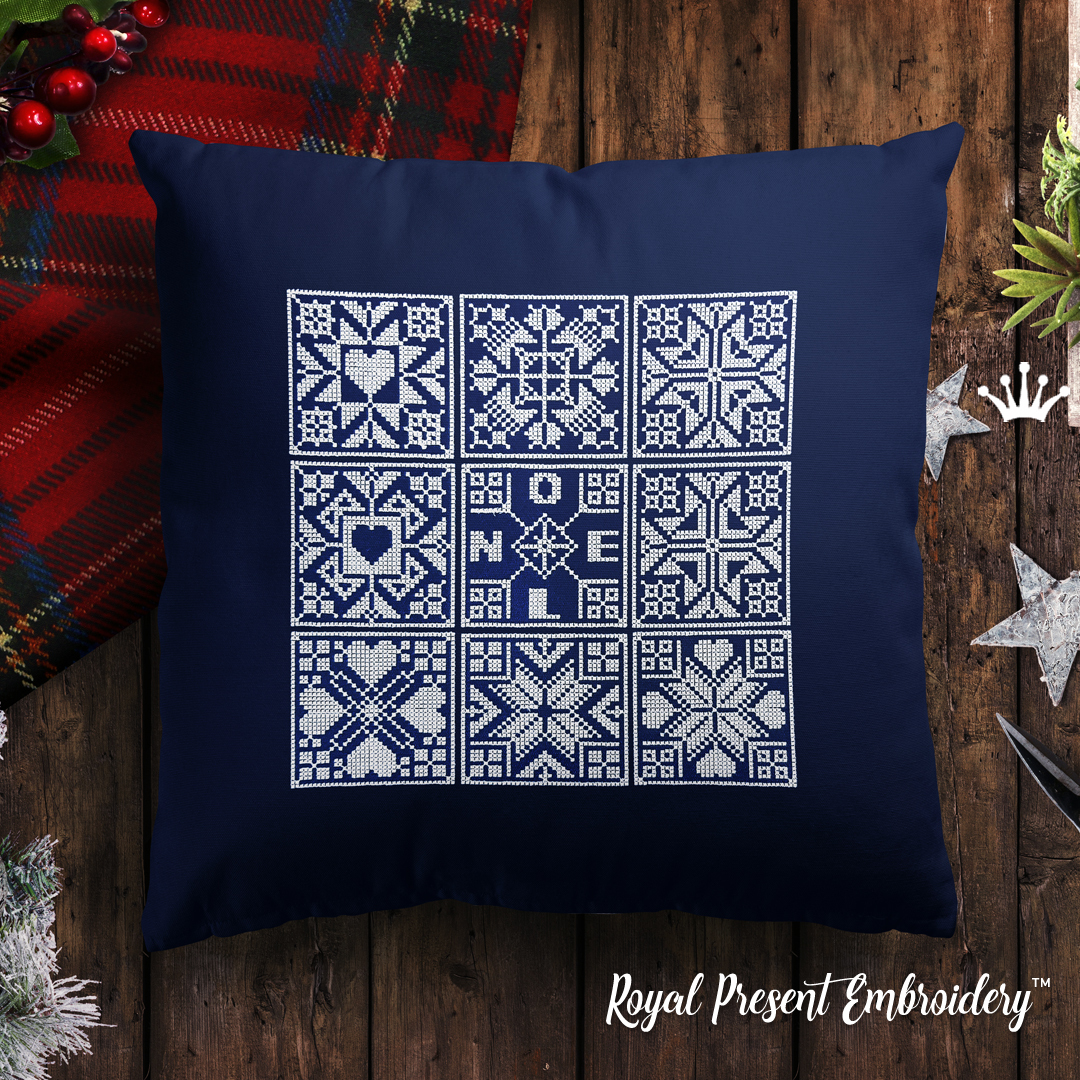
Noel Christmas Cross-stitch Designs
Nine square motifs in 74 × 74 and 94 × 94 mm / 2.91 × 2.91 and 3.70 × 3.70 in sizes. The easiest collection for a first biscornu and a 4×4 hoop.
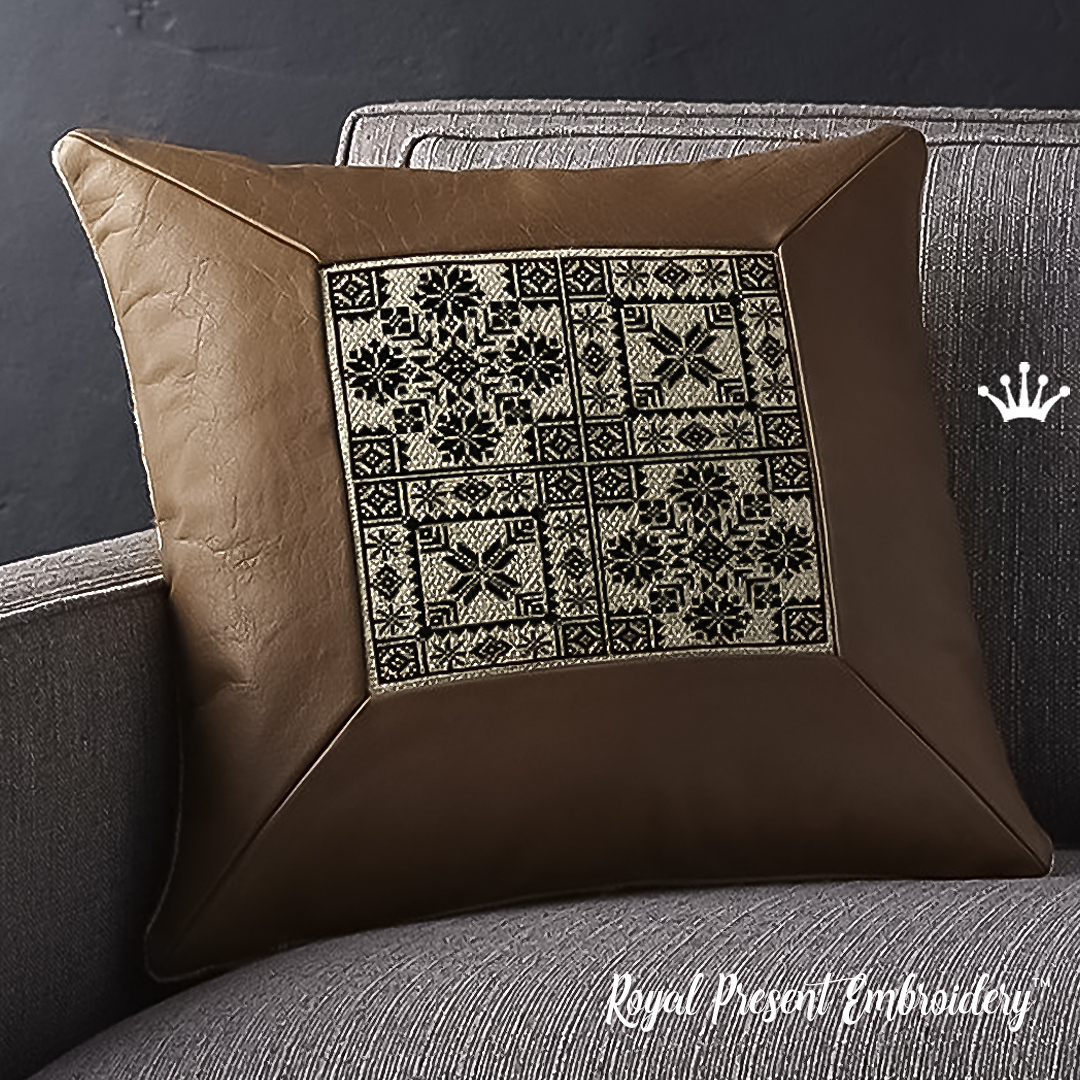
Norwegian Ornaments Cross-stitch Designs
Two different square patterns in four prepared sizes. These are the motifs shown in the step-by-step photographs.
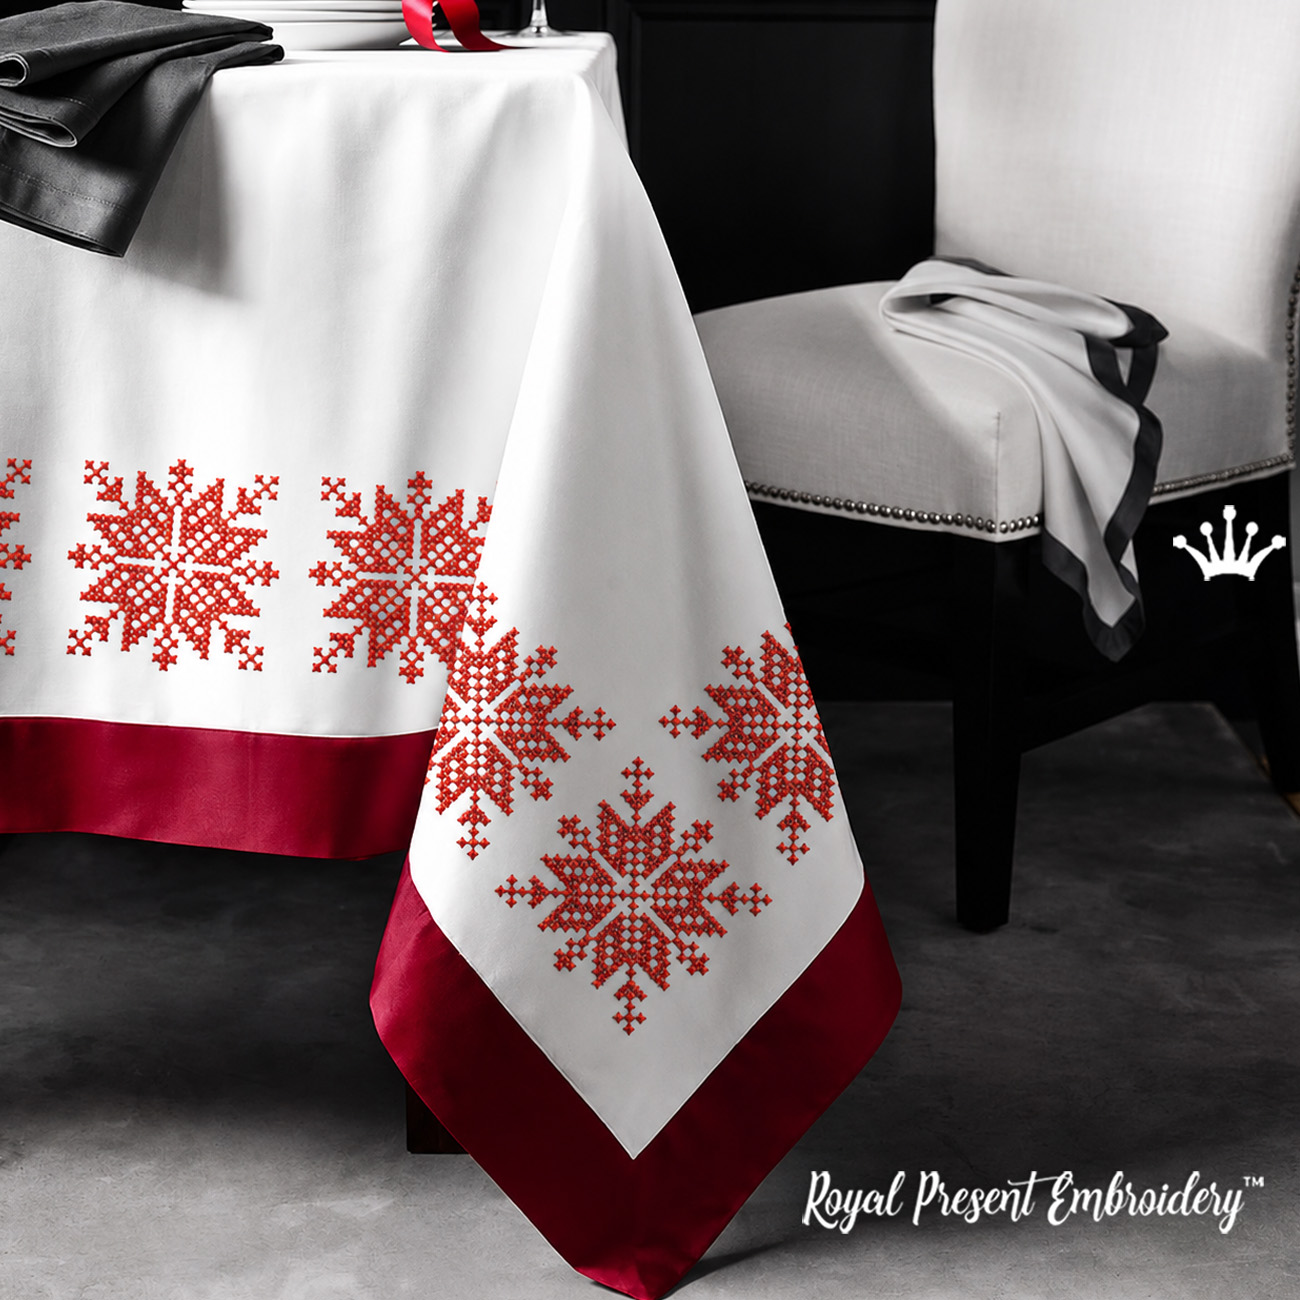
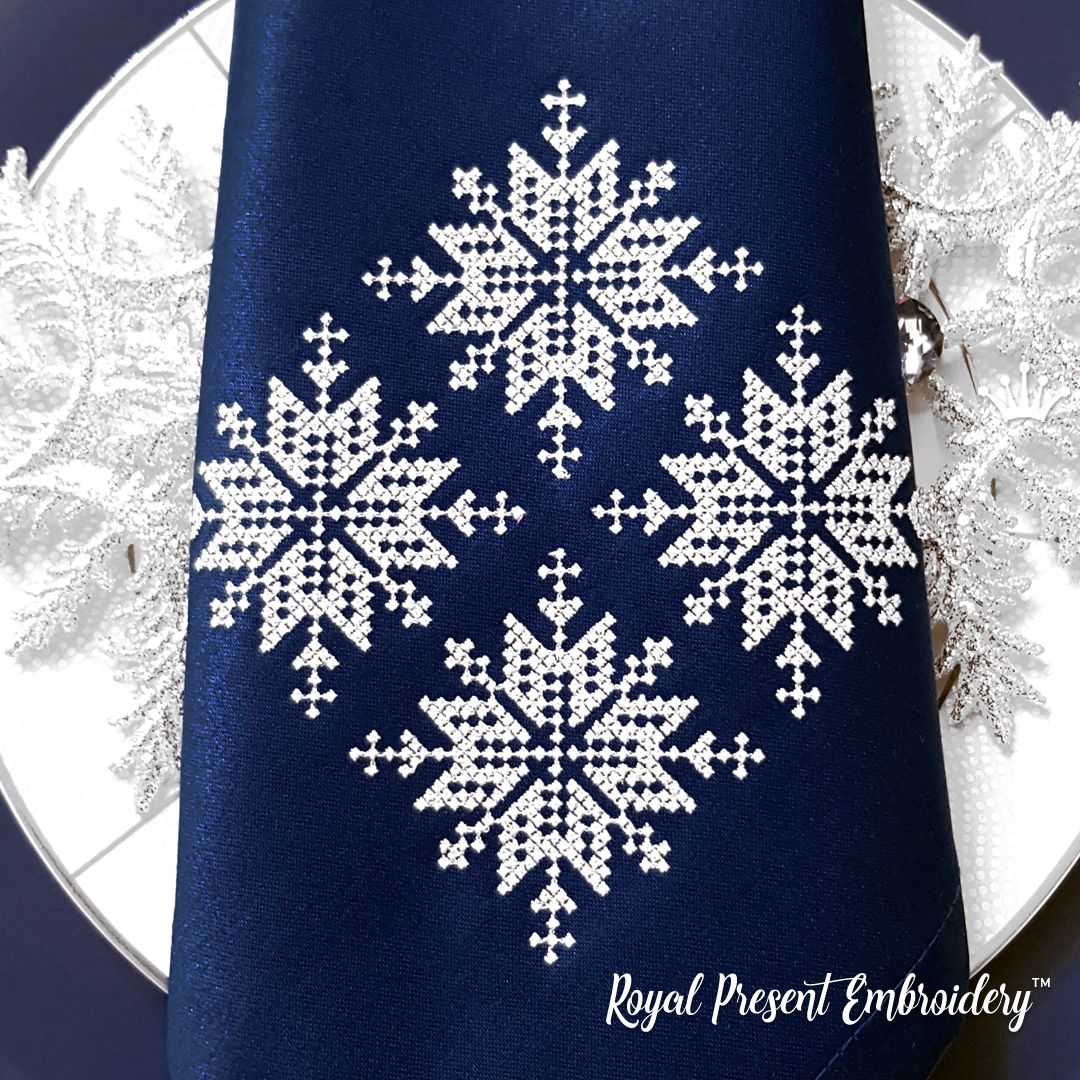
Norwegian Snowflake Cross-stitch
A one-color geometric double-cross snowflake. The smallest 97.9 × 97.9 mm / 3.85 × 3.85 in file fits a 4×4 field almost edge to edge.
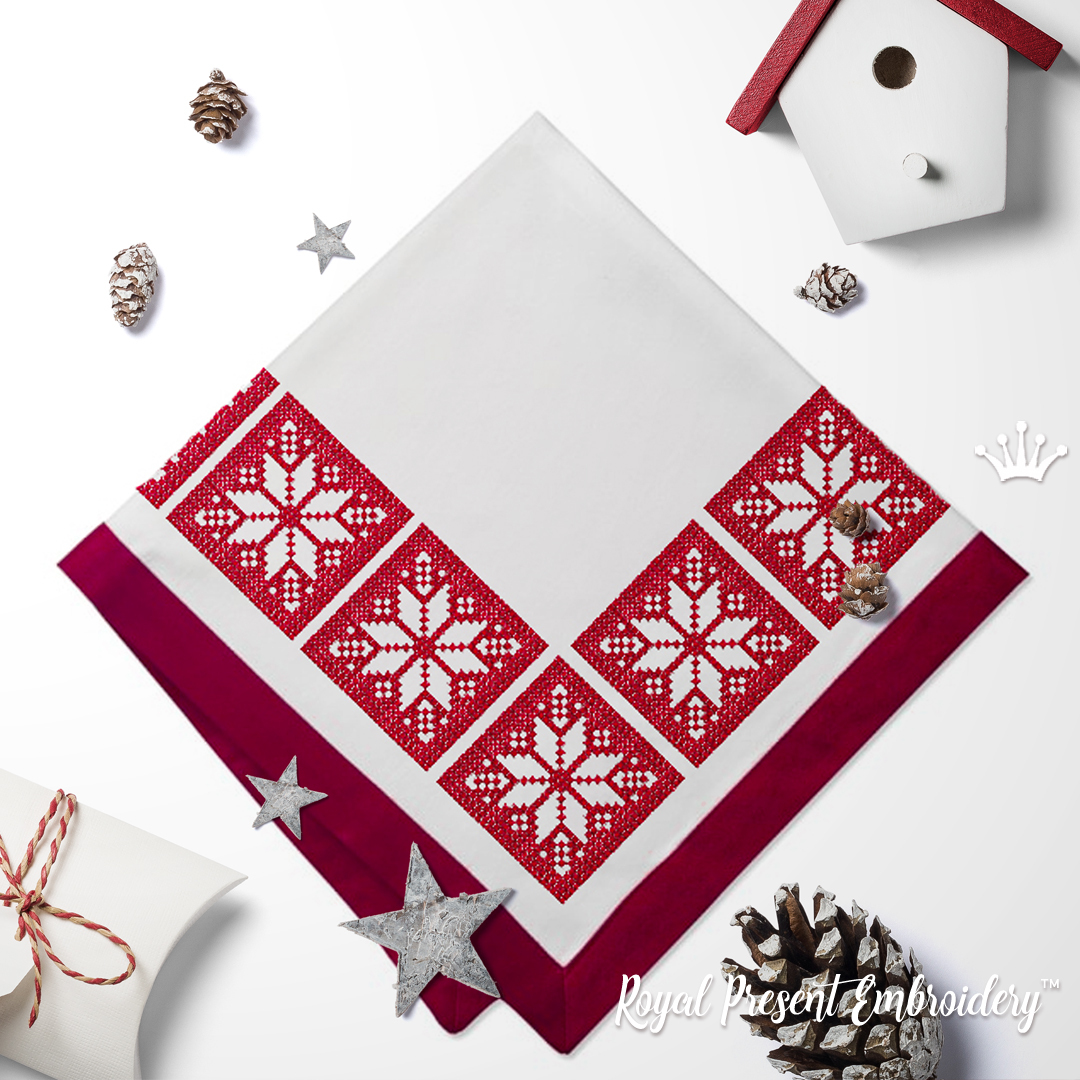
Red Scandinavian Snowflake Cross-stitch
A detailed one-color snowflake in four prepared sizes. The smallest square measures 97.9 mm / 3.85 in.
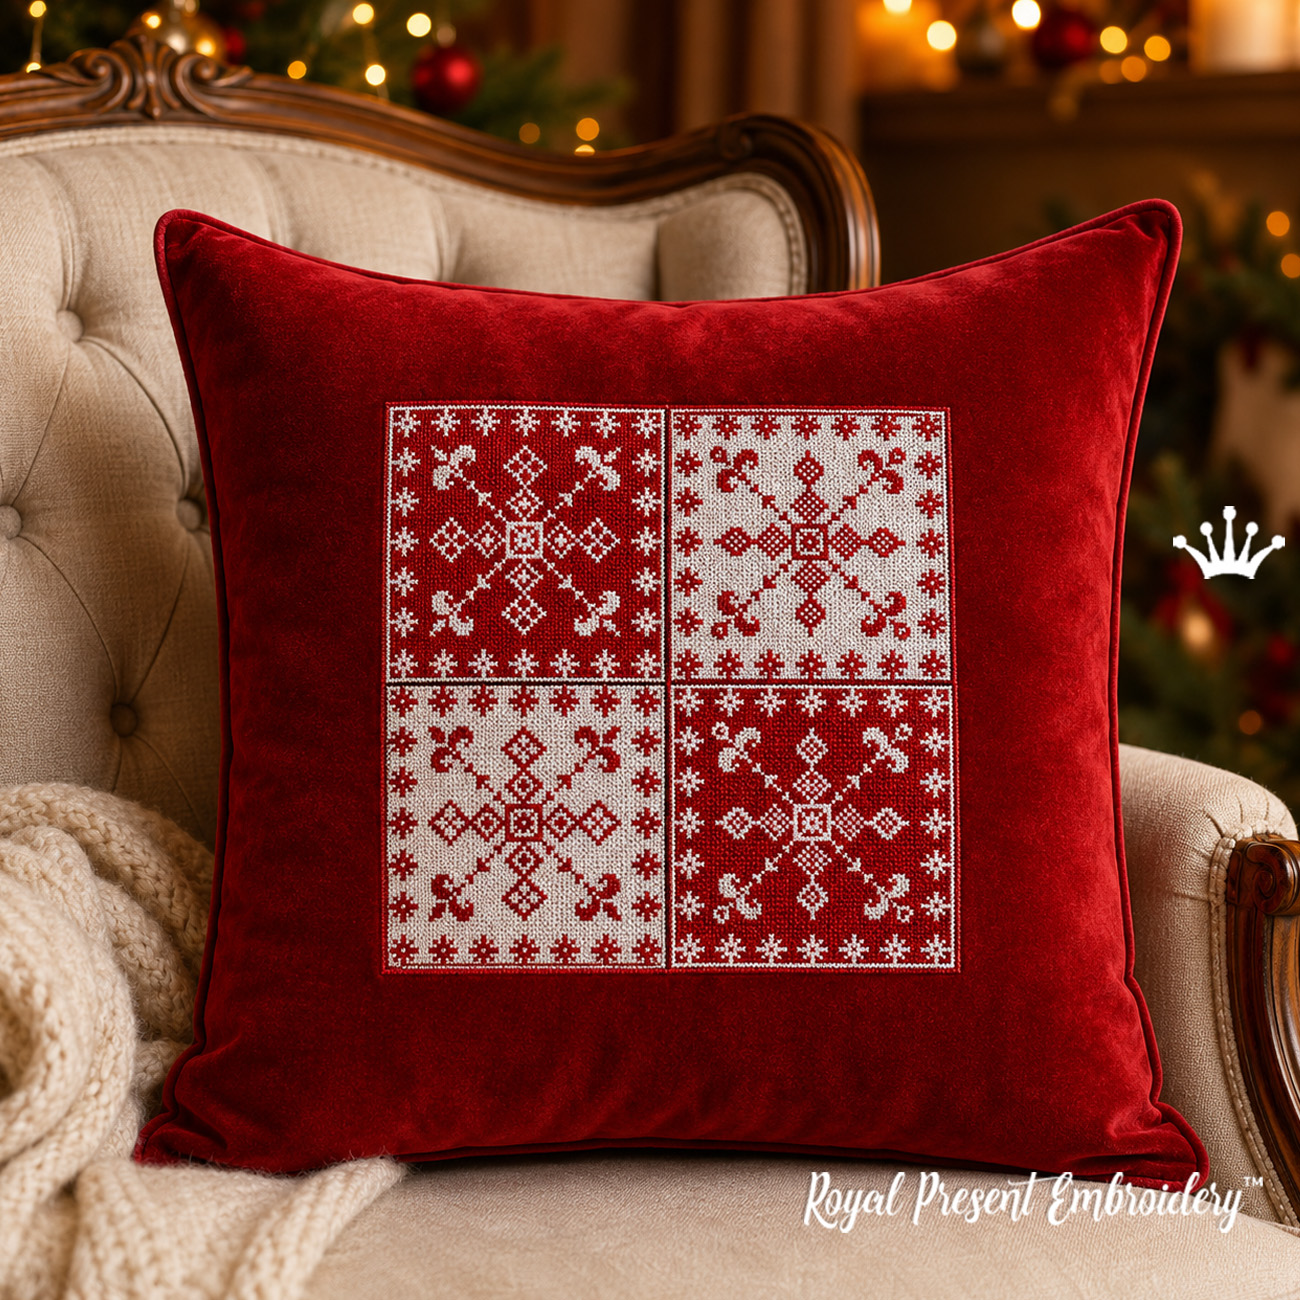
Snowflakes Cross-stitch Design
A dense red-and-white square ornament in three prepared sizes. The smallest file measures 98.1 × 98.1 mm / 3.86 × 3.86 in.
Scandinavian Snowflakes Cross-stitch — Set of 2
Two different motifs measuring 103.5 × 105.0 mm / 4.07 × 4.13 in. For a biscornu, mark a separate, identical square seam outline around each slightly rectangular design.
Browse more square motifs in Cross-stitch Quilt Blocks. Coordinating winter designs are available in Snowflakes and Stars and Christmas Cross-stitch Machine Embroidery Designs.
Frequently Asked Questions
Are a biscornu and a zigugu the same thing?
No. They are different forms of small embroidered cushions. A classic biscornu is made from two equal squares joined with each corner aligned to the midpoint of the other square's side, producing eight points. A zigugu uses a different construction. This tutorial is for a classic biscornu.
Can I embroider the same design twice?
Yes. The front and back do not need different motifs. Repeat one file in another color palette or reverse the main and contrast colors while preserving the programmed stitching order.
Do I need an in-the-hoop biscornu design?
No. In this method, the embroidery machine stitches two decorative blocks and the shape is assembled by hand. An ordinary square machine embroidery file works when both pieces have identical square seam outlines.
Which designs fit a 100 × 100 mm / 4×4 hoop?
The safest choices are the 74 or 94 mm files in the Noel Christmas set. The 97.9–98.1 mm squares also fit a true 100 × 100 mm field, but they require precise centering and leave almost no working clearance.
Can I make a biscornu on regular linen instead of Aida?
Yes. Machine cross-stitch does not require a counted fabric grid because every stitch coordinate is already programmed. Use stable woven linen or cotton with appropriate stabilizer, keep the fabric on grain and test the design before stitching the final pair.
Can stabilizer remain inside the biscornu?
A thin layer may remain beneath dense embroidery if removing it would distort the crosses. Remove stiff excess stabilizer from the seam allowances so the edges can fold neatly and the hand-joined seam does not become bulky.
Can I use metallic embroidery thread?
Yes, especially for a snowflake or outer border. Use a metallic needle, reduce the machine speed and complete a test stitch. Make the center tuft with ordinary strong sewing thread, not metallic thread.
Can I sell finished biscornu pincushions?
Royal Present designs may be used for personal projects, gifts and limited sales of finished handmade items. The digital embroidery files may not be copied, shared, uploaded, exchanged or resold. Read the complete Royal Present Embroidery Terms and Conditions of Use before commercial use.
Author: Ludmila Konovalova, machine embroidery designer and founder of Royal Present Embroidery.
Updated: August 1, 2026.

Author: Ludmila Konovalova
My name is Ludmila Konovalova, and I lead Royal Present Embroidery. Embroidery for me is more than a profession; it is a legacy of my Ukrainian and Bulgarian heritage, where every woman in my family was a virtuoso in cross-stitch and smooth stitching. This art, passed down through generations, is part of my soul and a symbol of national pride.
Date: 11.11.2018

 Get Sign-In Link
 Login with Google
 Login with Facebook
 Login with Amazon
 Login with Paypal