By knowing the speed of your embroidery machine, you can find out how long it will take to embroider a design.
To use the embroidery calculator, click on the number of stitches in the product description.
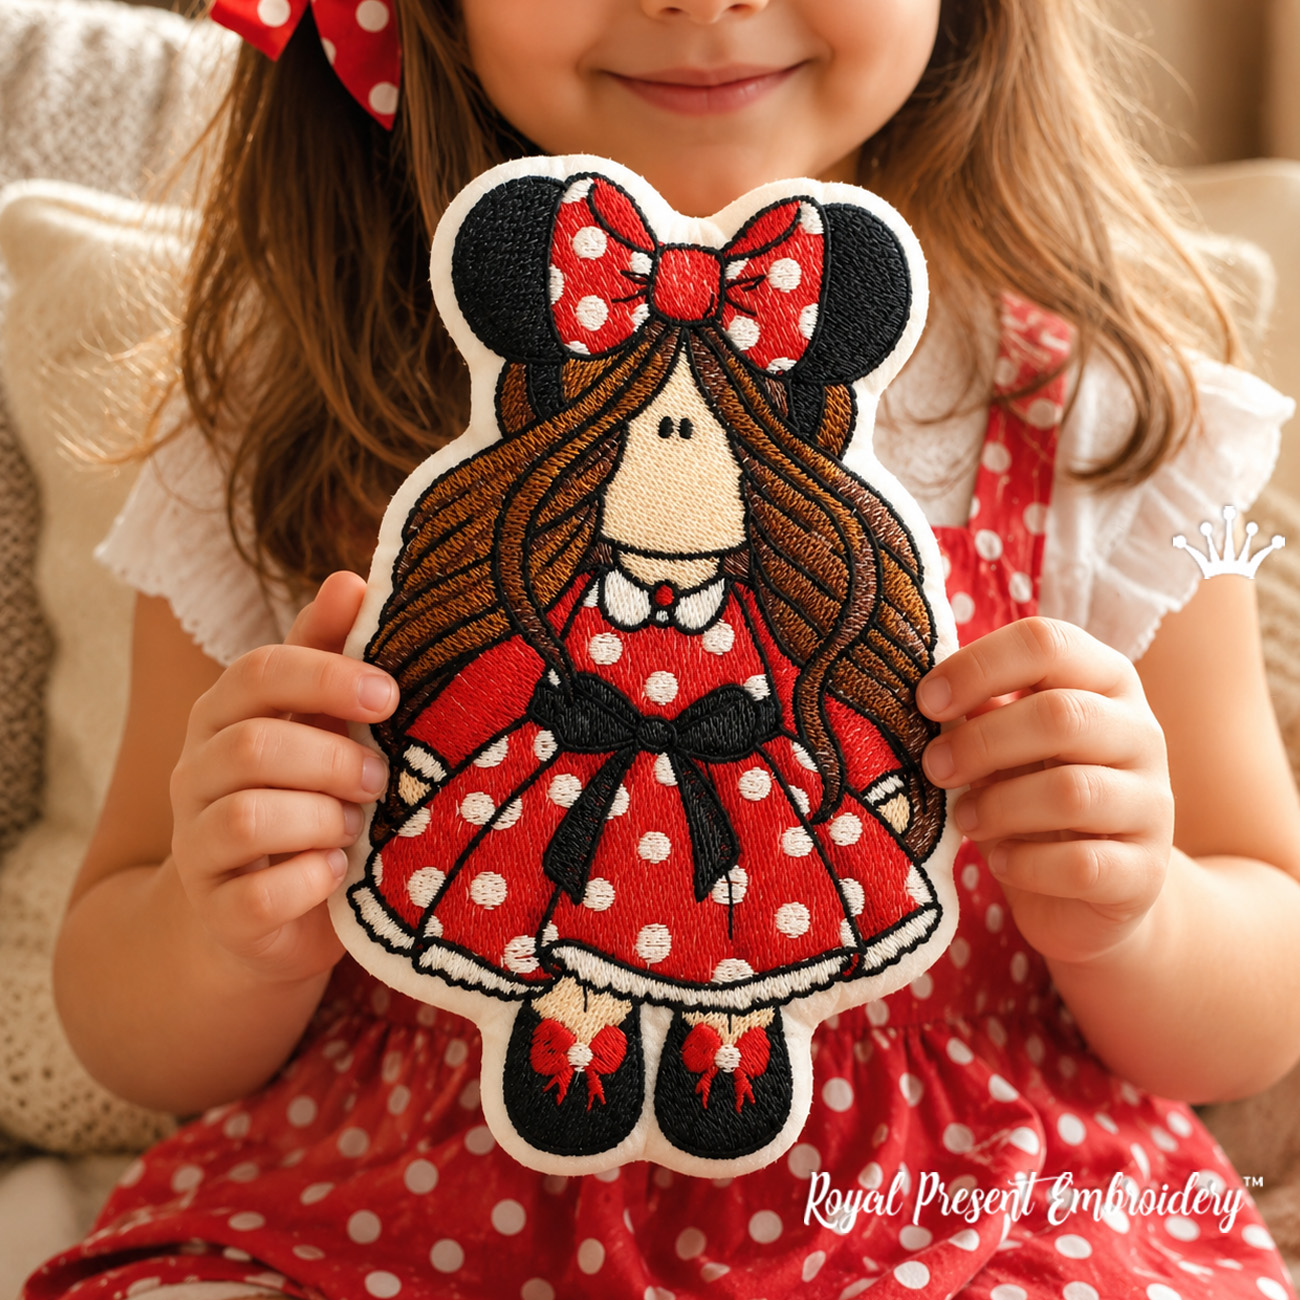
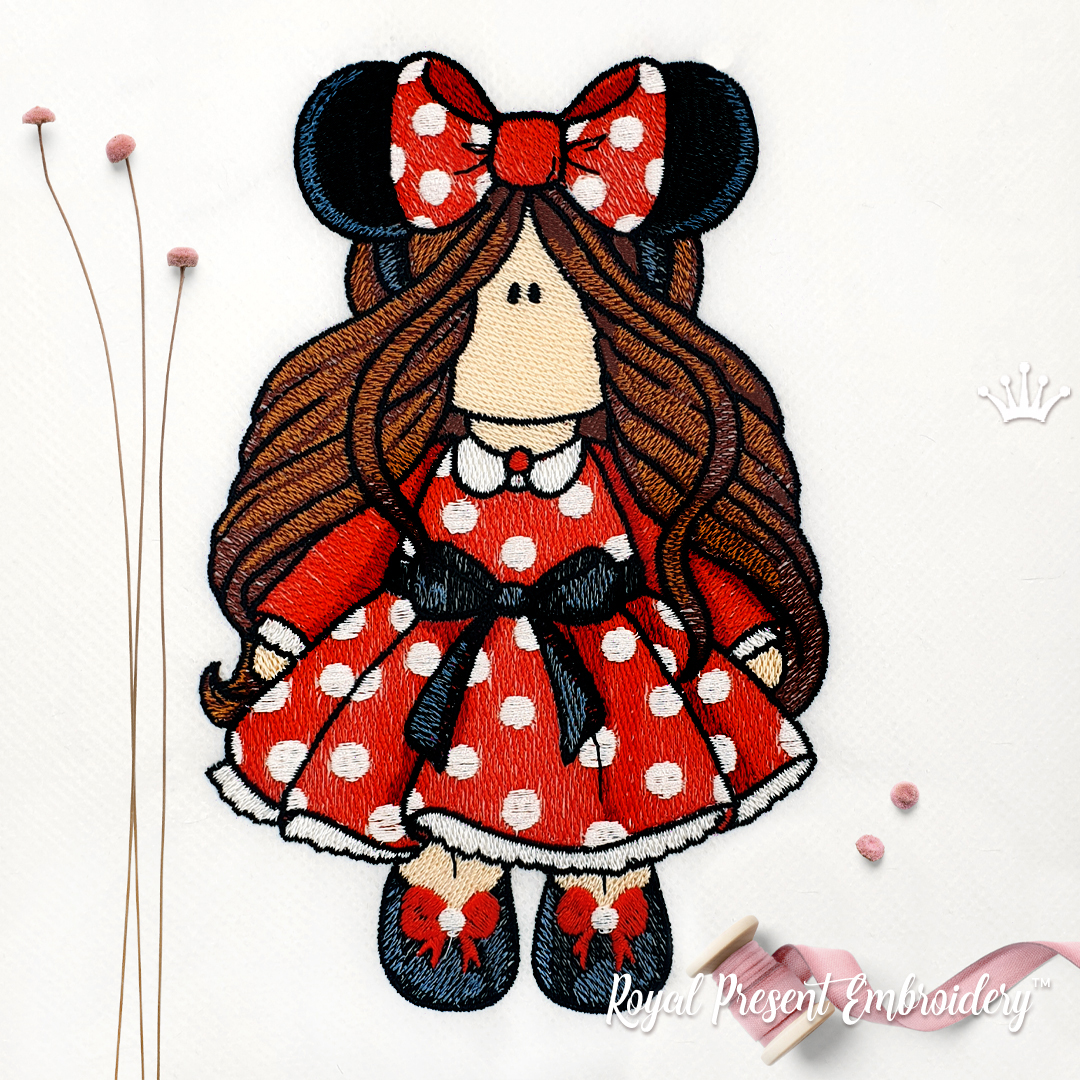
Minnie Mouse Tilda Doll Machine Embroidery Design features a whimsical faceless doll with long brown hair, round black mouse ears, a large red polka-dot bow and a matching red dress. Four sizes make the design suitable for girls’ shirts, dresses, hoodies, tote bags, backpacks, pillows, fabric panels and handmade flat felt play dolls.
The design was created using the WATERCOLOR machine embroidery technique. Light-colored fabric is recommended so the pale face area, white polka dots, hair shading and dark outlines remain clear.
This product contains machine embroidery files for an embroidery machine. It is not a finished doll, felt figure, stuffed toy, sewing pattern, shirt, dress, bag, pillow, patch or other physical product.
Product Details
Formats: .dst, .jef, .pec, .vip, .hus, .pes, .exp, .sew, .dat, vp3, xxx
INSTRUCTION
Technique: WATERCOLOR machine embroidery. Use light-colored fabrics.
What Is Shown in the Design?
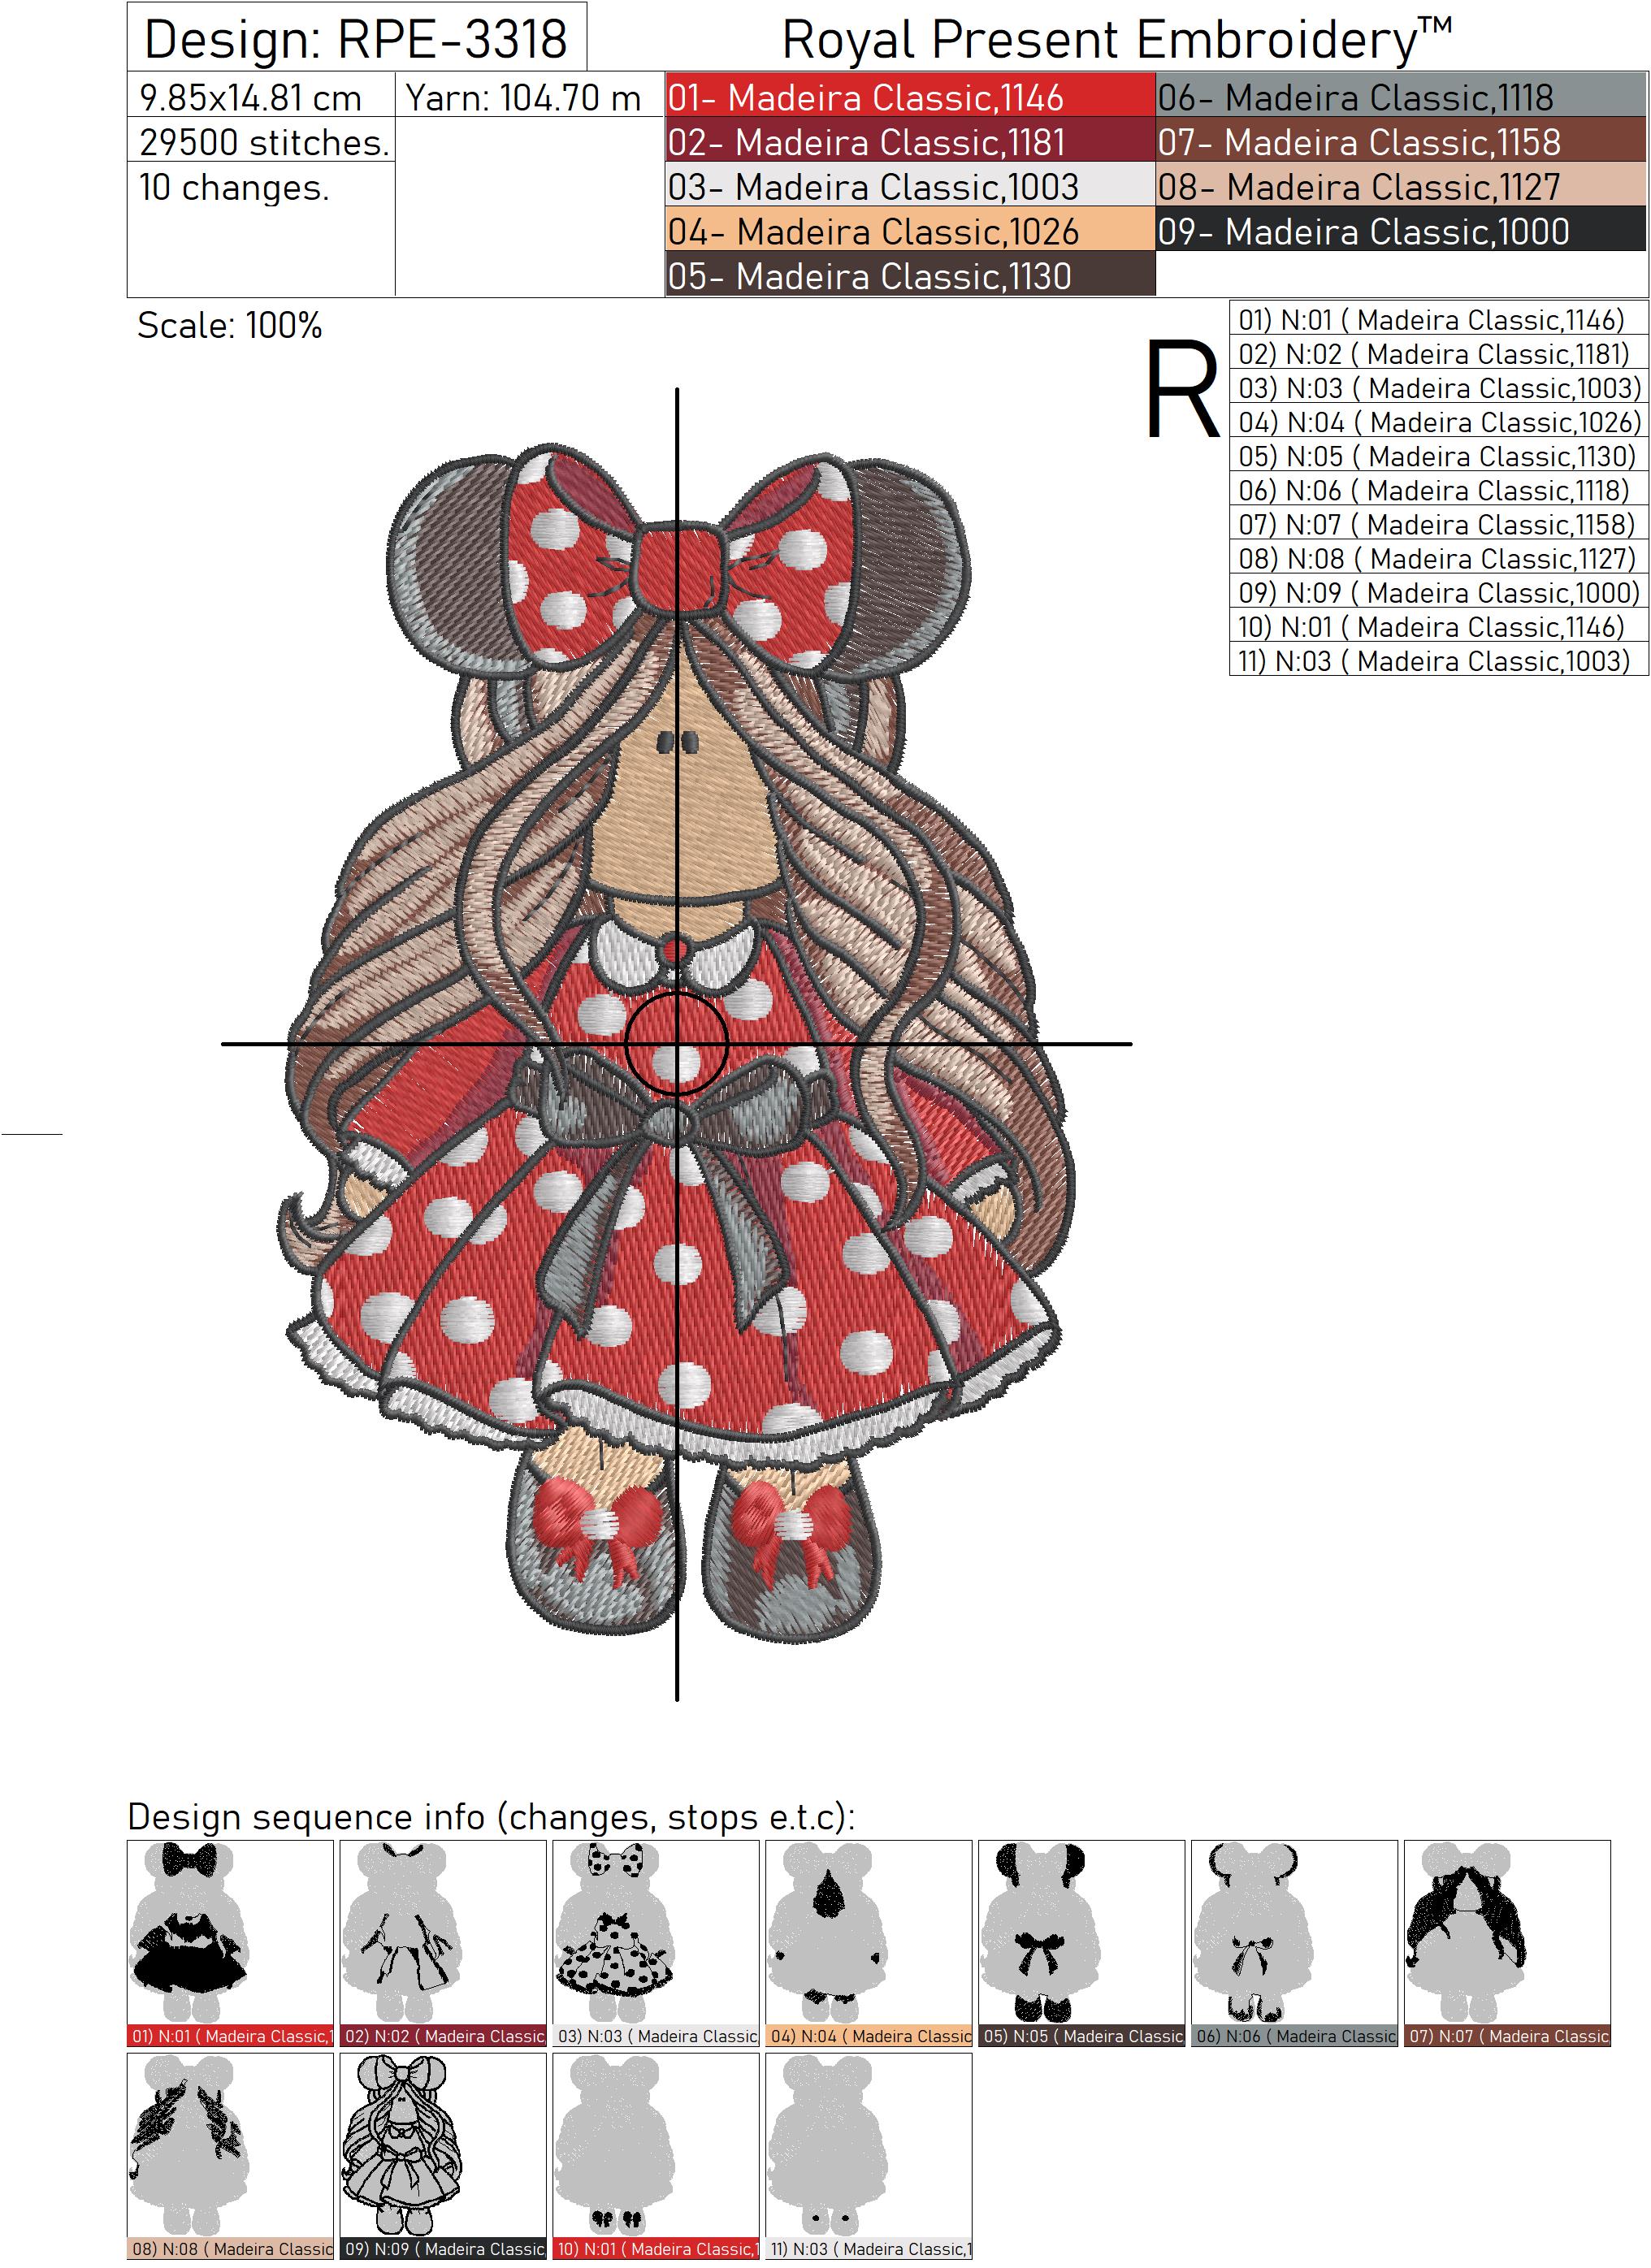
The composition shows a faceless storybook-style doll with long wavy brown hair. Round black ears and a large red bow with white polka dots form the upper part of the design. The doll wears a coordinating red polka-dot dress, dark waist bow and black shoes with small red bows.
The tall vertical silhouette makes the doll a strong central motif. It works best when enough open space is left around the ears, hair, dress and shoes.
This is a regular multicolor machine embroidery design. It is not an applique, freestanding lace design, ITH stuffed doll or automatic in-the-hoop assembly project.
Why Is Light-Colored Fabric Recommended?
The watercolor technique uses soft color transitions and areas of lighter stitch coverage. The background fabric can remain visible through some parts of the design and becomes part of the finished visual effect.
White, ivory, cream, pale beige, light gray and soft pink provide a predictable background. On black, navy or dark brown fabric, the ears, shoes, outlines and dark hair sections may disappear while the pale stitched areas may change color.
Test the complete thread palette on the actual fabric before embroidering a finished garment, bag or felt figure.
Which Hoop Fits Each Size?
The 98.5x148.1mm version fits within a nominal 130x180 mm or 5x7 inch embroidery field when the machine supports the complete listed dimensions.
The 108.3x162.8mm version also fits within most nominal 130x180 mm fields, but the machine’s real usable area should still be checked.
The 119.0x179.0 mm version is very close to the 180 mm height limit. It may fit a nominal 130x180 mm hoop only when the machine supports the full 179.0 mm stitching height without an additional safety restriction near the edge.
The 130.9x196.9 mm version requires a larger field. A nominal 140x200 mm hoop may be suitable if the machine supports the complete listed width and height.
None of the four sizes fits a standard 100x100 mm or 4x4 inch embroidery field. Compare the exact file dimensions with the machine’s real embroidery area instead of relying only on the commercial hoop name.
Best Projects for the Minnie Doll
- girls’ shirts, dresses and costume panels;
- hoodies, sweatshirts and jacket backs;
- tote bags, backpacks and gift bags;
- decorative pillows and cushion fronts;
- quilt blocks and fabric wall panels;
- covers for albums and fabric activity books;
- flat felt play dolls and story-board figures;
- slightly padded soft dolls;
- finger puppets and home-theater characters;
- hanging ornaments and bag charms.
Which Fabric Works Best for Regular Embroidery?
Stable cotton, linen, twill, gabardine, quilting cotton, sweatshirt fabric and smooth canvas are suitable choices. The material must support between 28269 and 42074 stitches without stretching, sagging or pulling inward.
For a lightweight shirt or dress, select the first or second size. The third and fourth sizes are generally better suited to sweatshirts, bags, pillows, fabric panels and separate felt projects.
Avoid beginning with transparent, loosely woven or highly elastic fabric. The watercolor fills, white dots and fine outlines remain clearer on a smooth stable surface.
Stabilizer for Clothing, Bags and Pillows
For stable cotton, linen, gabardine or twill, use medium-weight cutaway stabilizer. Permanent cutaway support is especially useful for clothing, bags and pillows that will be handled or washed.
For a T-shirt, use no-show mesh or lightweight cutaway stabilizer. Do not stretch the knit while hooping. Very soft jersey can be supported with a light fusible stabilizer before hooping.
For a hoodie or sweatshirt, use medium cutaway stabilizer and keep the embroidery away from pockets, zippers, ribbing, bulky seams and the neckline.
Placement on Girls’ Clothing
Print a full-size placement template before hooping. The doll can be positioned on the center front of a shirt or dress, on the back of a sweatshirt or as a large lower-front accent.
Make sure the ears and bow are not crowded by the neckline. Keep the shoes and lower edge of the dress away from waist ribbing, pockets and thick hems.
Compare the actual design height with the garment. A file may fit the machine hoop but still be visually too large for a small child’s shirt.
Placement on a Bag or Pillow
For a tote bag or backpack, embroider the flat front panel before assembling the project whenever possible. Leave enough room for handles, pockets, zippers, side seams and boxed corners.
On a pillow, use the doll as a central feature. Mark the finished seam allowance before embroidering so the ears, hair, dress and shoes remain inside the visible pillow front.
How to Make a Flat Felt Play Doll
The finished embroidery can be turned into a flat felt figure that can be held, moved around a play scene, attached to a felt board or used as a character in a fabric activity book.
For an actively handled figure, ordinary cardboard is not the best internal support. Cardboard can crease, absorb moisture, separate into layers and pull away from the fabric. A textile stiffener between two felt layers produces a more durable result.
This is an additional sewing idea. The supplied embroidery files do not include a separate back piece, cutting pattern, perimeter seam or automatic ITH assembly sequence.
- Embroider the selected size on light-colored dense felt. Place medium-weight cutaway stabilizer under the felt.
- After embroidery, trim only the excess stabilizer around the design. Leave the cutaway support directly beneath the stitches.
- Prepare a second layer of plain felt for the back of the figure.
- Place Decovil Light, Peltex, Timtex, firm bag stabilizer or another textile stiffener between the two felt layers.
- Cut the internal stiffener approximately 3–5 mm smaller than the planned outer silhouette so it does not create a thick exposed edge.
- Temporarily secure the layers with fusible web or a thin, even layer of suitable fabric adhesive.
- Stitch through the layers around a smooth outer silhouette approximately 3–5 mm away from the outer embroidery stitches.
- Do not follow every tiny curve of the hair, bows or shoes. A slightly simplified outline creates a stronger and neater edge.
- Cut out the figure, leaving approximately 2–3 mm of felt outside the connecting seam.
- Check the complete perimeter. The felt layers should remain securely joined and the stiffener should not be visible.
Recommended construction: embroidered felt on the front, a thin textile stiffener in the center, plain felt on the back and a connecting seam around the perimeter. This creates a flat figure that holds its shape without a paper or cardboard layer.
Can the Embroidery Simply Be Glued to Felt?
Yes, for a decorative figure that will not be handled often. For a play figure, adhesive alone is less reliable because the edges may begin to separate over time.
Use fusible web or fabric adhesive as temporary or supplementary fixation, then secure the layers with a perimeter seam.
Avoid applying a thick layer of hot glue. It can form hard lumps, show through pale felt, make sections brittle and create an uneven outer edge.
Can Cardboard Be Used Inside the Doll?
Firm cardboard can be used for a display figure, party centerpiece or photography prop that will remain dry and will not be bent repeatedly.
For a child’s handled figure, textile stiffener is a better choice. It tolerates bending and accidental drops more effectively, does not separate into paper layers and can be completely enclosed between the felt pieces.
How to Make a Slightly Padded Flat Doll
For a softer result, replace the firm internal stiffener with a thin layer of fusible fleece or low-loft batting. The figure will remain mostly flat but will feel softer in the hand.
- Embroider the front on stable light-colored felt.
- Cut a matching back from plain felt.
- Place a thin layer of fusible fleece or low-loft batting between them.
- Temporarily secure the three layers.
- Stitch around a smooth outer silhouette.
- Cut out the figure with a narrow felt border.
Do not use thick batting. Excessive loft can round the embroidered surface, distort the outlines and make the figure difficult to cut neatly.
How to Make a Fully Stuffed Soft Doll
A more dimensional doll can be made by sewing the embroidered front to a separate woven-fabric back and adding a small amount of polyester fiberfill.
- Embroider the design on stable cotton, linen or twill with cutaway stabilizer.
- Mark a smooth silhouette approximately 7–10 mm away from the outer embroidery stitches.
- Cut the embroidered front and a matching back piece.
- Place the pieces right sides together and sew around the perimeter with a short 2–2.5 mm straight stitch.
- Leave an opening approximately 4–5 cm long along a side or the lower part of the dress.
- Clip inward curves and carefully trim outward curves without cutting through the seam.
- Turn the doll right side out and shape the curves with a blunt turning tool.
- Add small portions of polyester fiberfill or hollow-fiber stuffing.
- Do not overstuff the doll. The embroidered front should remain relatively flat and undistorted.
- Close the opening by hand with an invisible ladder stitch.
More Ideas for the Finished Figure
- Felt-board character: attach a securely sewn hook-and-loop textile tab to the back.
- Finger puppet: add a felt pocket to the back instead of a fully closed rear layer.
- Home-theater character: enclose a smooth wooden stick securely between the layers.
- Fabric activity book: attach the doll permanently or make it removable with a textile fastener.
- Hanging ornament: insert a textile loop between the layers before stitching the perimeter.
- Bag charm: add a reinforced loop and suitable clip.
- Room decoration: mount the flat figure inside a shadow box or fabric wall scene.
Safety of a Handmade Play Figure
A handmade project is not automatically a certified children’s toy. Its suitability depends on the child’s age, the materials used, the strength of the seams and the way any accessories are attached.
For young children, do not add loose buttons, beads, magnets, charms, wire or other small detachable parts. Use suitable fabric adhesive only as directed by its manufacturer and allow it to cure completely before handling.
Inspect the figure regularly if it will be used for play. Stop using it if the layers separate, the seam breaks or the internal stiffener becomes exposed.
Thread and Background Color Ideas
For the familiar color scheme, use bright red, white, black, dark brown, chestnut and warm skin-tone shades. Several brown tones help preserve the depth and direction of the long hair.
White, ivory, pale pink and light gray backgrounds provide good contrast with the black ears, red bow and brown hair. On red fabric, the dress may disappear; on black fabric, the ears, shoes and outlines may become difficult to see.
For an alternative palette, replace red with pink, lilac, turquoise or blue while keeping enough contrast between the bow, dress, polka dots and background.
How to Prevent Puckering and Outline Shifting
- do not stretch fabric, knit or felt while hooping;
- use cutaway stabilizer larger than the hoop opening;
- do not select a large size for very thin fabric;
- support heavy garments and bag panels near the machine;
- reduce the machine speed around the face, hair and small bows;
- check upper-thread and bobbin tension before the final project;
- test the design on the same fabric, felt and stabilizer combination.
Needle, Thread and Machine Setup
Use a fresh 75/11 embroidery needle for cotton, linen, gabardine, sweatshirt fabric and standard felt. An 80/12 needle may be appropriate for dense multilayer felt or a heavy bag panel.
Quality polyester embroidery thread is practical for clothing, bags and handled felt figures. If outlines begin shifting away from the filled areas, reduce the stitching speed and review the hooping and stabilization.
Do Not Resize the Design Yourself
Do not reduce or enlarge the embroidery files independently. Changing the size without professional stitch recalculation can affect density, underlay, pull compensation, the shape of the polka dots, small facial details and alignment between the filled areas and outlines.
Royal Present is not responsible for embroidery quality after the customer independently resizes, edits or converts the supplied files.
Related Doll Designs and Collections
About the Designer
This design is part of the Royal Present Embroidery doll collection created by Ludmila Konovalova, machine embroidery designer.
FAQ
Is this a finished doll or a machine embroidery design?
This product contains machine embroidery files. A finished doll, felt play figure, stuffed toy, shirt, dress, bag, pillow or other physical product is not included.
Is this an applique or an ITH doll project?
No. It is a regular multicolor machine embroidery design created using the watercolor technique. It does not include applique placement, a separate back piece, cutting lines or an automatic in-the-hoop assembly sequence.
Why is light-colored fabric recommended?
The watercolor technique uses soft shading and lighter stitch coverage. Dark fabric can show through pale areas, change the intended colors and hide the black ears, shoes and outlines.
Can I make a flat felt play doll from the embroidery?
Yes. Embroider the design on dense felt, add textile stiffener and a plain felt back, stitch the layers around a smooth silhouette and cut out the figure with a narrow felt border.
Can I glue the embroidered doll to cardboard?
Cardboard can be used for a dry display figure, but textile stiffener is preferable for a handled play figure. Cardboard can absorb moisture, crease, separate into layers and pull away from the fabric.
Is fabric adhesive enough to join the felt layers?
Adhesive may be sufficient for a decorative figure, but a perimeter seam is more reliable for a figure that will be handled. Use adhesive as supplementary fixation rather than the only connection.
How much felt should remain around the embroidery?
Place the connecting seam approximately 3–5 mm away from the outer embroidery stitches, then cut the felt approximately 2–3 mm outside that seam.
Can I make the felt figure slightly soft?
Yes. Place a thin layer of fusible fleece or low-loft batting between the felt layers. Avoid thick padding because it can round and distort the embroidered surface.
Which sizes may fit a 130x180 mm or 5x7 inch hoop?
The 98.5x148.1mm and 108.3x162.8mm versions fit within a nominal 130x180 mm field. The 119.0x179.0 mm version is close to the height limit and requires confirmation of the machine’s exact usable area.
Which hoop is needed for the largest size?
The largest file measures 130.9x196.9 mm. A nominal 140x200 mm hoop may be suitable when the machine supports both complete listed dimensions.
What stabilizer should I use for felt?
Use medium-weight cutaway stabilizer. Trim only the excess around the finished embroidery and leave the support directly beneath the stitches, especially when making a separate felt figure.
Can I turn the design into a fully stuffed soft doll?
Yes. Sew the embroidered front to a matching woven-fabric back, turn the project right side out and add a small amount of fiberfill. This is a separate sewing project, not an automatic ITH doll file.
Can I resize the embroidery files myself?
No. Independent resizing can damage density, underlay, pull compensation, small details and outline registration. When another size is required, use the professional Resize of Design service.
Is a test stitch necessary?
Yes. A test confirms the actual hoop fit, stabilizer strength, thread contrast, watercolor coverage, outline registration and the behavior of the selected fabric or felt.

 Get Sign-In Link
 Login with Google
 Login with Facebook
 Login with Amazon
 Login with Paypal