Tilda Doll with Pumpkin Machine Embroidery Design - 4 sizes
By knowing the speed of your embroidery machine, you can find out how long it will take to embroider a design.
To use the embroidery calculator, click on the number of stitches in the product description.
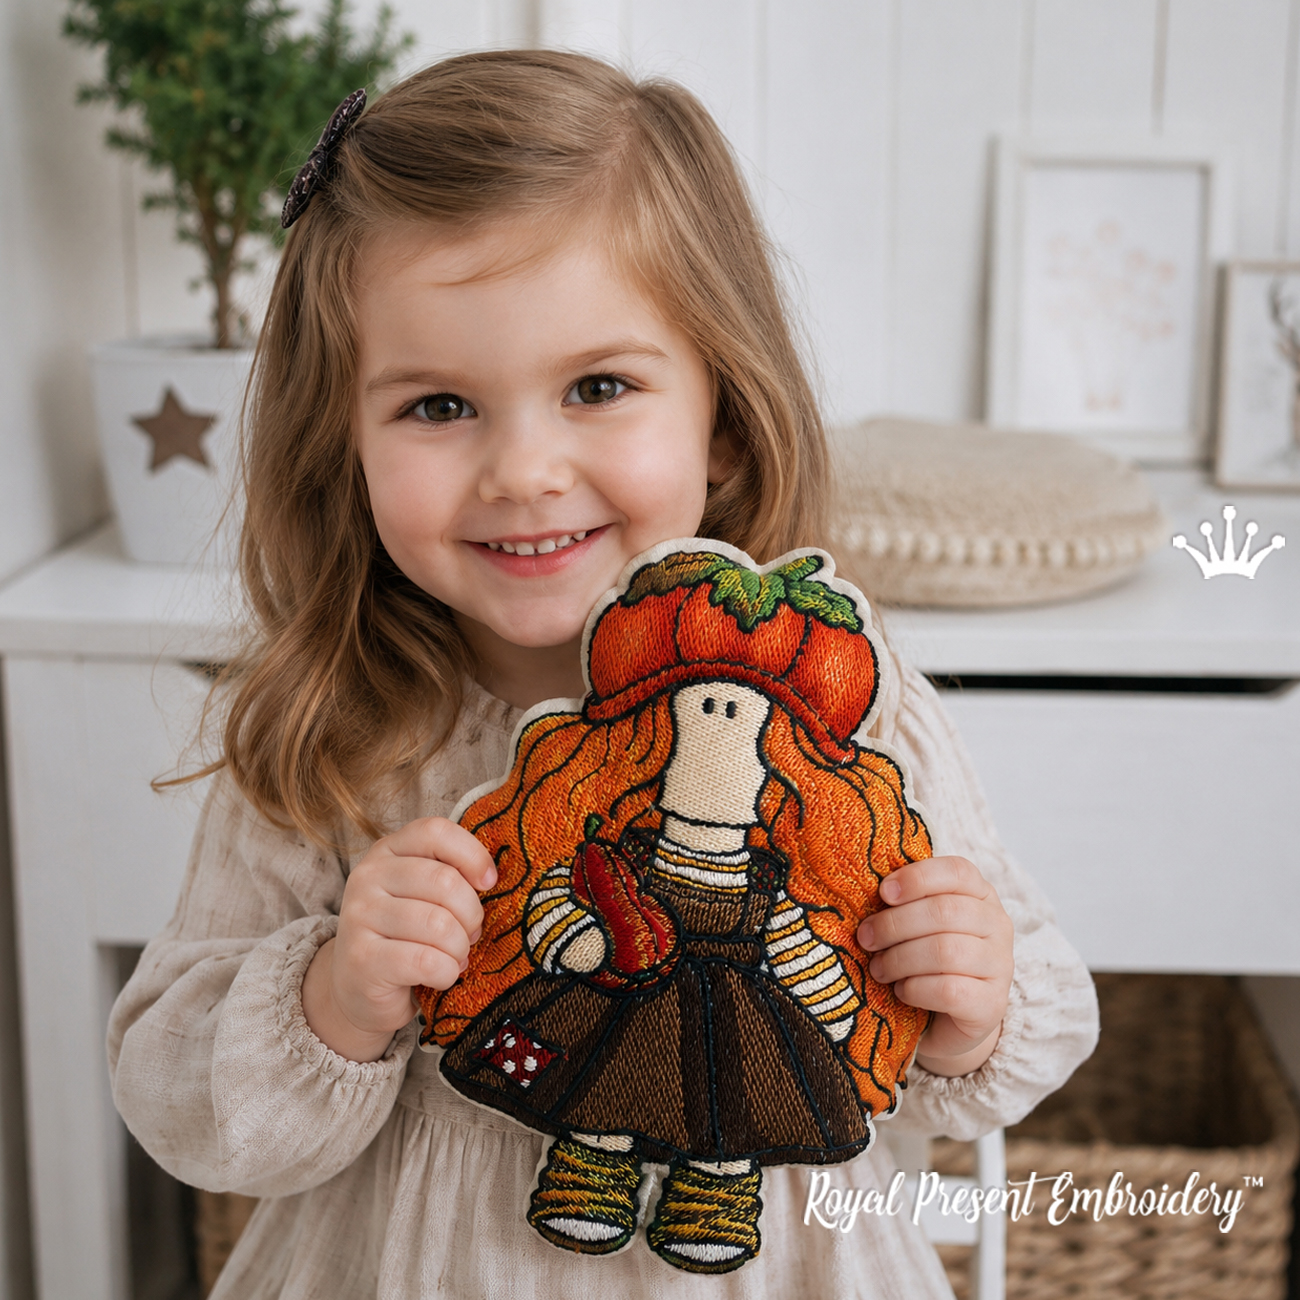
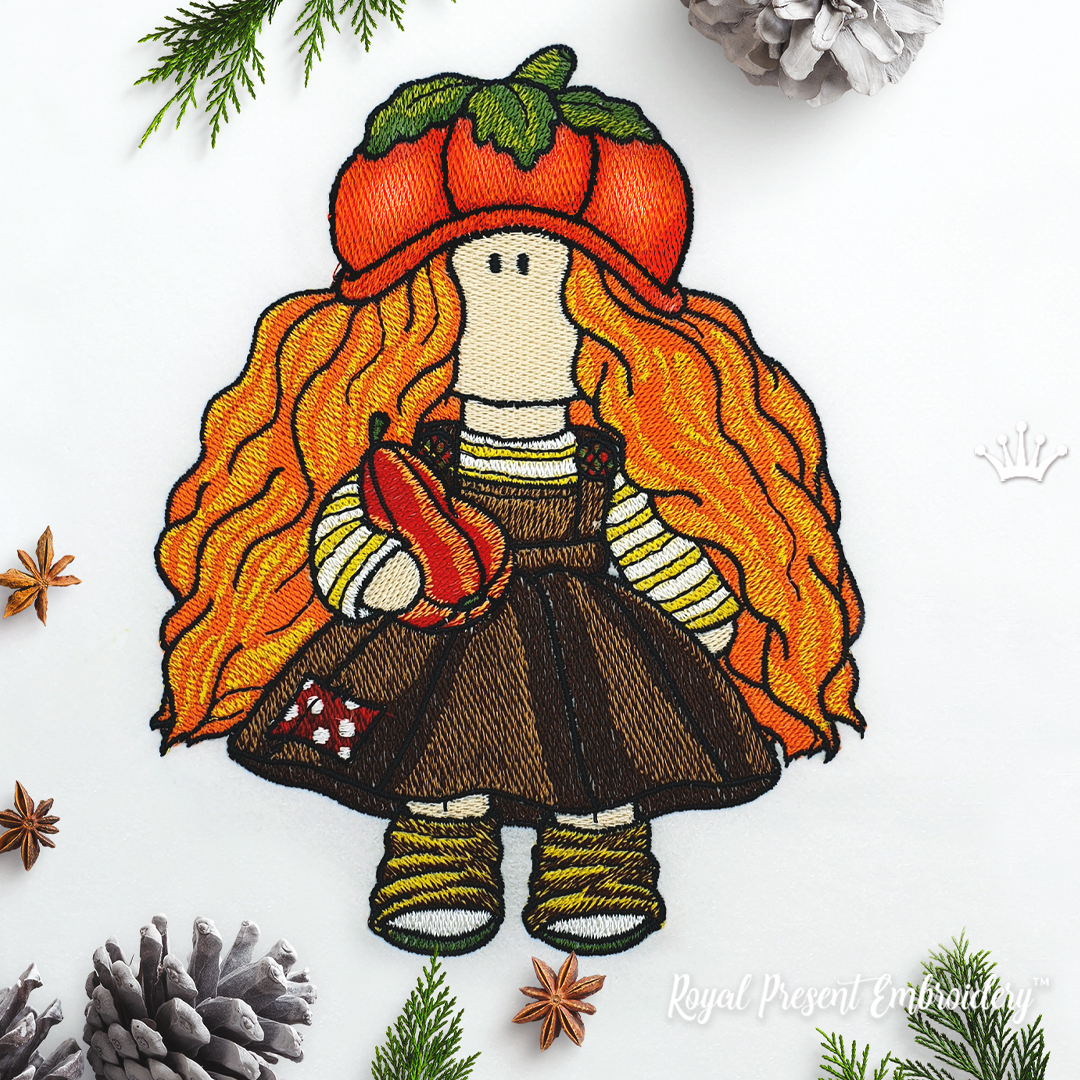
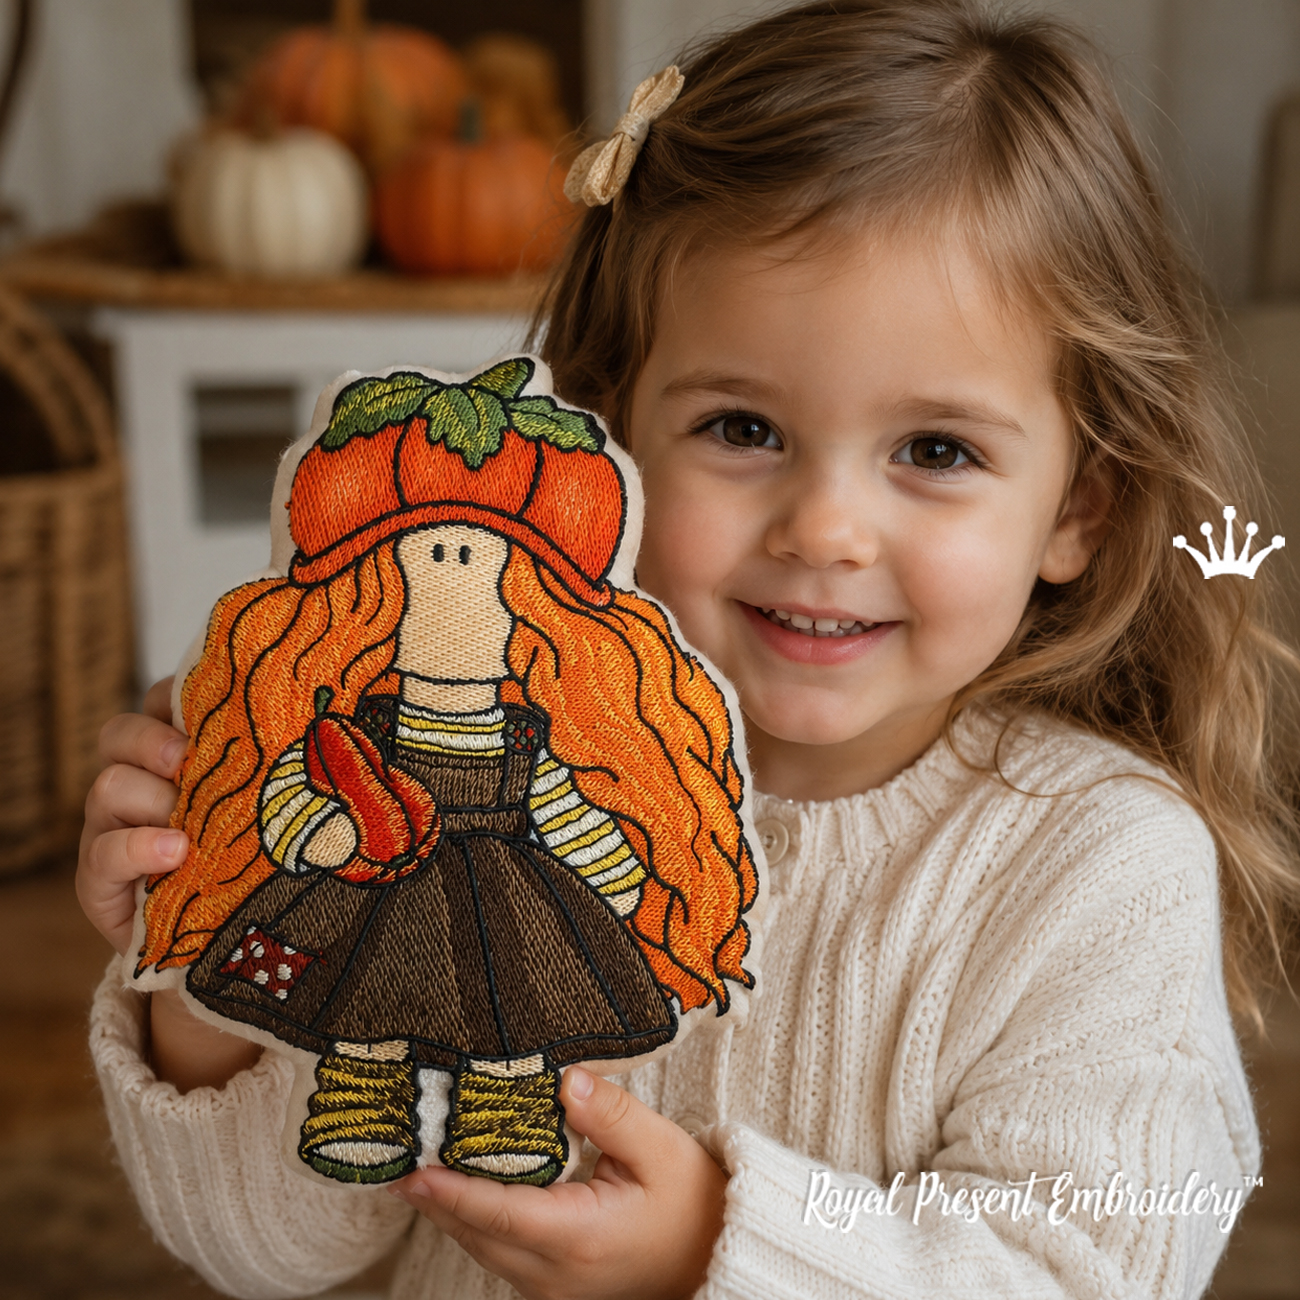
Tilda Doll with Pumpkin Machine Embroidery Design features a whimsical faceless doll with long orange hair, striped sleeves and a pumpkin-shaped hat. The warm watercolor-style composition is supplied in four sizes for girls’ shirts, hoodies, trick-or-treat bags, tote bags, decorative pillows, autumn wall panels and handmade soft fabric dolls.
The design uses the WATERCOLOR machine embroidery technique with soft shading and areas of lighter stitch coverage. White, ivory, cream, pale beige, light gray, soft peach and other light-colored fabrics provide the clearest color transitions.
This product contains machine embroidery files for an embroidery machine. It is not a finished doll, stuffed toy, sewing pattern, shirt, bag, pillow, patch or physical product.
Product Details
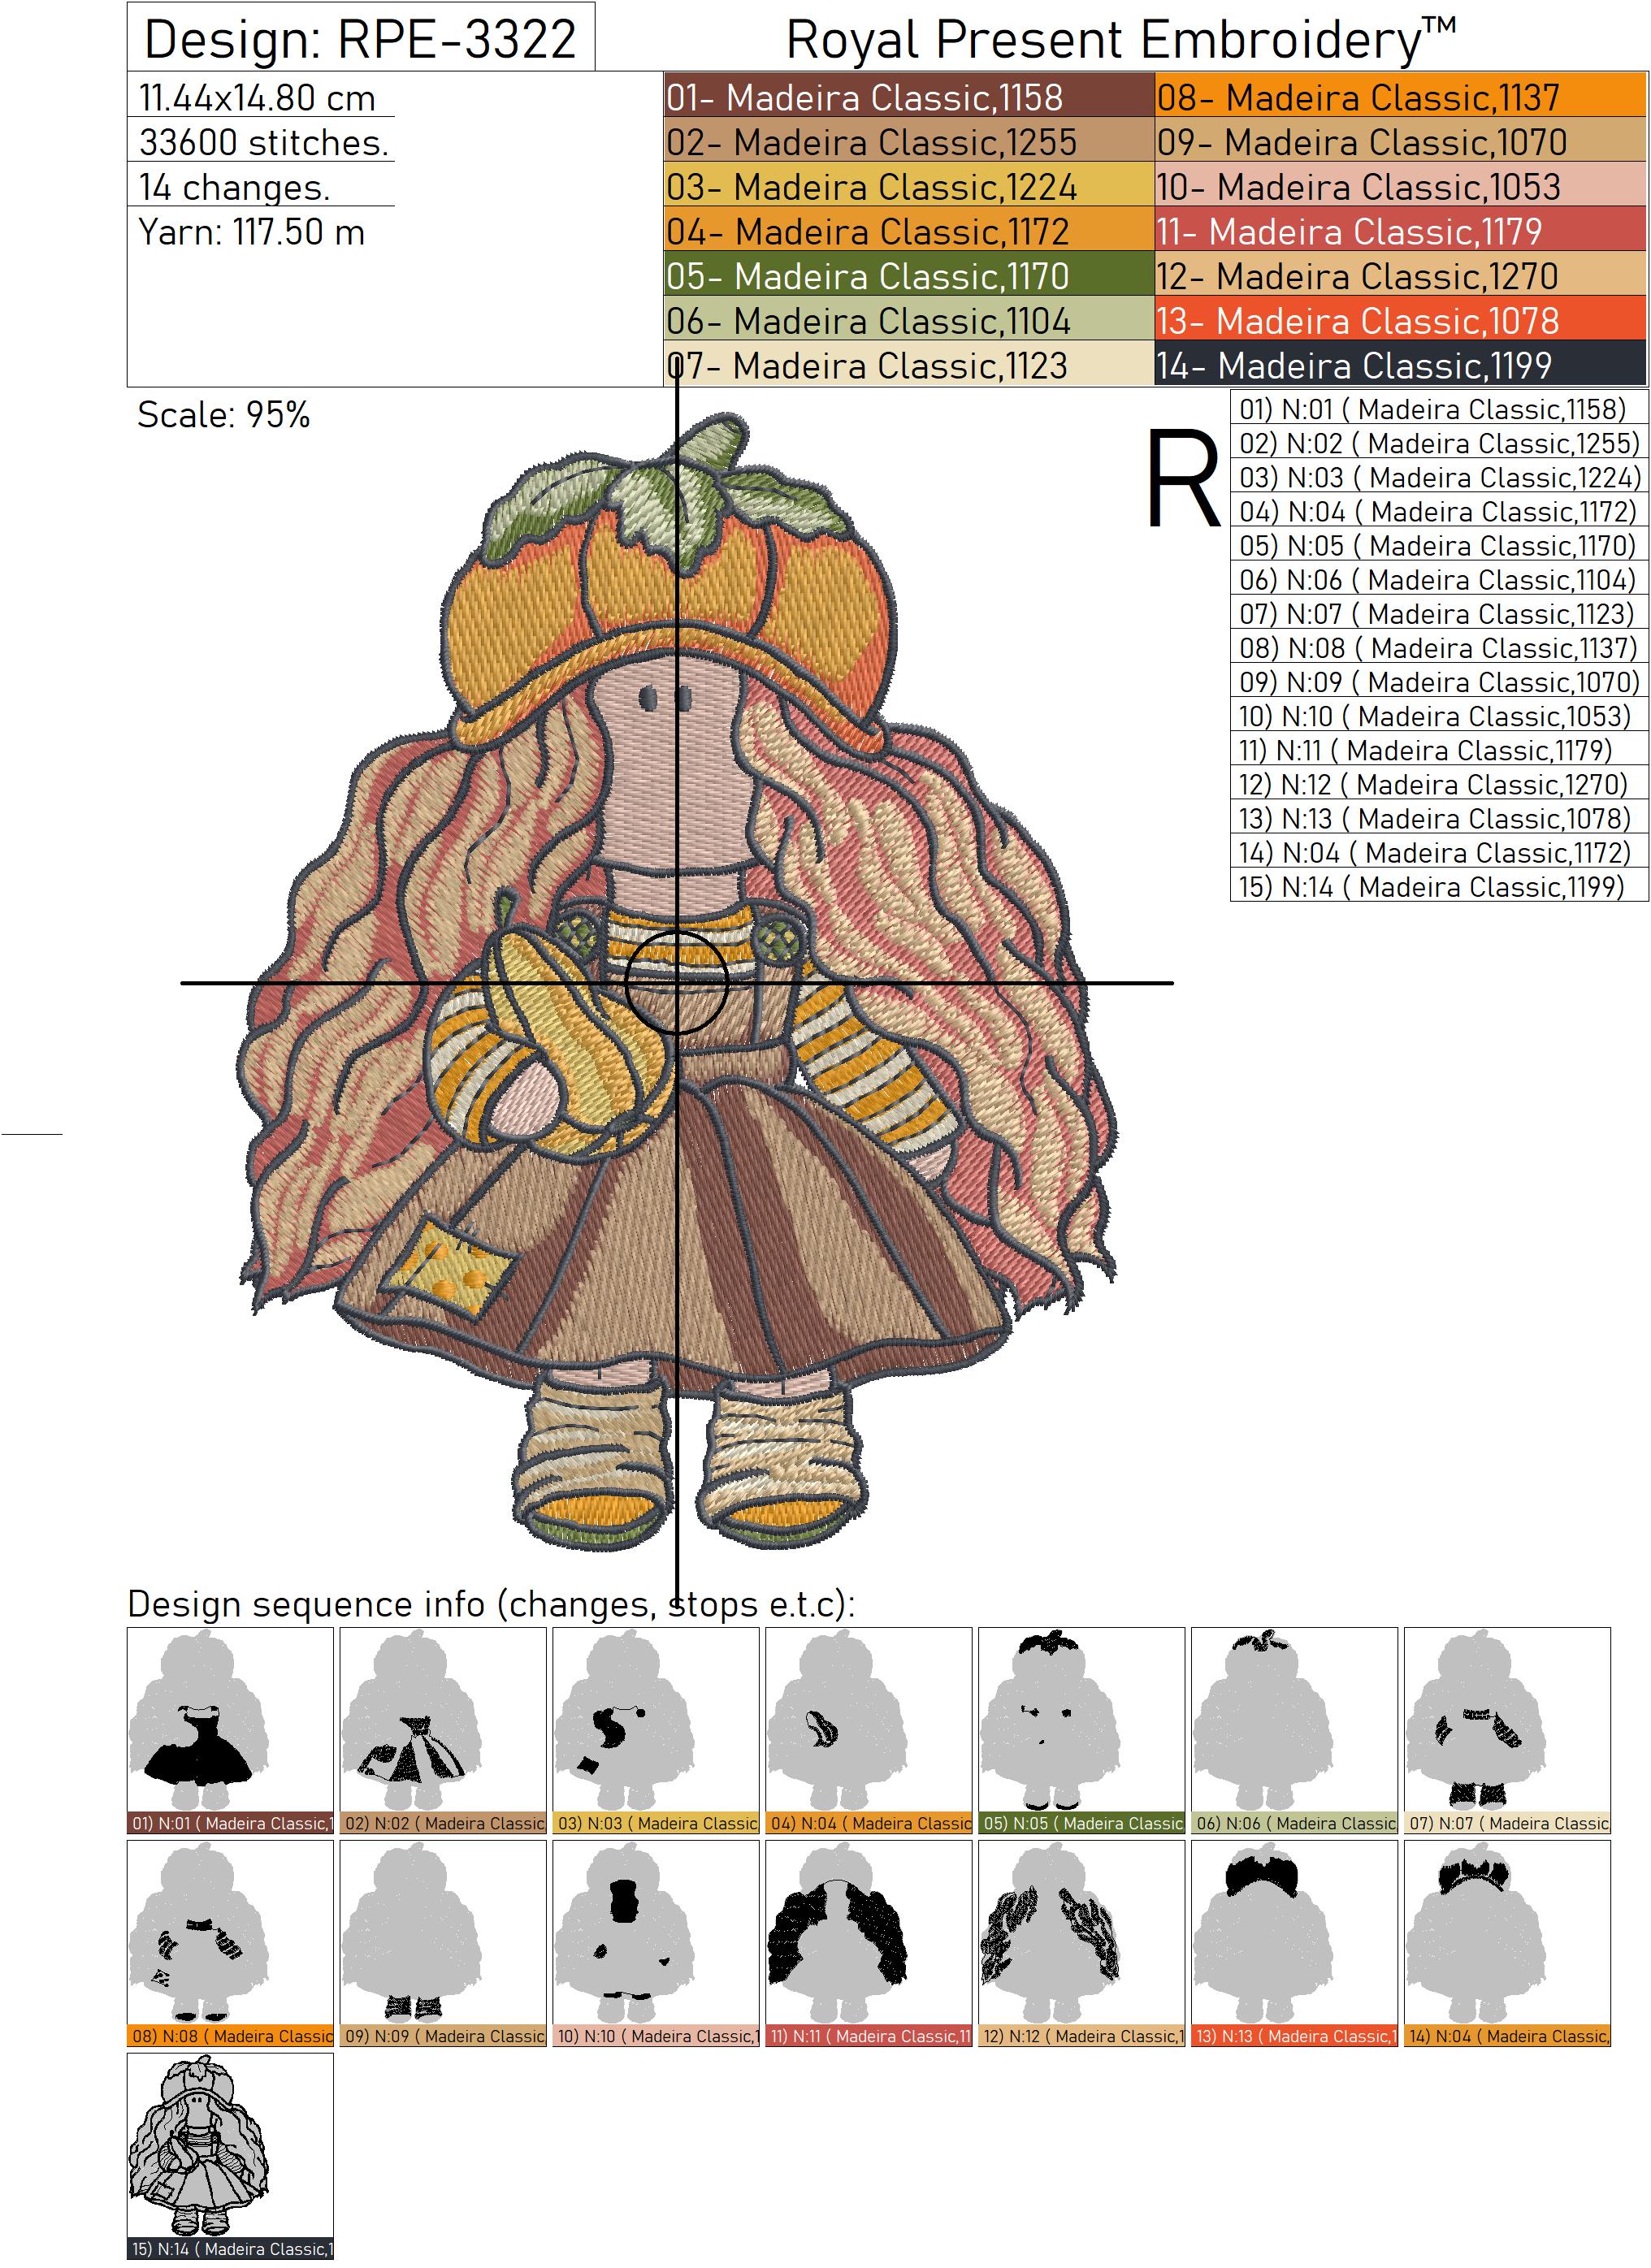
Size: 114.4x148.0 mm (4.50x5.83"), Stitches: 33329
Size: 125.8x162.7 mm (4.95x6.41 "), Stitches: 38159
Size: 138.3x179.0 mm (5.44x7.05"), Stitches: 43768
Size: 153.5x198.6mm (6.04x7.82"), Stitches: 50996
Formats: .dst, .jef, .pec, .vip, .hus, .pes, .exp, .sew, .dat, vp3, xxx
Technique: WATERCOLOR machine embroidery recommended for light-colored fabric.
What Is Shown in the Design?
The composition shows a faceless storybook-style doll with long wavy orange hair and a tall hat shaped like a pumpkin. Striped sleeves, a dark autumn dress and warm pumpkin colors create a gentle seasonal character suitable for autumn and child-friendly Halloween projects.
This is a regular multicolor machine embroidery design. It is not an applique, freestanding lace design, stuffed ITH doll or automatic in-the-hoop sewing project.
Why Is Light-Colored Fabric Recommended?
The watercolor technique uses lighter stitch coverage and soft transitions between neighboring shades. The background fabric remains visually involved in the finished embroidery.
Black, navy, dark brown or heavily patterned fabric may show through pale stitched areas, change the intended thread colors and hide dark outlines. A calm light background allows the face area, hair, pumpkin hat, clothing and fine contours to remain clear.
Before embroidering the final item, test the complete color sequence on the same fabric and stabilizer that you plan to use.
Which Hoop Fits Each Size?
The 114.4x148.0 mm version fits within a nominal 130x180 mm or 5x7 inch embroidery field when the machine supports the complete listed dimensions.
The 125.8x162.7 mm version may also fit a nominal 130x180 mm field. Its width is close to the 130 mm limit, so check the machine’s exact usable embroidery area before transferring the file.
The 138.3x179.0 mm version requires a field that supports at least the complete listed dimensions. A nominal 140x200 mm hoop may be suitable when the machine provides the required usable width.
The 153.5x198.6 mm version requires a larger embroidery field. A nominal 160x240 mm hoop or another compatible field may be suitable if it supports both listed sides.
None of the four sizes fits a standard 100x100 mm or 4x4 inch embroidery field. Compare the exact millimeter dimensions with your machine’s real stitching area rather than relying only on the commercial hoop name.
Best Projects for the Pumpkin Doll
- girls’ shirts and autumn dresses;
- hoodies, sweatshirts and costume panels;
- trick-or-treat and candy bags;
- canvas tote bags and backpacks;
- decorative pillows and cushion fronts;
- quilt blocks and fabric wall panels;
- gentle Halloween and pumpkin-season gifts;
- small handmade soft fabric dolls.
Which Fabric Works Best?
Stable cotton, linen, twill, gabardine, quilting cotton, sweatshirt fabric and smooth light canvas are suitable choices. The fabric must support between 33329 and 50996 stitches without sagging, stretching or pulling inward.
For lightweight clothing, select the first or second size. The larger versions are generally better suited to sweatshirts, bags, pillows, wall panels and separate fabric pieces than to very thin jersey.
Avoid beginning with transparent, loosely woven, deeply textured or highly elastic fabric. The fine outlines and watercolor shading remain clearer on a smooth stable surface.
Stabilizer for Woven Fabric
For stable cotton, linen, gabardine or twill, use medium-weight cutaway stabilizer. Firm tear-away support can be tested for a framed panel, but permanent cutaway backing is safer for clothing, pillows, bags and soft dolls that will be handled.
The stabilizer should extend beyond the complete hoop opening. Hoop the fabric evenly without stretching it or pulling the grain out of alignment.
Stabilizer for Shirts and Hoodies
For a T-shirt, use no-show mesh or lightweight cutaway stabilizer. Do not stretch the knit while hooping. Very soft jersey can be supported with a light fusible stabilizer before it is placed in the hoop.
For a hoodie or sweatshirt, use medium cutaway stabilizer. Keep the doll away from pockets, zippers, ribbing, bulky seams and the neckline.
For children’s clothing, a soft embroidery backing can be applied over the finished reverse side if the stabilizer or stitches may touch the skin.
Placement on Clothing
Print a full-size placement template before hooping. The vertical design can be placed on the center front, the back of a sweatshirt or as a lower-front accent.
Make sure the pumpkin hat is not crowded by the neckline or hood. The bottom of the dress should remain clear of pockets, waist ribbing and thick hems.
Compare the actual design dimensions with the garment. The largest available size may look disproportionate on a small child’s shirt.
Placement on a Bag or Pillow
For a tote bag or trick-or-treat bag, embroider the flat front panel before assembling the bag whenever possible. Leave enough room for handles, pockets, side seams, boxed corners, zippers and the upper hem.
On a pillow, use the doll as a central feature with open space around the hair and pumpkin hat. Mark the finished seam allowance before embroidering so no part of the composition disappears into the pillow seams.
How to Make a Soft Fabric Doll from the Embroidery
If you know basic sewing, the finished embroidery can be turned into a small stuffed fabric doll. It can be used as an autumn decoration, a handmade gift or part of a gentle Halloween display.
This is an additional sewing idea. The embroidery file is not an ITH doll project and does not contain a separate back piece, cutting pattern, in-the-hoop seam or automatic assembly sequence.
- Embroider the design on stable cotton, linen, twill or another non-stretch woven fabric. Use suitable cutaway stabilizer.
- After embroidery, press the fabric carefully from the reverse side through a pressing cloth. Do not flatten the embroidery by pressing a hot iron directly onto the front.
- Mark a smooth cutting line around the outside silhouette, approximately 7–10 mm away from the embroidery.
- Simplify very small curves around the hair, leaves and pumpkin hat. A slightly smoother outline will be easier to sew, clip, turn and stuff.
- Cut out the embroidered front piece along the marked line.
- Place the embroidered piece right side down on the fabric selected for the back. Cut a matching second piece.
- Place the two pieces right sides together and sew around the perimeter with a short 2–2.5 mm straight stitch.
- Leave an opening approximately 4–5 cm long. A side or lower section of the skirt is usually the easiest place for turning and closing.
- Clip the seam allowance at inward curves without cutting through the stitching. Carefully trim or notch outward curves so the edge lies smoothly after turning.
- Turn the doll right side out. Gently shape the curves with a wooden turning stick, a blunt paintbrush handle or another non-sharp tool.
- Add small portions of polyester fiberfill or hollow-fiber stuffing. Fill the narrow upper areas first, followed by the hair, body and skirt.
- Do not overstuff the doll. The embroidered front should remain relatively flat without stretching the fabric or distorting the stitch registration.
- Close the opening by hand with an invisible ladder stitch.
Practical tip: use a plain medium-weight woven fabric for the back. When both the embroidered front and the backing fabric are very thick or stiff, small curves become more difficult to turn and fill evenly.
Remove only the excess cutaway stabilizer around the embroidery. Leave the support directly beneath the stitched design because it helps the embroidered front retain its shape during stuffing.
A paper template made from the planned outer silhouette can help you check the seam allowance, turning opening and final shape before cutting the embroidered fabric.
This soft doll should be treated primarily as a decorative handmade project. For an item intended for a young child, do not add buttons, beads, charms or other small detachable parts, and follow the applicable toy-safety requirements in your country.
Can the Doll Be Embroidered on a Towel?
A smooth cotton towel or flat decorative towel panel provides the clearest result. Deep terry loops can hide lighter watercolor stitches, striped sleeve details and fine outlines.
For terry fabric, use cutaway stabilizer underneath and water-soluble topping above the towel. Test the design first to confirm that the pale stitching remains visible above the pile.
Thread Color Ideas
For the original autumn appearance, use pumpkin orange, rust, golden yellow, olive green, warm brown, cream and charcoal. Several orange shades help separate the pumpkin hat from the doll’s hair.
For a softer vintage palette, combine terracotta, mustard, sage, cocoa brown and antique cream. For a brighter children’s project, use vivid orange, yellow, green and warm brown.
Do not replace every neighboring shade with one color without testing. The differences between similar thread colors create dimension in the hair, pumpkin, sleeves and dress.
How to Prevent Puckering and Outline Shifting
- do not stretch woven or knit fabric while hooping;
- use cutaway stabilizer larger than the hoop opening;
- avoid stitching a large size on very thin fabric;
- support heavy garments and bag panels near the machine;
- reduce the machine speed around fine details and outlines;
- check upper-thread and bobbin tension before the final project;
- test the complete design on matching fabric and stabilizer.
Needle, Thread and Machine Setup
Use a fresh 75/11 embroidery needle for cotton, linen, gabardine and sweatshirt fabric. An 80/12 needle may be more suitable for heavy canvas or layered bag panels.
Quality polyester embroidery thread is practical for clothing, bags and other washable projects. If the dark outlines begin shifting away from the watercolor fills, reduce the machine speed and review the fabric stabilization.
Do Not Resize the Design Yourself
Do not reduce or enlarge the embroidery files independently. Changing the size without professional stitch recalculation can damage watercolor coverage, density, underlay, pull compensation, small details and alignment between the filled areas and dark outlines.
Royal Present is not responsible for embroidery quality after the customer independently resizes, edits or converts the supplied files.
Related Doll Designs and Collections
- Autumn series companion: Autumn Tilda Doll Machine Embroidery Design - 4 Sizes.
- Winter series companion: Winter Tilda Doll Machine Embroidery Design - 4 Sizes.
- Browse the character collection: Dolls Machine Embroidery Designs.
- More seasonal motifs: Halloween Machine Embroidery Designs.
About the Designer
This design was created for Royal Present Embroidery by Ludmila Konovalova, machine embroidery designer.
FAQ
Is this a finished doll or a machine embroidery file?
This product contains machine embroidery files. A finished doll, stuffed toy, shirt, bag, pillow, patch or other physical product is not included.
Is this an applique or an ITH doll project?
No. It is a regular multicolor machine embroidery design created in a watercolor style. It does not contain applique fabric placement, a separate back piece or an automatic in-the-hoop sewing sequence.
Why should the design be stitched on light fabric?
The watercolor technique uses lighter stitch coverage and soft color transitions. Dark fabric can show through pale areas, change the intended thread colors and hide the darker outlines.
Which sizes may fit a 130x180 mm or 5x7 inch hoop?
The 114.4x148.0 mm and 125.8x162.7 mm versions may fit a nominal 130x180 mm field. Check the machine’s exact usable area because the second size is close to the width limit.
Which hoop is needed for the largest size?
The largest file measures 153.5x198.6 mm. A nominal 160x240 mm hoop or another larger field may be suitable when the machine supports both listed dimensions.
Can I turn the embroidered design into a soft fabric doll?
Yes. Embroider it on stable non-stretch fabric, cut a front and matching back with seam allowance, sew the pieces together, turn them right side out and add polyester fiberfill. This is a separate sewing project, not an automatic ITH doll file.
Should the cutaway stabilizer be removed before stuffing?
Remove the excess stabilizer around the design, but leave the cutaway support directly beneath the embroidery. It helps the stitched front retain its shape and prevents excessive stretching during stuffing.
What fabric should be used for the back of the soft doll?
Use a plain medium-weight woven cotton or similar stable fabric. Avoid an excessively thick or stiff backing because small curves will be harder to turn and fill evenly.
Why should the soft doll not be overstuffed?
Excessive stuffing stretches the embroidered front, rounds the stitched surface and can visually shift the outlines. Add the filling in small portions and keep the front relatively flat.
Can I stitch the design on black fabric?
It is not recommended without a test. Black fabric may show through the watercolor fills and hide the dark outlines. White, ivory, cream, pale beige or light gray produces a more predictable result.
Can I resize the design myself?
No. Independent resizing can affect density, underlay, pull compensation, watercolor coverage and registration between the fills and outlines. When another size is required, use the professional Resize of Design service.
Is a test stitch necessary?
Yes. A test confirms the actual hoop fit, stabilizer strength, thread contrast, watercolor coverage and alignment between the filled sections and dark outlines.

 Get Sign-In Link
 Login with Google
 Login with Facebook
 Login with Amazon
 Login with Paypal