Christmas Reindeer with a Bow
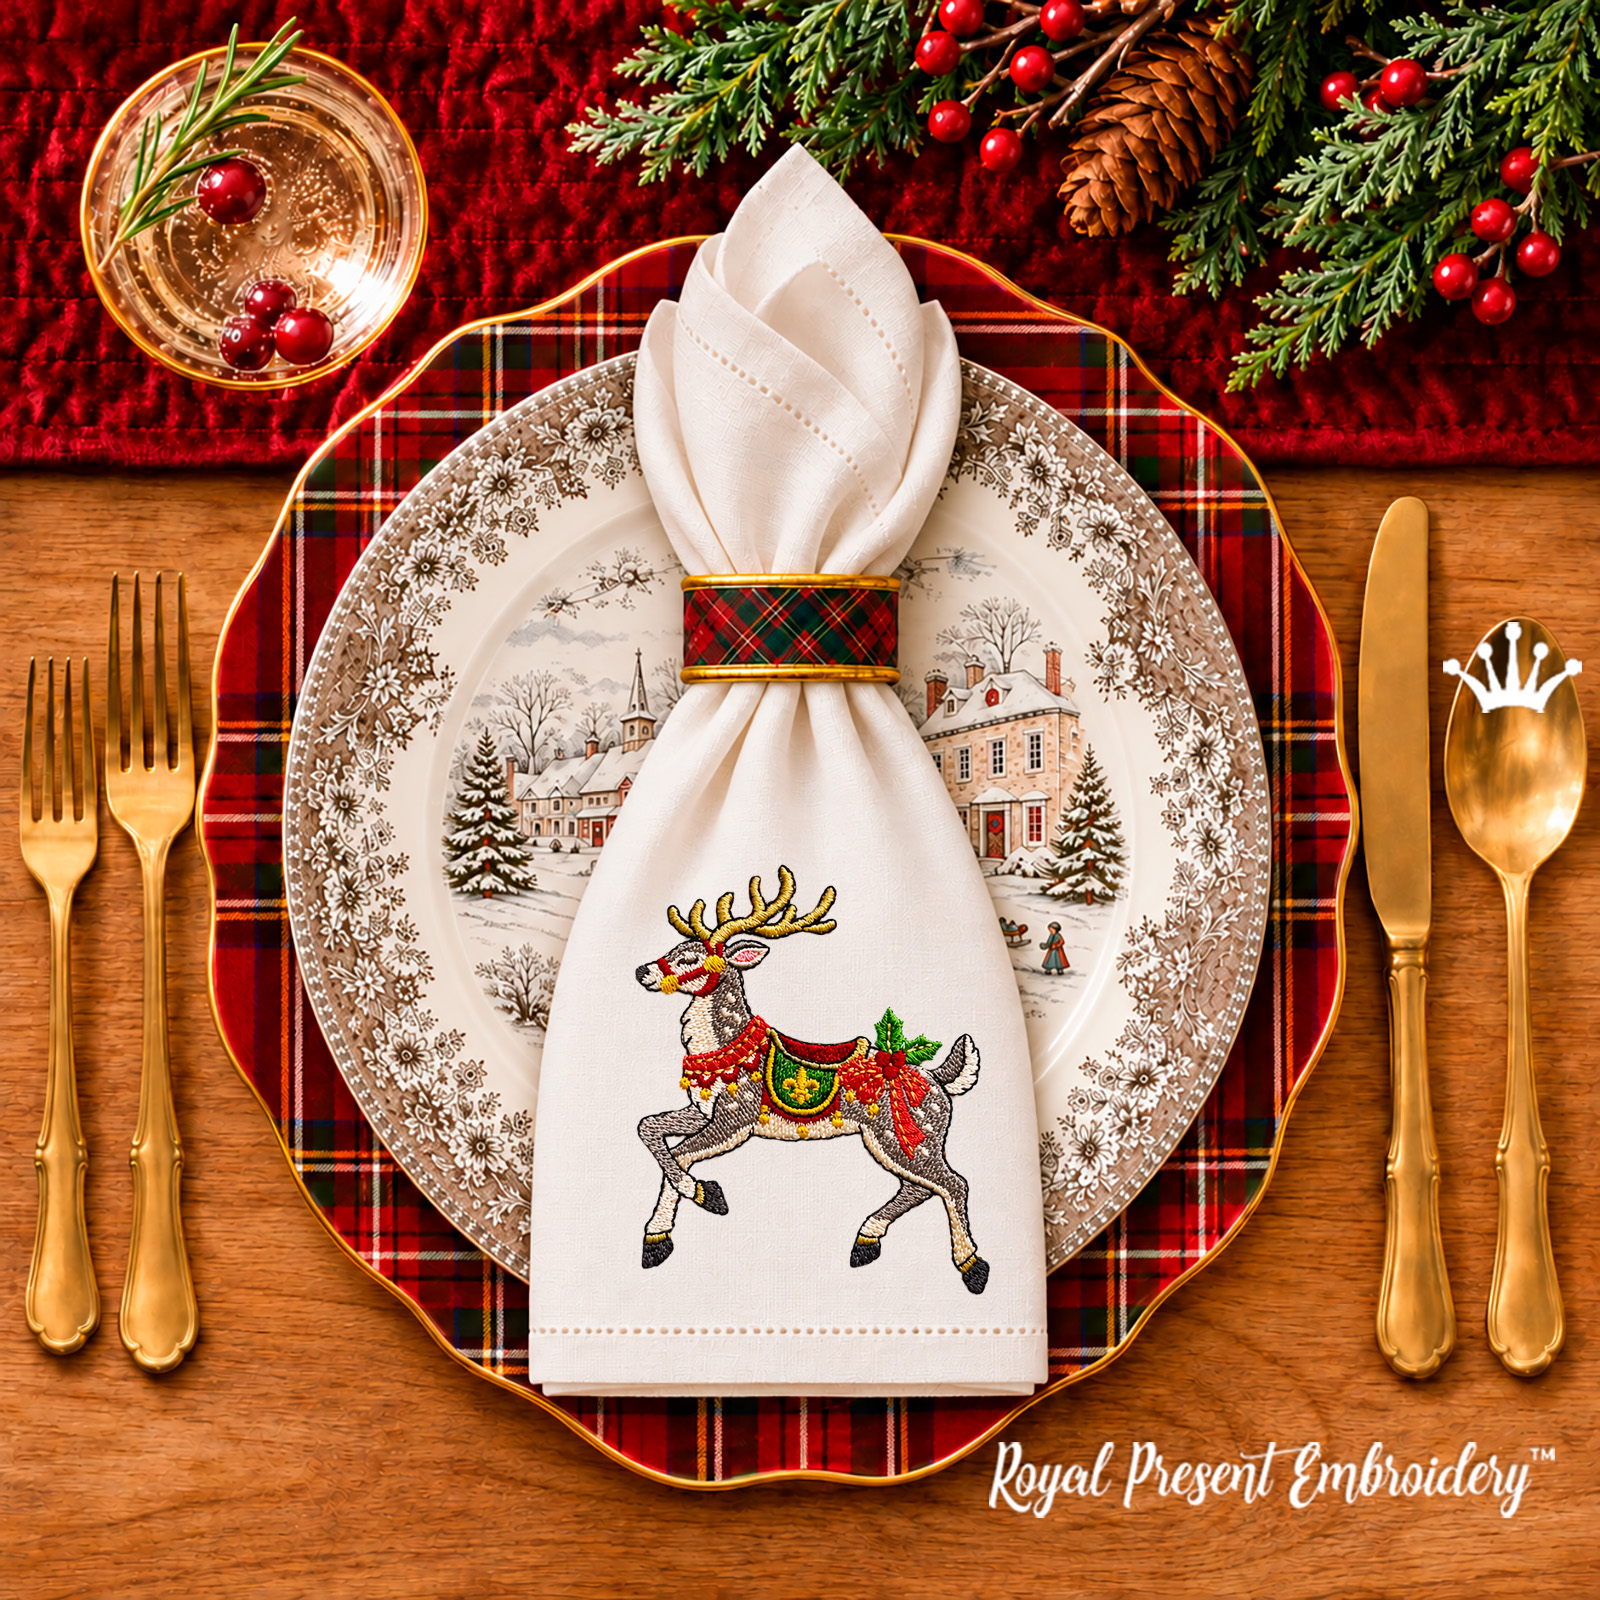
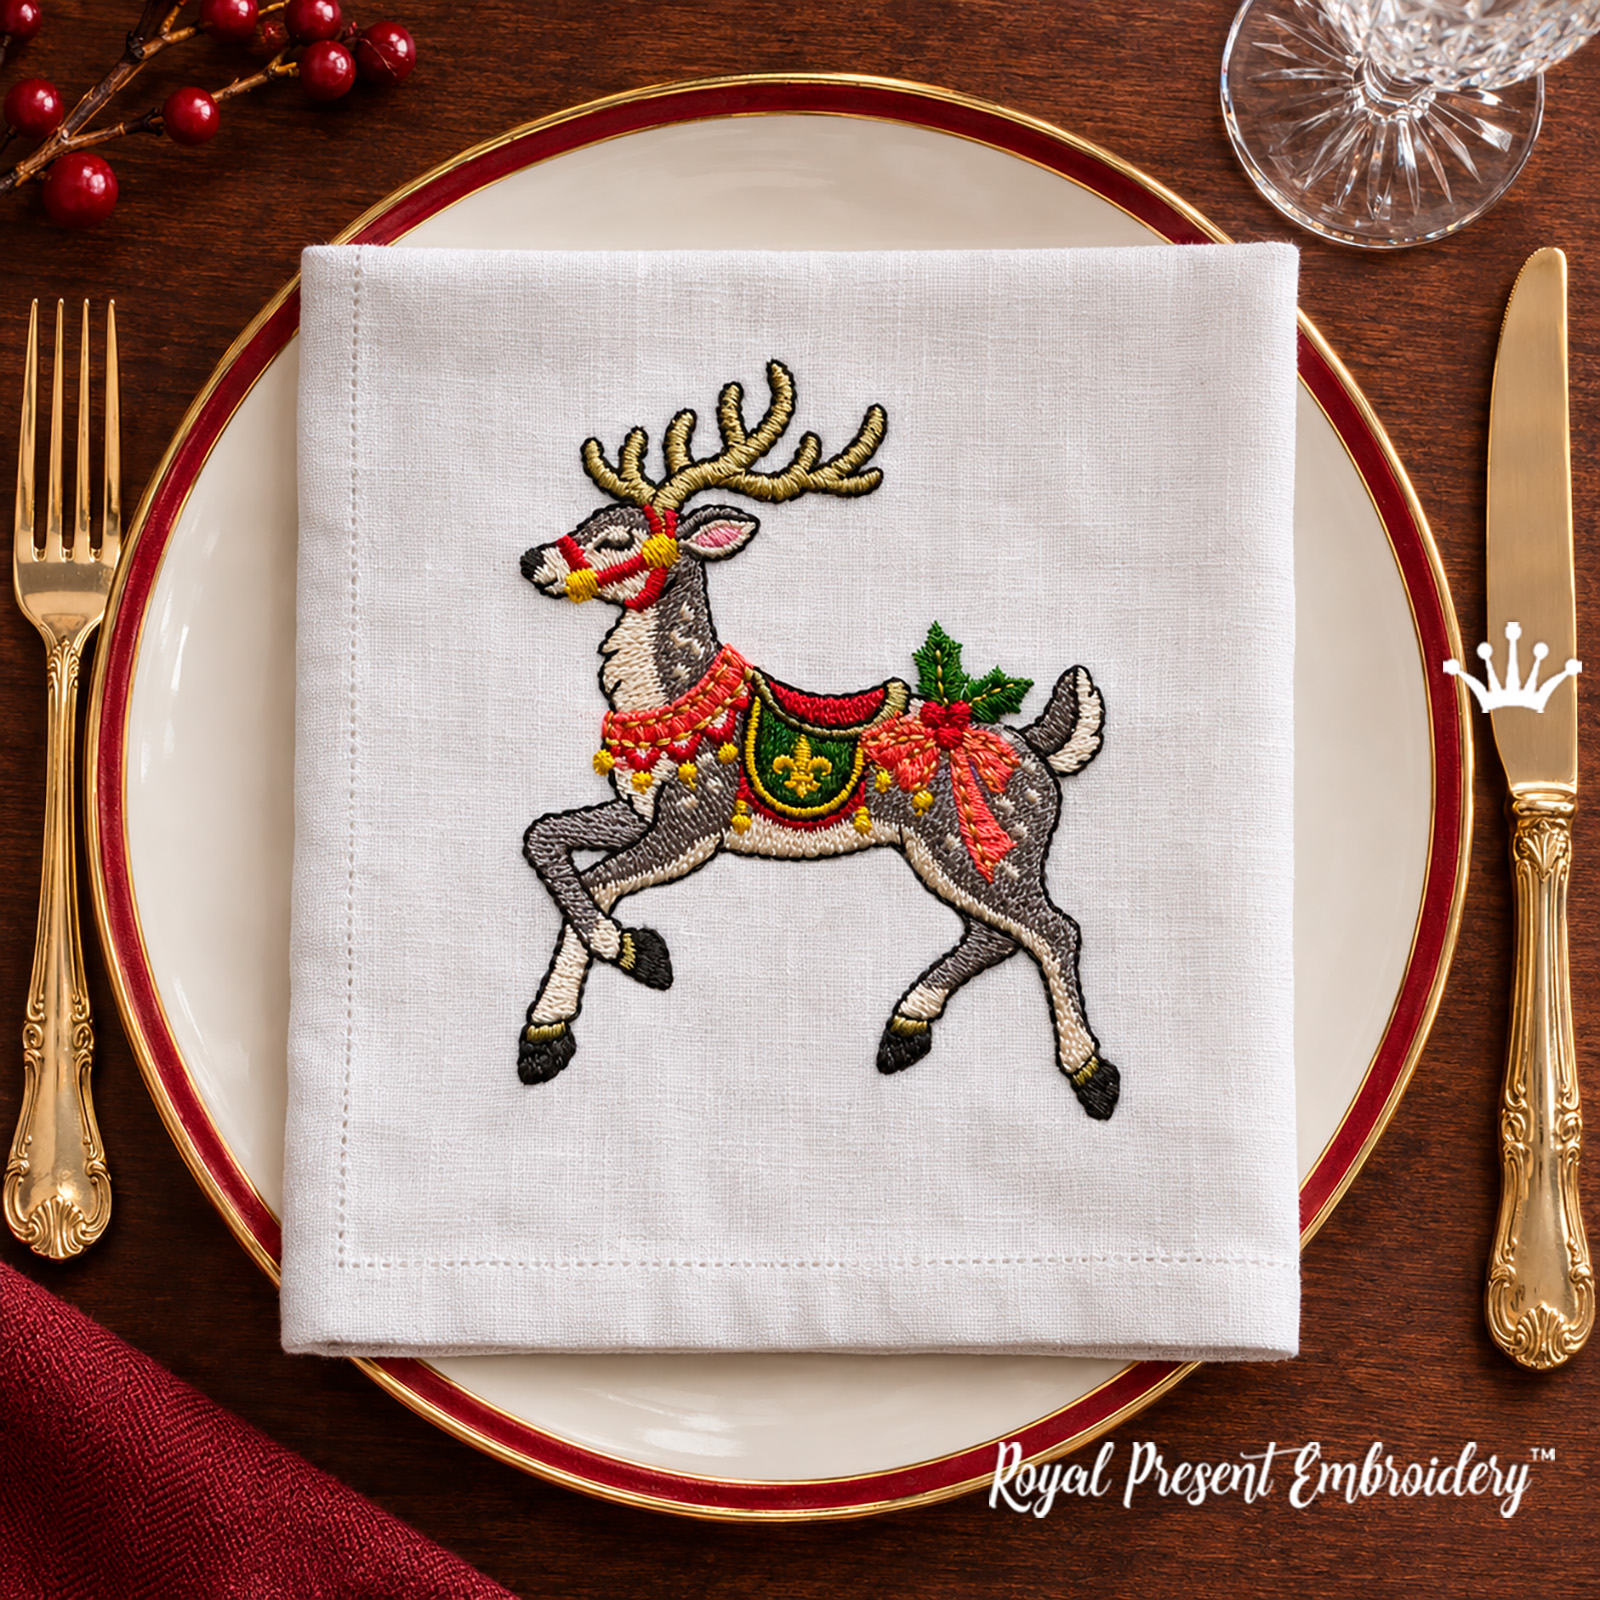
Gold-toned antlers, a red harness, and a green saddle blanket dress this reindeer for Christmas. A red bow with holly leaves and berries sits just behind the saddle. The dark outline and the small details on the blanket show up clearly on light linen. This is the reindeer on its own, without the carousel pole or overhead garland.
The download contains four sizes of the same digital machine embroidery design. The finished napkin shown in the photo is not included.
Design sizes and hoop requirements
SKU: RPE-3804-004. Dimensions are listed as width × height. Inch equivalents are rounded.
Size 1
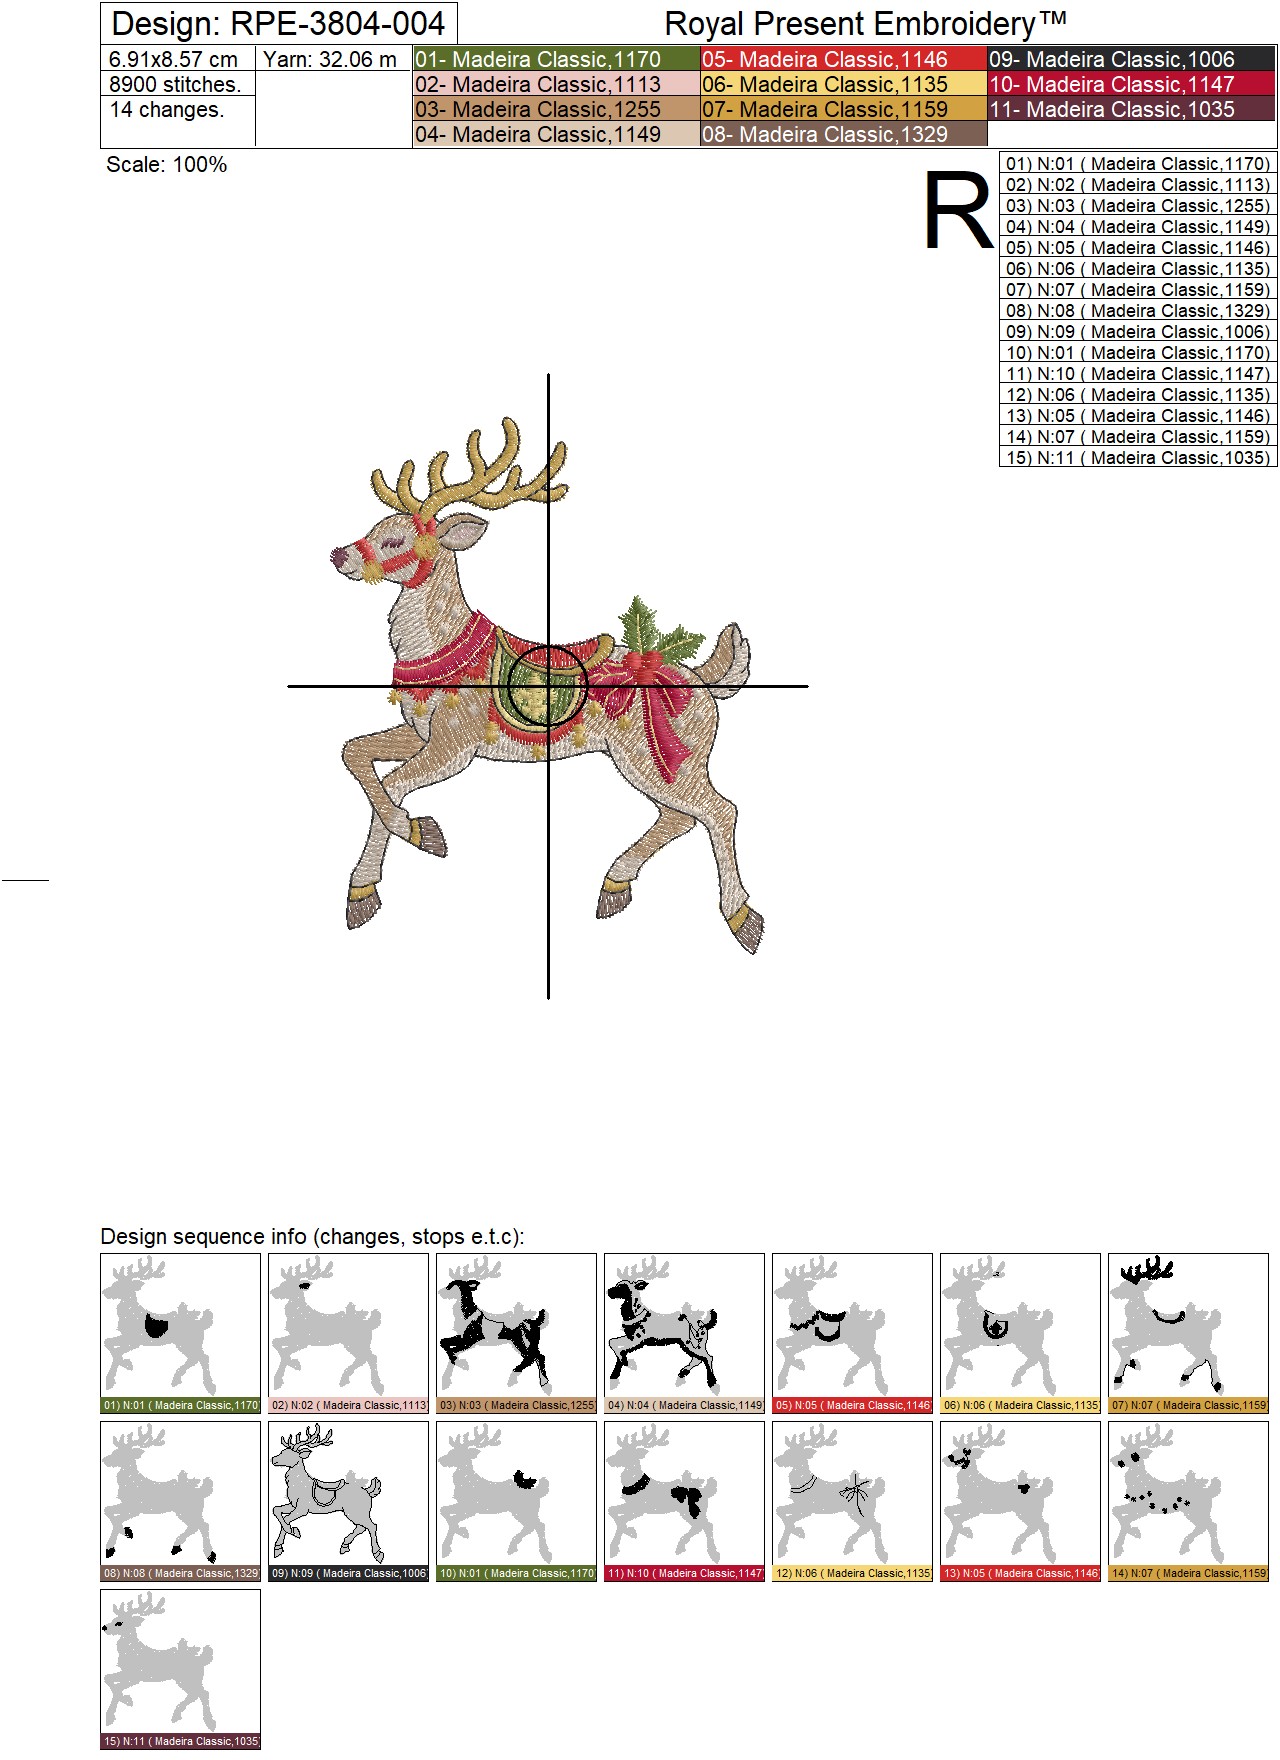
Size: 69.1x85.7 mm (2.72x3.37 "), Stitches: 8900
Hoop: 100x100 mm (3.94x3.94"), commonly labeled 4 × 4 in.
Size 2
Size: 76.0x94.1 mm (2.99x3.70 "), Stitches: 9700
Hoop: 100x100 mm (3.94x3.94"), commonly labeled 4 × 4 in.
Size 3
Size: 83.5x103.5 mm (3.29x4.07 "), Stitches: 10900
Hoop: 130x180 mm (5.12x7.09"), commonly labeled 5 × 7 in.
Size 4
Size: 91.8x113.8 mm (3.61x4.48 "), Stitches: 12200
Hoop: 130x180 mm (5.12x7.09"), commonly labeled 5 × 7 in.
The first two sizes fit a 100 × 100 mm (3.94 × 3.94 in) embroidery field. Size 2 leaves just 5.9 mm (0.23 in) of total height clearance. Trace the design boundary before stitching. If you add a basting box, check that it also fits your machine’s actual embroidery field.
Formats: .dat, .dst, .exp, .hus, .jef, .jef+, .pec, .pes, .sew, .shv, .tap, .vip, .vp3, .vp4, .xxx
Where to stitch the Christmas reindeer
Place a smaller reindeer in the part of a folded dinner napkin that shows on the plate, or near a lower corner of an unfolded napkin. The taller sizes work well at the ends of a table runner or on a gift bag. Embroider the bag’s front panel before sewing the bag together so you do not stitch through both sides.
For a matching table setting, stitch the Christmas napkin corner and fir sprigs on alternating napkins. For a cushion front, the large Christmas carousel reindeer adds the carousel pole, bow, and evergreen garland.
How to embroider a linen napkin
- Mark the placement. Fold the napkin as you plan to serve it. Use a full-size template to check the space above the antlers and below the hooves. Mark the center and vertical axis, then unfold the napkin.
- Hoop a single layer. Start with a medium-weight cutaway stabilizer and a sharp 75/11 embroidery needle compatible with your machine. Hoop the fabric and stabilizer together without stretching the weave. Keep the hem and any hemstitching clear of the design.
- Check the test stitch-out. Use the same fabric, thread, and stabilizer. After unhooping the sample, check for puckering around the saddle blanket and see whether the outline meets the fill at the antlers and hooves. When the finished napkin is unhooped, trim the excess backing without nicking the stitches.
Madeira Classic thread colors
All four sizes use 11 Madeira Classic shades and 14 color changes. Some shades are used more than once; follow the color chart for the stitch order.
| Color | Madeira | Stitched area | |
|---|---|---|---|
|
1170 Pantone 370 C |
Green saddle blanket and holly leaves | |
|
1113 | Pink detail inside the ear | |
|
1255 | Tan areas of the coat | |
|
1149 Pantone 9202 C |
Light areas on the neck, belly, and legs | |
|
1146 Pantone 485 C |
Berries and red harness details | |
|
1135 Pantone 1205 C |
Pale gold details on the saddle blanket and bow | |
|
1159 Pantone 117 C |
Antlers and gold-toned harness trim | |
|
1329 Pantone 7614 C |
Hooves | |
|
1006 | Dark outline of the reindeer | |
|
1147 Pantone 1795 C |
Bow and chest strap | |
|
1035 Pantone 505 C |
Dark details on the muzzle and face |


The squares show Madeira’s digital swatches. Pantone references are included where Madeira lists a match. Use the Madeira thread numbers when shopping, since screen colors may differ from the actual thread.
Embroidery FAQ
How do I position the design in the corner of a napkin or handkerchief?
Place a full-size paper template on the part of the fabric that will show. If the napkin will be folded on the plate, fold it before deciding on placement. Check that the reindeer is upright and that the antlers and hooves stay clear of the fold. As a starting point, leave about 2 cm (0.79 in) between the outermost stitches and the inside edge of each hem. Mark the center and both axes on the fabric. For a set of napkins, measure from the center mark to each hem and repeat those two measurements. Unfold the fabric before hooping so you stitch through just one layer.
How do I hoop a corner if the fabric does not reach the rim?
Apply temporary embroidery adhesive to the stabilizer away from the machine. Smooth the corner onto it, wrong side down, without stretching the fabric. Secure the stabilizer around the entire hoop and catch as much of the napkin in the hoop as you can without pulling it out of shape. If the marked axes stop short of the rim, extend them onto the stabilizer to line them up with the hoop marks. Trace the design boundary before stitching to keep the needle clear of thick hems and hemstitching.
How large should I cut the stabilizer?
Measure the width and height of the hoop from the outside edges, not from the listed embroidery field. Add twice your chosen margin to each dimension. For example, for an outer hoop measuring 13 × 15 cm (5.12 × 5.91 in), a 2.5 cm (0.98 in) margin on each side gives a cut size of 18 × 20 cm (7.09 × 7.87 in). The stabilizer must be held around the entire rim and extend beyond it on all sides. For six napkins stitched individually, cut six pieces.
Which stabilizer and how many layers should I use for this reindeer?
On sturdy linen or cotton, start with one layer of medium-weight cutaway, about 85 g/m² (2.5 oz/yd²). Test on a scrap of the same fabric. After unhooping, check for puckering and see whether the dark outline lines up with the fill. Total stitch count alone does not tell you how many layers you need: fabric stability and how closely the stitches are packed both matter. For a fine batiste handkerchief, choose a light outline design instead of this filled reindeer. If the handkerchief can be soaked, use a fibrous wash-away backing for that lighter design.

 Get Sign-In Link
 Login with Google
 Login with Facebook
 Login with Amazon
 Login with Paypal

