Monogram KK Machine Embroidery Design - 5 sizes
By knowing the speed of your embroidery machine, you can find out how long it will take to embroider a design.
To use the embroidery calculator, click on the number of stitches in the product description.
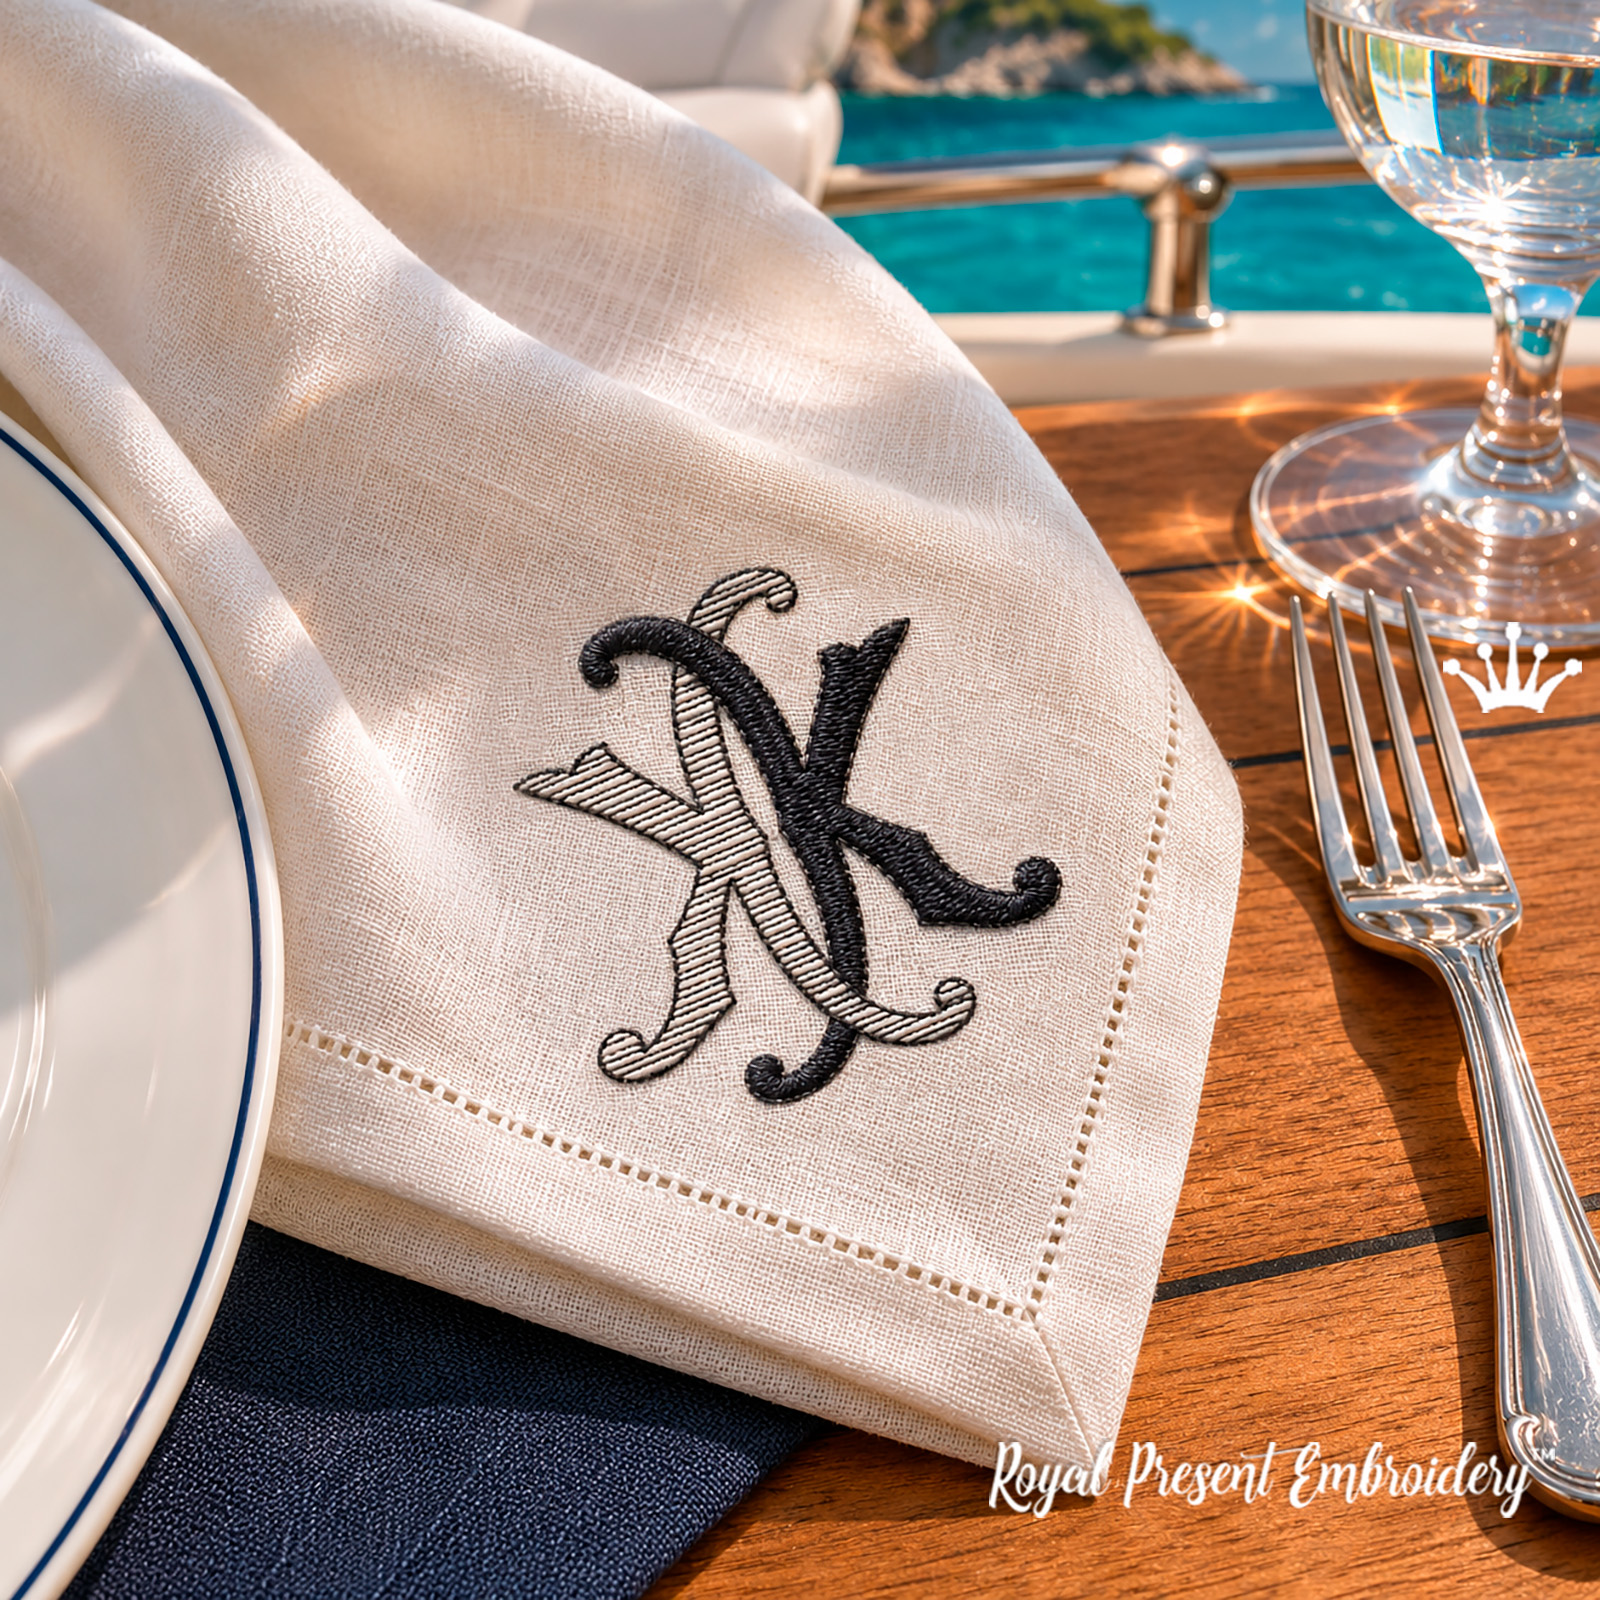
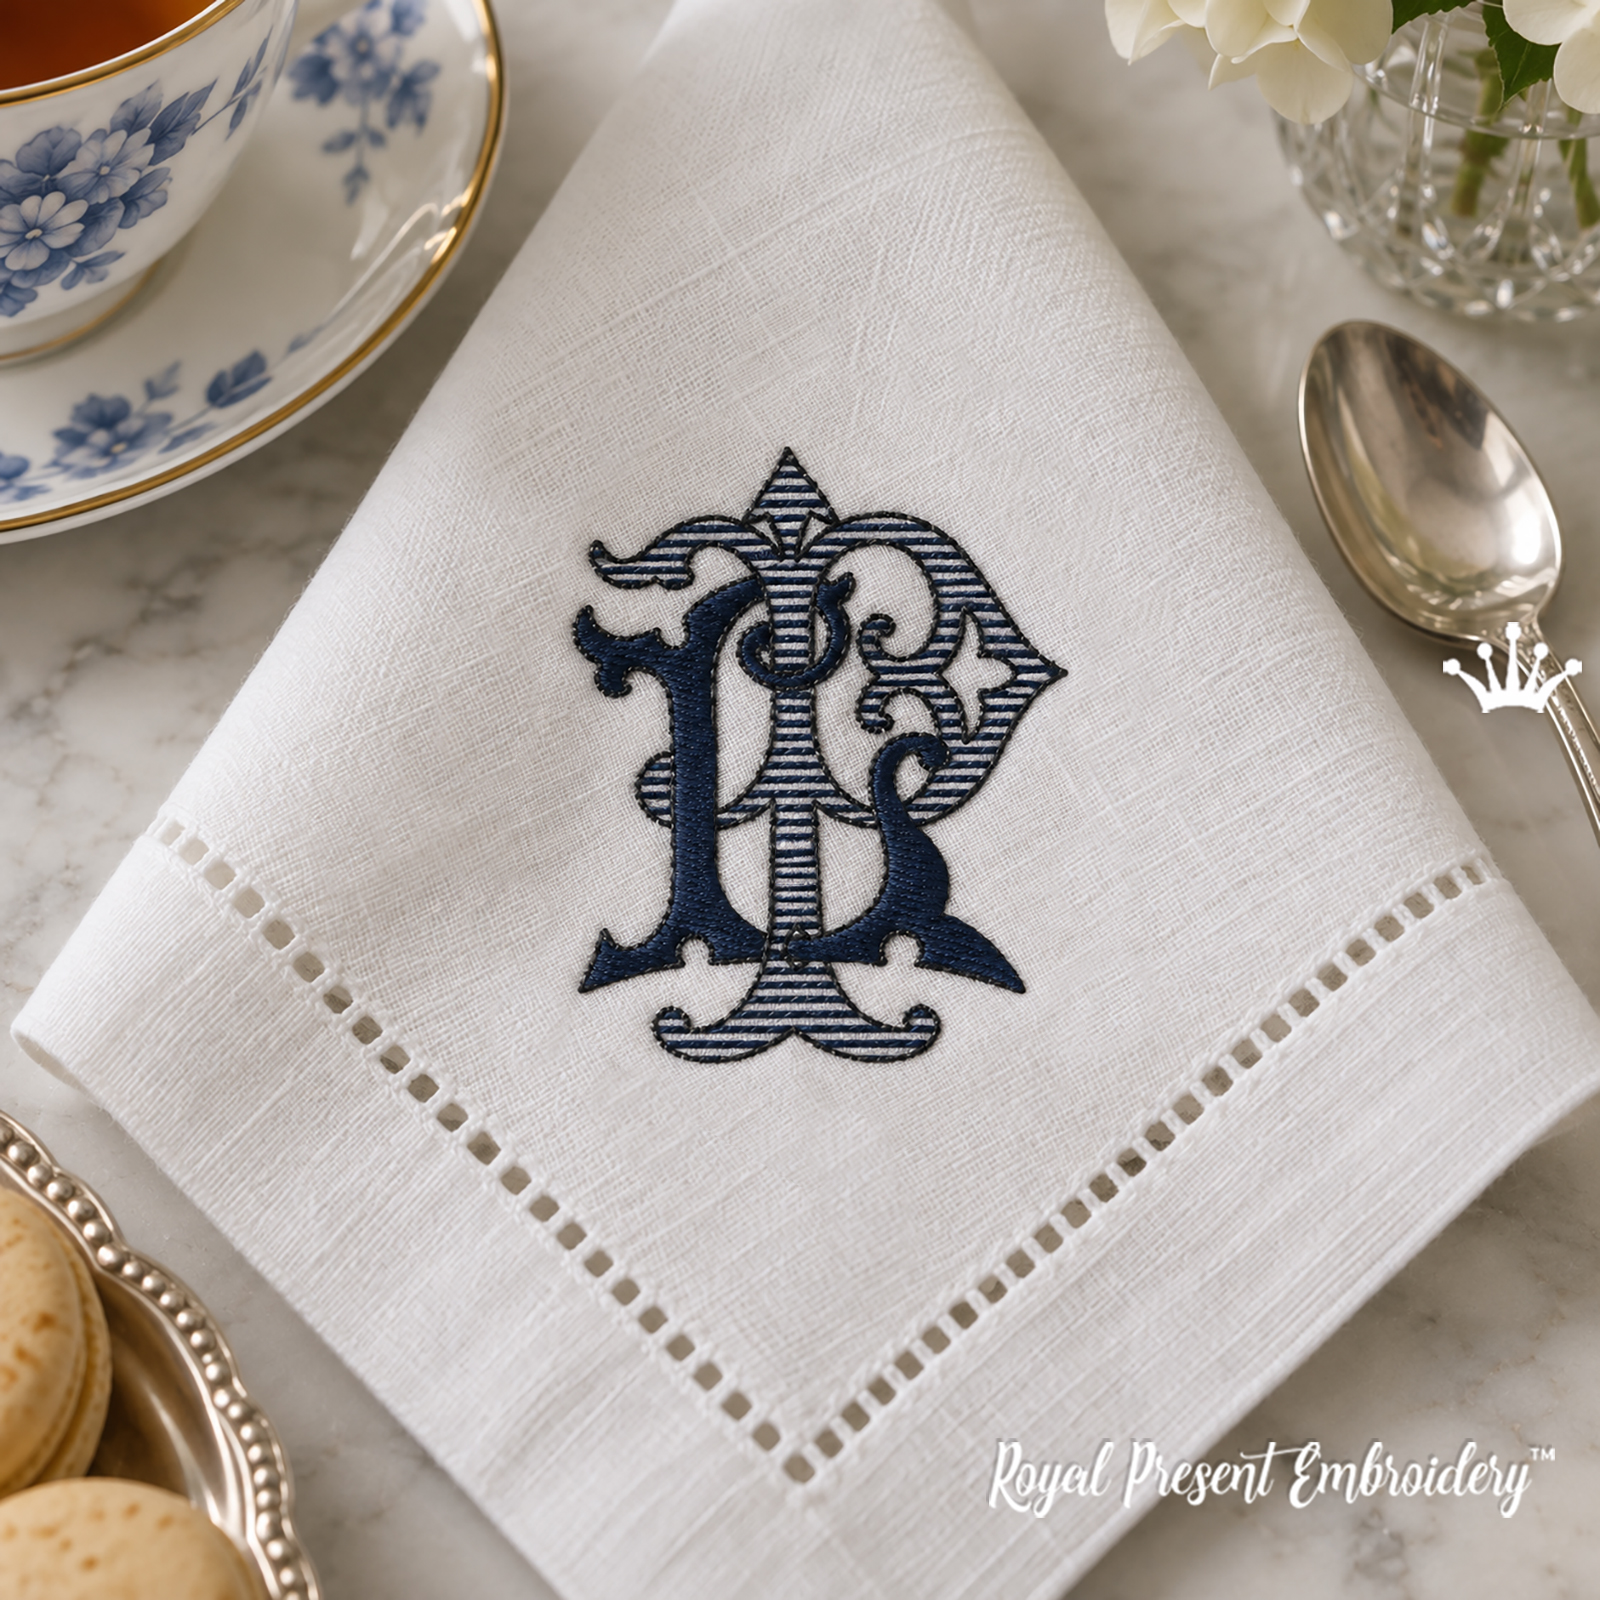
KK Monogram is a digital machine embroidery design featuring two intertwined K initials with curved flourishes. Four sizes are included: the first three fit an 80×80 mm embroidery field, while the largest requires a 100×100 mm (4×4″) hoop. Download the files after purchase and transfer them to your embroidery machine.
A mirrored letter with open horizontal linework is paired with a letter in solid fill stitching. This contrast in texture keeps the monogram distinctive even when stitched in a single thread color. Use it on the corner of a linen napkin, a guest towel, a pillowcase or a personalized textile gift. On a light napkin with a hemstitched border, it adds a classic finishing touch to a table setting at home or aboard a yacht.
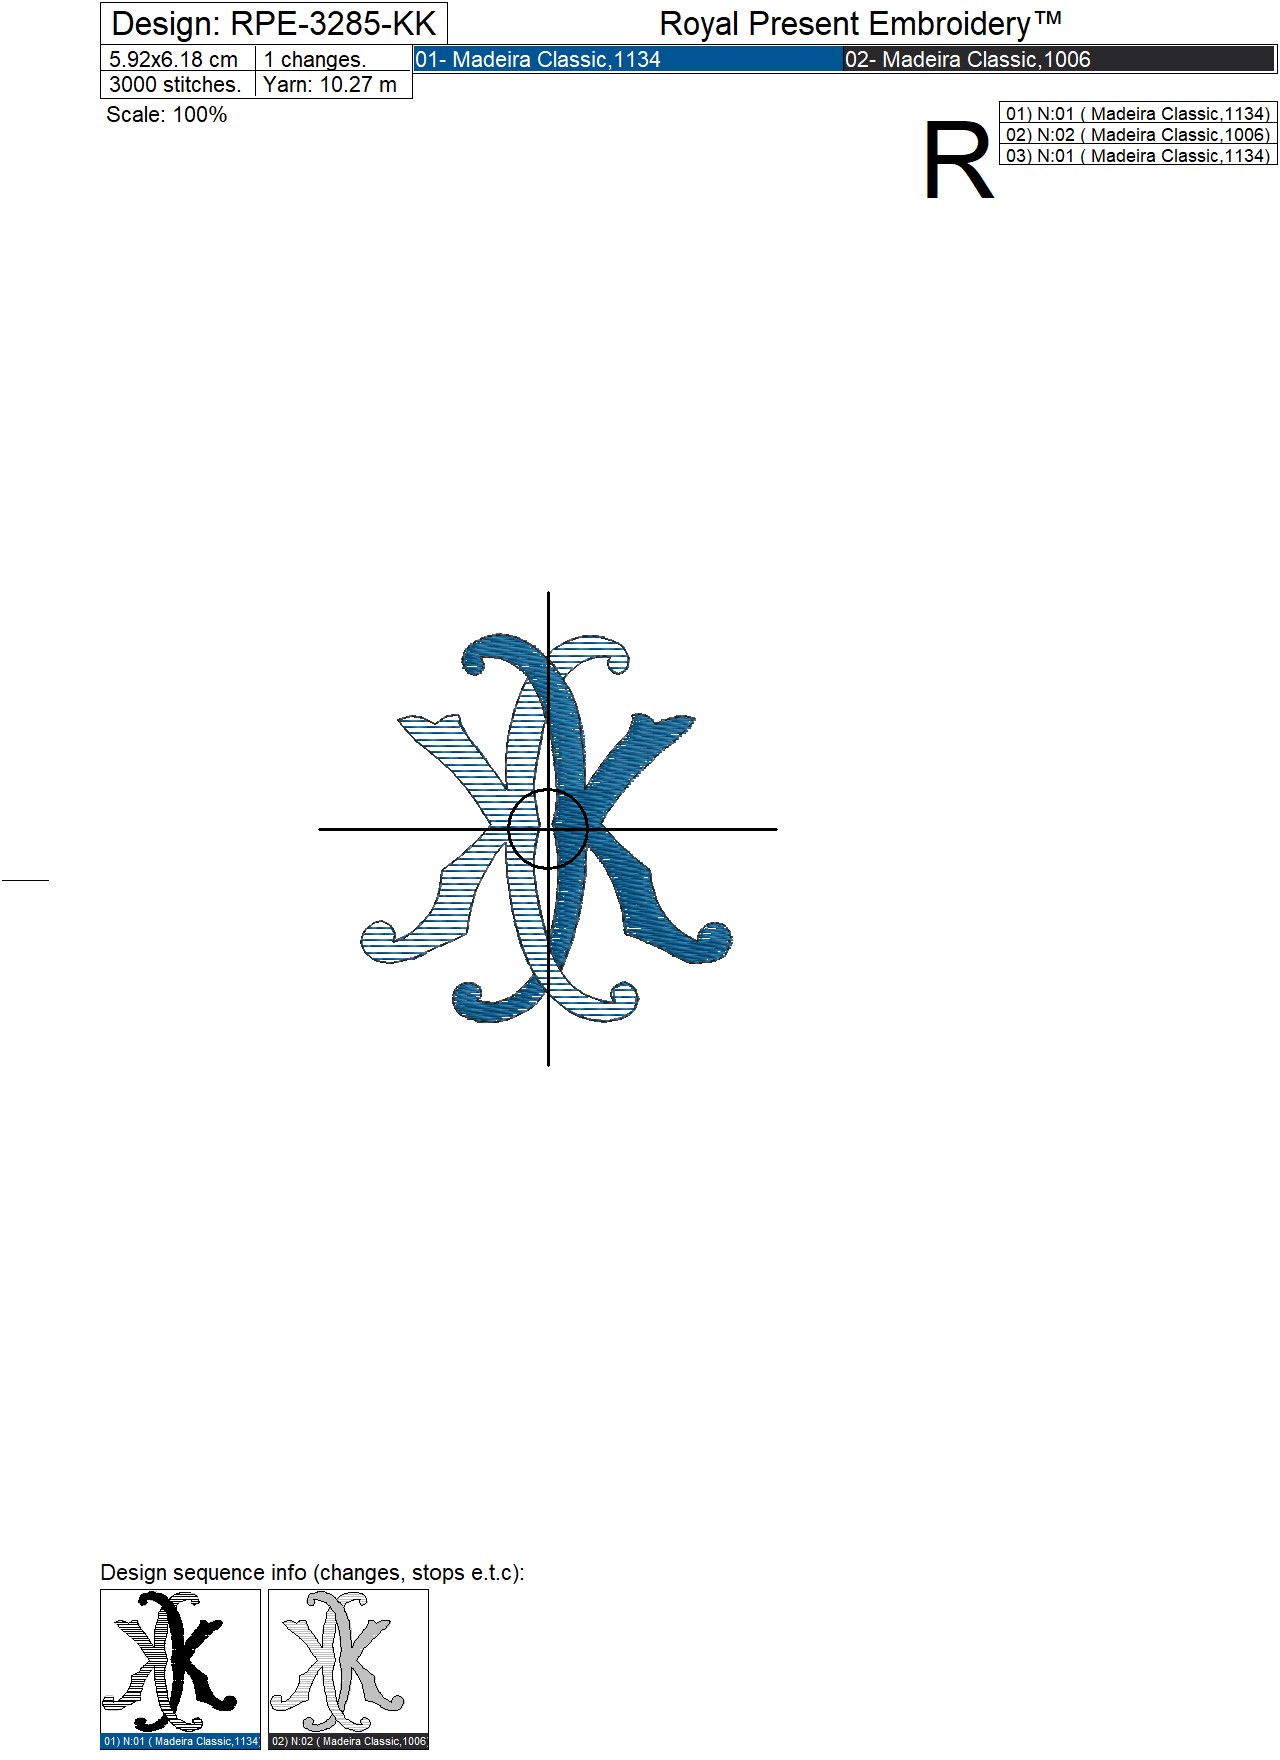
Size: 59.2×61.8 mm (2.33×2.43″), Stitches: 3000, hoop: 80×80 mm
Size: 65.2×67.9 mm (2.57×2.67″), Stitches: 3400, hoop: 80×80 mm
Size: 71.7×74.8 mm (2.82×2.94″), Stitches: 3800, hoop: 80×80 mm
Size: 78.9×82.3 mm (3.11×3.24″), Stitches: 4300, hoop: 100×100 mm (4×4″)
Formats .dst, .jef, .pec, .vip, .hus, .pes, .exp, .sew, .dat, .vp3, .xxx
Design Specifications
| Product type | Digital machine embroidery design |
|---|---|
| Design | Two intertwined K initials, one of them mirrored |
| Number of sizes | 4 |
| Minimum hoop size | 80×80 mm for the first three sizes; 100×100 mm (4×4″) for the fourth |
| Colors and color changes | 2 colors and 1 color change, as listed on the design chart |
| Delivery | Digital files available to download after purchase |
About the Design
The K on the right has solid fill stitching. The K on the left is mirrored and formed by an outline with spaced horizontal stitches, allowing the fabric to show through. Curved vertical strokes intertwine at the center, with flourishes at the top and bottom completing the composition. The mirrored arrangement is an intentional part of this decorative double-initial monogram.
Madeira Thread Colors — Suggested Palette
The design charts list two Madeira Classic threads. Use these colors as a starting point, or choose shades to complement your fabric, tableware or coordinating linens. For a single-color version, stitch every color block with the same thread, keeping the original stitching sequence.
| No. | Color | Madeira Classic thread |
|---|---|---|
| 01 |  |
Madeira Classic 1134 Royal Blue |
| 02 |  |
Madeira Classic 1006 Diamond Black |
The white spaces inside the striped letter represent areas of exposed fabric. If you stitch on colored fabric, its shade will show between the horizontal stitches.
You May Also Like These Designs from the Collection
 Machine Embroidery Design |
 Machine Embroidery Design |
 Machine Embroidery Design |
 Machine Embroidery Design |
Fabric Preparation and Stabilizing
- Linen and stable woven cotton: start with a test stitch-out using Madeira Cotton Soft tear-away stabilizer. Hoop the fabric smoothly without stretching it.
- Finished napkins: if the corner is difficult to hoop, secure it to hooped Madeira Cotton Fix self-adhesive stabilizer. Check that the fabric is secure and the folded hem is clear of the stitching area before starting.
- Terry towels: use a suitable backing stabilizer underneath and Madeira Avalon Film water-soluble topping on top. The topping holds down the pile during stitching and helps keep outlines clear.
Practical Tips
- For centered corner placement, prepare a full-size paper template. Align the monogram’s vertical axis with the line that bisects the napkin corner, and check the distances to both sides of the hemstitched border.
- Before marking the placement, fold the napkin as it will appear on the table so the monogram stays visible.
- Choose a smooth fabric or a towel with a low pile for the open striped letter. On loose terry fabric, test how clearly the lines show before stitching the finished item.
- Use the same placement template and machine settings throughout a napkin set to keep the size and position consistent.
Helpful reading: the difference between hoop sizes and embroidery fields.
Frequently Asked Questions
How can I prevent puckering around the monogram on a linen napkin?
Hoop the fabric with a suitable stabilizer, keeping it smooth, free of folds and unstretched. For stable linen, begin with a test stitch-out using Madeira Cotton Soft. If ripples appear around the letters, check that the fabric is held securely and review the thread tension settings in your machine’s manual. Change one setting at a time and assess the result after removing the sample from the hoop.
How do I secure a finished napkin if the corner cannot be hooped?
Hoop a piece of Madeira Cotton Fix self-adhesive tear-away stabilizer and attach the marked napkin corner to its adhesive surface. The fabric should lie flat and be held securely across the entire stitching area. Keep loose edges clear of the underside of the hoop and use your machine’s trace or boundary-check function to make sure the stitches will not cross the folded hem.
How do I center the monogram in a napkin corner?
Prepare a paper template of your chosen size at 100% scale. Mark a line that bisects the napkin corner and align the monogram’s vertical axis with it. Check that the outer flourishes are equally spaced from both sides of the hemstitched border or folded hem. Judge the clearance using the entire design, including the bottom and side flourishes.
How can I keep the open horizontal lines visible on a terry towel?
Choose a towel with an even, low pile. Use a suitable stabilizer underneath and Madeira Avalon Film water-soluble topping on top to hold the loops down during stitching. On thick, high-pile terry, the pile may cover the gaps after the topping is removed, so make a test stitch-out first. You can try the largest included size when assessing the result.
Can I stitch the entire monogram in one color?
Yes. Stitch both color blocks with the same thread, keeping them in their original order. At the programmed color stop, continue with the same color. The solid fill and open horizontal linework create different textures, so the monogram remains distinctive in a single color.
How do I remove stabilizer from between the fine horizontal stitches?
Support the fabric close to the stitches and remove tear-away stabilizer in small sections. Avoid pulling on the stitches or forcing out trapped pieces, as this can distort the design. Remove any remaining water-soluble topping according to its manufacturer’s instructions and the fabric’s care requirements.
How do I keep the monograms consistent across a set of napkins?
Use one paper template and mark the center and orientation against the same reference point on every napkin, such as the inside edge of the hemstitched border. Keep the design size, thread, stabilizer and machine settings consistent. Remove the first napkin from the hoop and check the result before embroidering the rest of the set.

 Get Sign-In Link
 Login with Google
 Login with Facebook
 Login with Amazon
 Login with Paypal

