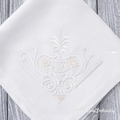
Classic corner decor - 3 sizes


By knowing the speed of your embroidery machine, you can find out how long it will take to embroider a design.
To use the embroidery calculator, click on the number of stitches in the product description.
Size: 128.6x128.6 mm (5.06x5.06 "), Stitches: 16470
Size: 139.6x139.6 mm (5.50x5.50 "), Stitches: 18648
Size: 149.0x149.0 mm (5.87x5.87 "), Stitches: 18920
Formats: .dst, .jef, .pec, .vip, .hus, .pes, .sew, .exp, .dat, vp3, xxx
This design has a companion Classic border Machine embroidery design in 3 sizes
Mastering Corner Machine Embroidery: Elevate Your Napkins with Classic Corner Decor Machine Embroidery Design
If you're a fan of meticulous craftsmanship and wish to infuse a touch of elegance into your home, then the Classic corner decor Machine Embroidery Design is your perfect ally. With its intricate patterns and timeless appeal, this embroidery design lets you transform ordinary napkins into art pieces. In this guide, we'll walk you through the step-by-step process of machine embroidering these exquisite corner designs onto napkins, bringing a touch of sophistication to your dining table.
Hooping the Napkin Corners
Before you begin, print the colour chart corner design and place it onto the napkin corner, adjusting its position as desired. Mark the central and axial points of the embroidery-to-be using a particular marker. If your design is close to the napkin's edges, you might encounter a challenge where the corner itself won't fit within the hoop. There are two solutions to this predicament.
Solution 1: Extending the Fabric
The first approach involves simulating a larger fabric area by sewing extra pieces onto the corner to be embroidered. By doing so, the corner can be hooped following standard practices. This technique provides stability and space for your embroidery machine to work its magic seamlessly.
Solution 2: Adhesive Stabilizer Method
Alternatively, you can opt for the adhesive stabilizer method. To fit the hoop, begin by cutting a piece of adhesive-backed tear-away stabilizers, such as Madeira E-ZEE Stick-on or Wet N Gone Tacky. Attach the napkin's corner to the stabilizer using the adhesive backing. Although only a portion of the corner is hooped, the sticky base ensures sufficient stabilization for embroidery. If needed, you can substitute a tear-away stabilizer with temporary fixation glue. Double-check that the axial points of the design align with the hoop markings.
Embroidering the Design
You're ready to embroider once your napkin corner is securely hooped using either method. Let your embroidery machine work magic, meticulously stitching the intricate Classic corner decor Machine Embroidery Design onto the fabric.
Finishing Touches
After the embroidery is complete, it's time to put the finishing touches. Gently remove the stabilizer from the fabric. If you're working with tiny stabilizer pieces, eyebrow tweezers can aid in their removal. If you've used a water-soluble stabilizer like Madeira Wet N Gone Tacky, follow the manufacturer's instructions for removal.
Versatility Beyond Napkins
Beyond embellishing table linens, the versatile corner machine embroidery design featuring delicate motifs can enhance soft kitchen attributes like stands and pot holders. These thoughtfully embroidered items make for beautiful gifts for your loved ones, adding a dash of sophistication to their homes.
Incorporating the Classic corner decor Machine Embroidery Design into your home décor repertoire allows you to create artistic and functional pieces that resonate with timeless beauty. From corner Embroidery Designs to expert tips on hooping and finishing, this guide equips you with the knowledge to elevate your embroidery projects to new heights of elegance and sophistication. Discover the joy of crafting exquisite pieces that seamlessly blend tradition and innovation.
Classic corner decor - 3 sizes
Have not used it yet but very nice design
Classic corner decor - 3 sizes
Oh my! This design is simply exquisite. I stitched it our as a ring bearer pillow for my nephew's wedding. It was just stunning!

 Get Sign-In Link
 Login with Google
 Login with Facebook
 Login with Amazon
 Login with Paypal