It is difficult to imagine a Christmas interior without green and red shades. They are so entrenched in the symbolism of Christmas that it is almost impossible to separate them from each other. And the human subconscious reacts just like that. After all, everyone when think about this warm family holiday, has an association with evergreen needles and bright red Poinsettia. This color palette Poinsettia Border Machine embroidery design has.
Imagine how great and unforgettable your home will look. Bright juicy shades will add to your interior a special magic, mystery.
Poinsettia, or Christmas star, will decorate the interior of your house with the traditional Canadian embroidery. To do this, you only need to place it on a variety of home attributes. Tablecloths and napkins, bedspreads and pillows, wall panels in combination with other Christmas embroidery or even bed linens will transform the interior.
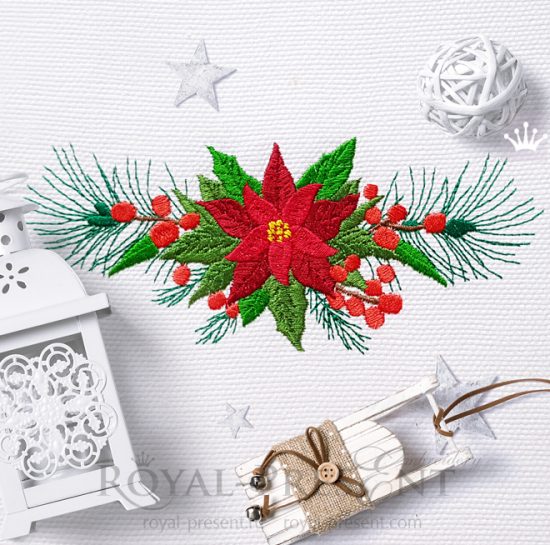
Poinsettia Border Machine Embroidery Design

Size: 70.5×166.5 mm (2.78×6.56 “), Stitches: 11700
Formats: .pes, .pec, .hus, .vip, .dst, .exp, .sew, .dat, .vp3, .jef, xxx
Very successfully, Poinsettia Border Machine embroidery design will be used to decorate terry towels. We have already talked with you about embroidery on terry cloth more than once. Nevertheless, let’s recall its main points, and consider the conditions of embroidery on it specifically this design.
Machine embroidery on terry towels
It is interesting: Turkey is the ancestral home of terry towels. For a hundred years, masters of other countries have tried to recreate this technology and fabric. And yet they succeeded.
The modern appearance of terry towels was purchased in the XIII century. True, they were considered a luxury and were only available to aristocrats and their families. Widely available terry towels became only in the late XIX – early XX century.
Terry towels are a popular and far from new basis for machine embroidery. Nevertheless, beginners, and sometimes, unfortunately, experienced embroiderers make mistakes. Most often they are associated with an incorrect ratio of tissue density and embroidery.
Let’s consider in more detail possible errors and ways of their solution.
Mistake 1. The stitches are “lost” in the nap of the fabric. Often such a problem can arise because of the choice of light or contour design. Because of the not dense cover, the stitches cannot break through the pile of the fabric. As a result, visually the embroidery looks like some parts of the stitches is completely missed.
Mistake 2. The embroidery seems cumbersome, like a bulletproof vest. As a rule, such a problem arises due to the fact that very dense tissue was chosen as the basis. Remember, for designs with dense cover it is better to take a medium-thick fabric and with an average type of pile.
Mistake 3. The embroidery looks sloppy, parts of the stitches are invisible due to the nap, although the design is quite dense. This is one of the most common mistakes. It arises because of embroidery without the top water-soluble stabilizer. Note that the terry cloth refers to the nap type of fabric, and the using of a water-soluble stabilizer on top is not a luxury in this case, but a NECESSITY.
Now, we will sum up all that has been said, and characterize the machine embroidery on terry cloth.
Fabric: it is best to use a medium-density fabric with a slightly high pile type. If you take a heavily dense fabric, and a dense design, embroidery will seem cumbersome. Also you may have problems with the hooping of very dense fabric. And, do not forget that embroidery of dense design on a dense fabric is a big load on your embroidery machine.
Design: Medium in density and dense designs will look just great, using the right technology.
Stabilizer: Use both types of stabilizer, lower and upper. The lower will help prevent undesirable puckering of the fabric. The upper stabilizer protects the embroidery from skipping stitches and “stumbling” into the pile of the fabric.
Surely you had a question in your head which type of stabilizer to use from below, and which one from above. Naturally, this is up to you. Nevertheless, it is preferable to use a cut-away stabilizer from below. As a terry towel is often washed. And from the top, traditionally use a dense water-soluble stabilizer.
Needle: Use a special needle with a rounded tip. This will help the embroidery to easily make its way through the pile of the fabric, without pulling out excess strands of fibers.
Thread: As a rule, for embroidery on terry towels use more traditional threads, for example, polyester or viscose. Despite this, you can use those threads that you liked. However, in this case, embroidery cannot keep its attractive appearance for so long.
We hope this article will help you to embroider the Poinsettia Border Machine embroidery design on a terry towel (and maybe on any other terry cloth item) impeccable. Successful results!
You may also like

Machine Embroidery Design Christmas floral wreath

Author: Ludmila Konovalova
My name is Ludmila Konovalova, and I lead Royal Present Embroidery. Embroidery for me is more than a profession; it is a legacy of my Ukrainian and Bulgarian heritage, where every woman in my family was a virtuoso in cross-stitch and smooth stitching. This art, passed down through generations, is part of my soul and a symbol of national pride.
Date: 28.09.2018

 Get Sign-In Link
 Login with Google
 Login with Facebook
 Login with Amazon
 Login with Paypal