Spring’s a pretty challenging time for any fashionista there is, what with keeping up with new trends, while updating their wardrobes. To alleviate the stress, Royal Present Embroidery offers new takes on the ultimate springtime trend – the florals. Join the blooming trend with our embroidery designs of violets, lilies of the valley, peonies and so many other aromatic gems. The list of florals, boasting their fresh and vibrant petals on pages of our flowering catalogs, is truly endless.
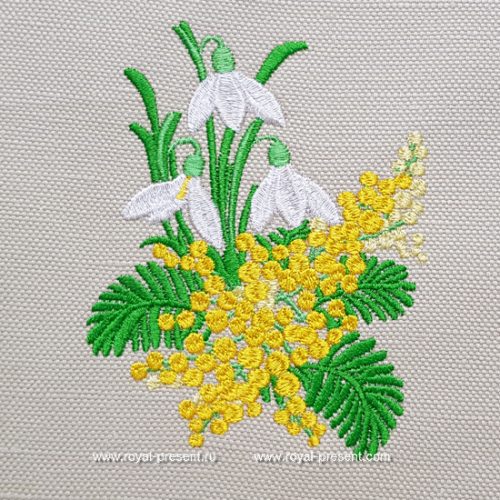
If you’re looking for timeless classics in the kingdom of efflorescent fashion, then you’ll definitely like our updated collection of roses. Stylish ladies who love mixing effortless elegance with utterly feminine touches of first verdure shouldn’t miss Snowdrops and Mimosa Machine Embroidery Design. In best traditions of Blumarine, Valentino and Giambattista Valli, this lovely bouquet breathes delicateness and finesse – things that spring is made of.
Live it up to colorful treasures of spring, displayed in snowdrops and mimosa machine embroidery design. Three main colors – luscious gold of the sun, delicate white of the clouds and juiciest green of the springtime verdure – have never been translated into a more charming form. We’ve “dressed” these pretty hues into Madeira Classic rayon, what with beautiful natural sheen, these threads are famous for. If, however, your choice of threads steers towards polyester or any other non-rayon type, you can always go with your preference.
With so many online charts available swap from one thread to another can be done in just few clicks. Some, like for example Thread Chart Information, offer multiple choices for your thread-change request.
Snowdrops and Mimosa Machine Embroidery Design

Formats: .dst, .pec, .vip, .hus, .pes, .exp, dat, jef, .vp3, .tab, xxx
E.g.: Snowdrops and mimosa machine embroidery design has 7 colors. Fronds of the snowdrops are done with Madeira Classic 1168 (Sharp Green). According to the cart, if you’d like to change rayon to polyester, you can opt from Madeira Polyneon 1648 (Sage Green), 1706 (Cypress), 1809 (Hemp) or 1848 (Meadow). Having so many possible interchanges, you can fine-tune the embroidery’s color scheme to better match the fabric of your project.
While we’re at it, let’s speak about what other threads that can be used for embroidery design snowdrops and mimosa. Due to its quite peculiar theme the design offers great opportunities for being creative and going beyond the usual rayon or polyester range of threads. We talk about the wonderful nature of “fluffiest cloud-like” mimosas of course. You can play on the texture of the yellow flowers to add a bit of extra interest to the embroidery. How can you do it? With the help of a woolen (acrylic) thread!
INFO: Woolen threads are called “special effect” type of threads, because they are thicker than usual rayon or polyester ones. Good quality woolen threads are produced by Madeira (BurmiLana and BurmilanaCo), Gunold (Filain), Ginko, Monet and others.
To achieve perfect match you can sort out our colors, using the same chart as we used above. According to it, colors used for the mimosa branches Madeira Classic 1068 (Canary) can be converted to Madeira Burmilana 3724 (Mimosa), 3852 (Hazel), 3853 (Yellow) or 3850 (Gold/Orange).
Because of their thickness you might want to make special adjustments in the program of the design, you’re working with. List of the adjustments will be given further on for those, who are willing to make them themselves. If you feel that such thing isn’t quite up to your par for the moment, Royal Present Embroidery is always here to help. Fill in our contact form and we’ll gladly help you make any changes in the design that you want.
How to machine-embroider with woolen (thick, acrylic) threads
1 – Always make test embroidery. As the woolen thread is more demanding (thicker, more textured etc.) than the common polyester or rayon ones, you’ll need to test its “cooperation” with other components of your project (needles, fabric-stabilizer sandwich, design etc.);
2 – Use the correct needle. With woolen (acrylic) threads the general advice for needles is to use one of a larger size. A more precise choice will be a needle with a larger eye to handle the thread friction (embroidery needles, metallic needles, topstitch needles). Depending on thickness of the thread you can use needles with sizes from 90/14 – 110/18;
3 – Check your tension. The thread tension should be lowered.
4 – Check the density of the stitching in the design. Thick threads cover the area differently from thin ones, so you might need to lower the density. The minimum here is 0, 9 – 1 mm.
5 – Check the stitch length. Generally wool thread is not fond of making short stitches, so you’ll need to adjust that too.
6 – Lower the speed of your embroidery machine.
7 – After the embroidery is over, you can “brush” the wool thread to make it even fluffier. (Imagine the boost that the thread would give to the cloud-like nature of the mimosa!)
Now that we’ve covered the threads, it’s high time we elaborated on how Snowdrops and Mimosa can upgrade your wardrobe.
Where Snowdrops and mimosa machine embroidery design can be used?
The fact that floral embroidery is a springtime must, gives snowdrops and mimosa design a free rein for décor of any item of your wardrobe. If you’re thinking of updating your favorite jeans and blazers or giving a new life to tops and tees, this pattern is the one for any job. Those gowns and dresses from last years’ can rival new-comers with ease should you enhance them with this lovely embroidery. With three sizes of the pattern available you can create gorgeous new numbers out of your favorite old-timers in few easy steps. For your convenience we’ve gathered those steps in a form of a plan, which we present further on. Read, get organized and prepare to look fabulous this springtime season!
How to decorate ready-to-wear with snowdrops and mimosa machine embroidery design
1 – Print out a template. Print out several sets of various sizes of the design to create a perfectly fit pattern for your project. Don’t forget to number the templates. If you use mirror images, it’s useful to mark them differently from the others. This will help you not to mix sides when you’ll be applying the templates on the garment. Also don’t forget to mark the upper side of the template (a little pointer or an arrow will do).
2 – Fold the template according to the lines showing horizontal and vertical axis of the design (in the end the template should be folded in fourths).
3 – Cut out a notch in the center of the folded template. Be sure to make a very small nip off the center, because when you open the template it’ll be bigger anyway. Through this notch you’ll mark the center of your embroidery on the fabric.
4 – Trim around your design. You don’t have to cut precisely around the outlines.
5 – Arrange the numbered and cut-out template (or templates) on your piece of garment. Mark their center points (through notches) and axis points (at the top of the folded lines) with air dissolving markers. These marks will help you align your design correctly with marks on your hoops. Don’t forget to number the position of each design accordingly.
Helpful advice #1:
Instead of marking the points with markers, one can use stickers with pre-marked orientation pointers on them (e.g.: TARGET STICKERS by Dime). You can put according numbers on to the stickers so that you know which design goes in each particular place.
Helpful advice #2:
When arranging templates on the garment, make sure you take into account the effect that the embroidery will have on the draping quality of your piece. For best result you might want to consider wearing the piece while placing the designs. In this case you’ll also need a mirror (for obvious reasons) and a scotch tape to adhere the templates.
6 – Check the symmetry. Before you continue with the work, you will need to check the precision of your design placement. This is especially important if you arrange your designs in certain order, e. g. symmetrically. To check the design placement you’ll need measure from the center of each design to the center of the embroidery composition. Use any of your measuring tools suitable for this job. Both sides of the composition should have even measurements.
7 – Hoop the garment. In many cases you won’t be able to hoop a ready-to-wear piece, due to peculiarities of its cut. This means that you’ll have to hoop the backing and attach your fabric to it with some sort of adhesion (the so-called floating technique). Usually stabilizers with an adhesion layer (Madeira Cotton Fix, Madeira Super Stable) provide quite firm bond between the fabric and the backing. If, however, you’ll need extra adhesion, use any temporary spray for fabrics (Gunold KK 100 is a great choice for the work). Avoid using pins, as they usually end up in the working area of your embroidery needle.
NOTE #1:
When hooping your garment, make sure center of the design that you marked on the fabric and center of the hooped stabilizer align.
NOTE #2:
When hooping, make sure that any pockets, facings or other extra layers of materials are out of the way. If there’s one of such, it may interfere with the quality of the result.
8 – Embroidery. With all preparations been done correctly, the process of embroidery itself should go as usual.
9 – Final touches. After the embroidery is over, clean up the excess stabilizer and random threads accordingly. If you want to make the back of the embroidery feel smoother, you can always attach a “cover-it” fusible interfacing. Good choices of such could be: Sulky’s Tender Touch, Cloud Cover Stitch by Super Punch, Soft Touch Fusible Tricot by TexmacDirect, Fusi-knit by HTC etc.
Is Snowdrop and Mimosa Machine Embroidery Design suitable only for garments’ decoration?
Charming as an embellishment for your clothes, this floral pattern can be used in projects of other kind too. Accent pillows, embroidered with snowdrops and mimosas can be employed in seasonal makeover both of your living room or your master. Chair pillows, potholders, curtains and napkins, boasting this vibrant design, will make your kitchen feel more welcome and stylish. List of this pattern’s implementations will go on and on. Interior attributes decoration, handy household item prettification, garnish of table linens and so on – snowdrop and mimosa design can be used on any type of textiles.
You may also like
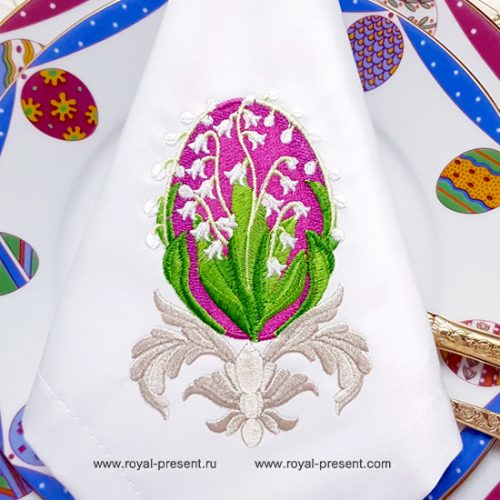
Faberge Egg Embroidery Design – 3 sizes

Author: Ludmila Konovalova
My name is Ludmila Konovalova, and I lead Royal Present Embroidery. Embroidery for me is more than a profession; it is a legacy of my Ukrainian and Bulgarian heritage, where every woman in my family was a virtuoso in cross-stitch and smooth stitching. This art, passed down through generations, is part of my soul and a symbol of national pride.
Date: 25.03.2018

 Get Sign-In Link
 Login with Google
 Login with Facebook
 Login with Amazon
 Login with Paypal