Machine Embroidery Design Traditional Chinese Dragon Pattern – 2 sizes
Greek symmetry and grandeur, Russian ardency and zeal, Hungarian whimsy and African zest… Aromas and flavors from all over the world, translated into gorgeous embroidery designs, are gathered in Royal Present Embroidery catalogues. Beauty of the diverse at its finest! The collection, however, wouldn’t be complete without a touch of mystery and a whiff of symbolism and an exquisite fragrance of time-honored tradition. In the art of cooking such piquancy is added by oriental spices. In the art of embroidery such kind of flavors are imbued by oriental motives. If your projects need some extra refined pep of the kind, help yourself to our Chinese ornaments and motifs category. With the category constantly expanding, you’ll never run out of inspirational designs.
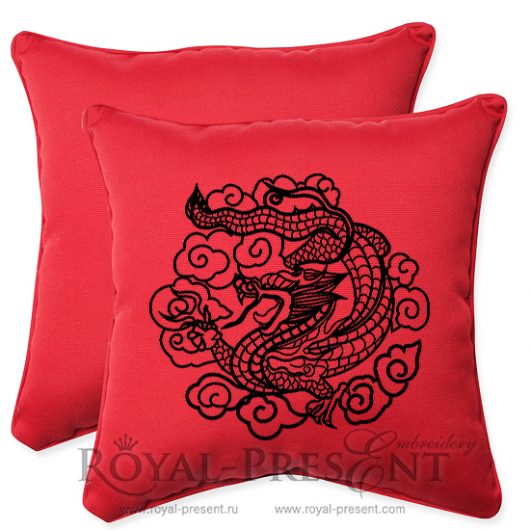
As mythical traditions of orient were forged by breathing fire dragons, our Chinese collection couldn’t omit including a number of dragon embroidery designs. The newest extension to the legendary assemblage comes in the form of fierce but wondrously magnetic Machine Embroidery Design Traditional Chinese Dragon Pattern. This coiling in clouds, scales-clad Chinese serpent is a magnificent paragon of a legend coming alive. Add its exotic pizzazz to the back of a silk kimono robe to highlight the passionate side of your character. In home décor this traditional Chinese pattern can be used on decorative pillows, throws and, why not, table accentuation. With 2 sizes available with you can work with so many items. Anything from tote-bags to car seat covers to backpacks can be decorated with Chinese dragon patterns.
Machine Embroidery Design Traditional Chinese Dragon Pattern – 2 sizes
When searching for sewing machine embroidery designs dragons, you definitely want their quality to be perfect for all types of fabrics. Machine Embroidery Design Traditional Chinese Dragon Pattern is one of such kind. Embroider it on canvas totes, silk blouses or even neoprene car seat covers – it will look stunning on almost anything. Thinking of working it on the back of a jacket to give it an awe-inspiring upgrade? The satin stitch, which the dragon is “clad” in, will go well with faux leather, cordura, denim and the like. If your heart set on embroidering that leather double rider of yours, just adjust the design in your software. Otherwise, contact us and we’ll help you adjust the pattern for this ravishing but demanding material.
And while we’re at the biker’s theme, let’s speak a bit further on how to embroider Traditional Chinese Dragon Pattern on a biker jacket. Great as a present for a special motorist in your environs, embroidering these types of jackets has its knots. But don’t worry, with our help, some tips and instructions, you’ll get them over real smooth! So if you’re ready, shall we begin?
How to decorate a jacket with Machine Embroidery Design Traditional Chinese Dragon Pattern
Let’s start with the things, which should be taken into account before
First of all, let’s make it clear, that we’ll be talking about embroidering textile biker jackets, which fall in the so-called smart-casual category. Made usually from cordura, oxford or other sturdy textiles, such jackets don’t have armor patches. Such feature (or the lack of it) is a huge advantage for needles of your embroidery machine.
Secondly, let’s further into the theme of the material. As fabrics used in the jackets are quite heavy, it might intervene in the movement of hoops. This can cause stitches misalignment, shifting of the fabric etc. How to avoid such a predicament? In general, textile jackets are lighter in weight than leather ones. So, if you’ve already worked (successfully) with a leather jacket on your machine, than you’re safe to proceed with a textile one. If this is your first “easy rider” experience, than consider helping your machine with the weight. Some makeshift platform (books, magazines), which would support the weight of the fabric, hanging outside of the hoop, might help. Some embroiderers just hold the “gravitating” parts with hands or hand them on make-do hangers.
Thirdly, which is not so vital, but still pretty helpful with any decorative work on biker jackets. As a biker jacket is used for protection from the element, it usually is waterproof treated. When you embellish such jacket with machine embroidery, you might intervene with its waterproof quality. It might be not so dramatic, but still it could be something to be concerned with. To eat your pie and still have it, however, you can “seal” the embroidered part with water repellents, widely available on the market. GearAid (Revivex), Granders (Fabsil), Nikwax are some of the most frequently used brands. Read labels, because some are strictly specialized for application on certain materials only.
Now, let’s collect all the needed for the project supplies
~ The jacket
~ Machine Embroidery Design Traditional Chinese Dragon Pattern and its printed template
~ Embroidery threads. We’ll speak about the threads in detail further on.
~ Sewing threads to match those, used in the jacket’s seams. (You’ll need them to re-attach the lining of the jacket.) Hand sewing needle to finish re-attaching the lining.
~ Embroidery needles. The size will depend on the thickness (denier) of the material and the type of the needle on your threads.
~ Stabilizers. If you’ll be removing the lining, a medium weight cut-away backing enhanced by a temporary spray adhesive is your sure bet. However a stick-on tear-away can also do the trick perfectly well.
~ Scissors or seam-reaper, a piece of chalk or a textile pen and a measuring tool.
Before we continue, let’s talk about the threads in a more detailed way. To stitch Machine Embroidery Design Traditional Chinese Dragon Pattern on a cordure jacket, best choices of threads are rayon or polyester. As polyester has a better color-retaining quality, we’d suggest you’d go with it. Opt for any brand that you like, be it Madeira, Gunold, DMC or what have you. For a more dramatic impact, however, you could choose “dressing” the dragon design in glow-in-the-dark threads. A dragon literally “blazing” on the back of your jacket is a statement made in an unforgettable style. If you’re interested in such a luminous experiment, let’s learn more about its “shining heroes”.
Glow-in-the-dark embroidery threads are available at such brands as:
–Madeira Glow in the Dark Embroidery Thread,
– Robison-Anton Moonglow Glow-In-The-Dark Embroidery Thread,
– Gunold Glowy,
– Fil-Tec’s Luminary,
– Guterman Sulky Glowy,
– Coats and Clark Glow in the Dark Threads.
When working with glow-in-the-dark embroidery threads take into account the following:
~ At daylight, colors of such threads are quite pale/milky (light pink, light yellow etc.),
~ In the darkness such threads glow for up to 2 hours and the color of their “glow” is usually yellow-ish or green-ish. Only few brands manufacture glowing threads with the glow, matching their color. One of such brands is Acmelight
~ The glow of such threads is intensified in the black light. Some threads (Gunold Fluor) glow only in the black light.
~ The quality of the threads is similar to that of thin polyester threads, as usually they are made of same fibers. However, due to the fact, that glow-in-the-dark threads are treated with a special formula, they tend to be more demanding in work. They might need different settings in your embroidery machine (lesser speed, lesser tension) than the regular polyester. Also a needle with a larger eye (like the one, used for metallics) could be a better choice when working with the threads.
~ Now that you know everything there’s to know about the threads, let’s get down to the real business.
How to embroidery Traditional Chinese Dragon Pattern on the back of a jacket
1 – Design placement. With the help of a printed template, decide the placement of the design. As the pattern is available in two sizes, you can print out both of them to see which one will suit the garment better.
The classic (and the most fitting) position a circular design like this is in the center of the back. It could be in the upper or lower part, depending on personal preference or the cut of the garment. To find the guiding line for a perfectly balanced placement, fold the jacket along its length. The vertical crease will coincide with the design’s vertical axes. This line is quite a safe guiding for placement. Another way to find the perfect placement is with the help of a measuring tool. Just measure the distance between the sleeves and use its middle point as guidance for centering your template.
When finding design placement, take into account the cut of the jacket’s back. Ideally there shouldn’t be any seams interfering with the background of the pattern. If there’re, check their thickness, as some non-industrial embroidery machines can’t tackle a seam thicker than 3 mm (1/8 inches). To determine the thickness simple press the seam between your fingers and measure it with your measuring tool.
2 – Center and axes marks. Using pointers, given on the template, mark the center of the design and its vertical and horizontal lines.
3 – The lining. Usually biker jackets, even textile ones, have a removable type of the lining (vest). If this is the case with your garment, than just unzip it from its lining. If your jacket has a regular sewn-on lining, than you’ll need to open the seams with a seam-reaper (or scissors). Make the opening big enough for the hooping to be convenient.
4 – Stabilizers. Spray the stabilizer with a temporary spray adhesive of your choice and attach it onto the back of the area, with the marks (where the embroidery will be done).
5 – Hooping. Hoop the area. If the jacket cannot be hooped, hoop the stabilizer and “adhere” the item onto it with the help of a temporary spray adhesive. Extra basting (hand or machine) could be employed for additional stability.
6 – Embroidering. Embroider as usual. Mind that the excess of the garment shouldn’t get into the working area of the needle during the process. We won’t recommend securing (the hanging) parts of the jacket with a mask tape or clips (like one would do with t-shirts or other smaller item). This would only make it harder for the hoop to move. With such heavy items as biker jacket use the makeshift platform method, we’ve describe before.
7 – When embroidery is done remove the excess stabilizer and clean up all the loose threads. With cut-away stabilizer you should remember not to cut it away too close to the embroidery.
8 – Sew the lining back on. You can use your sewing or embroidery machine for the most part of the sewing, leaving the small are for the turning of the garment. This area will be sewn by hands. Use invisible stitch for perfect polish.
9 – In the end, when everything is done, you can treat the area with the water-repelling spray.
My name is Ludmila Konovalova, and I lead Royal Present Embroidery. Embroidery for me is more than a profession; it is a legacy of my Ukrainian and Bulgarian heritage, where every woman in my family was a virtuoso in cross-stitch and smooth stitching. This art, passed down through generations, is part of my soul and a symbol of national pride.
Most machines run around 600-750 stitches per minute. If a design has plenty of color changes and trims, it will take significantly longer to embroidery the design.


 Get Sign-In Link
 Login with Google
 Login with Facebook
 Login with Amazon
 Login with Paypal