Nautical style in interior or fashion designs has its periods of high and low tide. In summer, then the tide is high, we literally bathe in nautical everything. And no wonder, really! The sizzling season is the perfect time to make refreshing sea part of our wardrobe, house décor and accessory styling. Get the most of summer’s favorite trend with Royal Present Embroidery nautical collection. Bright, colorful and all-around scenic its marine life embroidery designs will make staying stylish and chic throughout summer heat plain sailing. Start navigating in the sea of our embroidery patterns with Lighthouse Machine Embroidery Design. Follow its beacon and, we promise, its stylish appearance and variety of available sizes will make you fall in love with it in a flash.
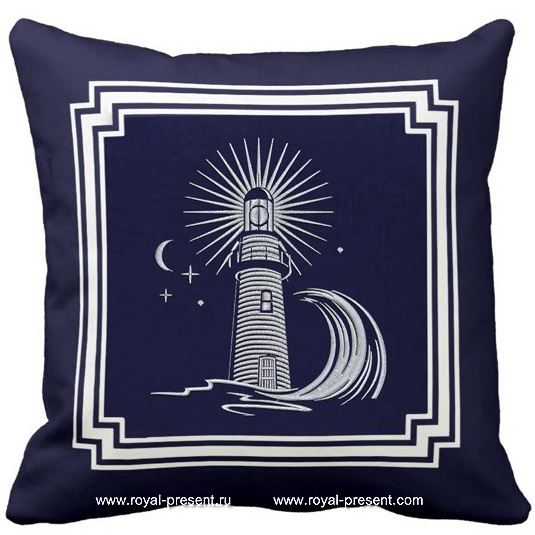
Night skies, stars, crescent of the moon and whispering sea waves… Lighthouse machine embroidery design can give you sweet romance of seashore adventure. Take advantage of such fanciful coastal vibes and create a dreamy spot for your after-work time. Embroider the pattern on decorative pillows in your living room or your master to relax and enjoy while dreaming about the sea. On the black or dark navy background, the night-at-sea illusion will look especially real! Otherwise, just to make use of little novelty contrast, you can switch the light with the dark. Get inspiration from the example with Madeira Classic 1176 Baltic Blue on white in the description of the design. A sea-infused color for the sea-inspired pattern – a marvelous combination indeed! You can pair the pattern with other marine life embroidery designs to create the total coastal look. Choose monochromatic patterns to easily coordinate them in color.
Lighthouse Machine Embroidery Design

Formats .dst, .pec, .exp, .hus, .vip, .pes, .dat, .vp3, .sew, .xxx, jef
Moonlit romance enriched by the coastal charm of Lighthouse embroidery is sweet, but there’s more to the motive than just its sweet taste and flair. Try it with a splash of the brine during summertime holidays at the seaside! We know how important it is to feel good during holidays, and real fashionistas feel good when they feel stylish. Make everyone know who the real queen on the shore is with elegant set of beach attributes decorated with Lighthouse machine embroidery design. Beach bags, towels, cozies and spreads – you can work this pattern on any of the accessories to get for the most stylish look during all those hours of fun under the salty sun of the sea.
Further we’ll show you how to place and stitch Lighthouse machine embroidery designs on a beach bag (with the tips on the hooping included). And after you’ve learned all the ropes you’re welcome to take the knowledge and further it onto any other beach accessory of your choice. You can even expand the nautical theme and add to the lighthouse set few things, say a wrap or even a sun hat, decorated with other marine life embroidery designs. So, are you ready to sail? Then let’s make sure you’ve got everything that you need for the voyage!
The list goes like this:
~ A tote bag (any basic bag will do, but as the tote-bags are really easy to come by, we take their shape as our example base).
~ Lighthouse machine embroidery design and its printout.
~ Medium weight cut-away stabilizer. If the material of your bag is sheer or loosely woven, then you might want to switch from the cut-away to the heavy water soluble backing. If the material is textured (terry cloth, pet screen, polyester/organic straw weave) use a layer of water soluble topper (light or medium weight) as well.
~ Polyester embroidery threads. Polyester is surely a much better choice for projects like these. It keeps its sheen and color throughout the sun and the sea-salt “attacks”, ensuring you sport an impeccable nautical style.
Tip: You might also consider using glow-in-the-dark threads for working Lighthouse machine embroidery design on a beach bag. An actually shining lighthouse can make quite an impression during moonlit outings to the shore. Use good quality threads for better results. Some of the most popular brands include Madeira Glow in the Dark Embroidery Thread, Gamma, Robison-Anton Moonglow Glow-In-The-Dark Embroidery Thread, Gunold Glowy, Fil-Tec’s Luminary, Guterman Sulky Glowy, Coats and Clark Glow in the Dark Threads.
~ Embroidery needles: sharp, 75/11.
~ Temporary spray adhesive (Gunold KK 100, Sulky KK 2000 or any other good quality one).
~ Temporary textile marker, measuring tool, pins and hair clips to keep the excessive material of the bag out of the embroidery area.
So, now that we’ve got everything that we need, let’s get down to work.
1 – Finding the perfect placement. Examine your bag and check if its cut and décor let you position, hoop and stitch lighthouse machine embroidery design freely. There should be no zippers, buttons or other obstructions that can stand in the way of the needle or the bands. Also, make sure your hoop can fit into the bag. If it doesn’t fit, you’ll need to cut the seams to make hooping convenient. After the embroidery will be done you’ll just sew them back together.
2 – Putting the placement marks.
2.1. Fold the bag in half making a vertical crease in middle. This crease will serve as the vertical axis line for the design placement.
2.2. Arrange the printout along the vertical axis line (the crease) and find the position for it that you like.
2.3. When you find the perfect position for the printout, trace its horizontal axis lines onto the bag.
2.4. Remove the printout and join the marks. Now you have two crossed axis lines. Their center will be the center of your future embroidery.
Now if you don’t want to position Lighthouse machine embroidery design right in the middle of the bag, just move the vertical line left or right. Use your measuring tool to make the adjustment precise.
3 – Hooping.
3.1. Spray temporary adhesive onto the stabilizer and smooth it on the back of the embroidered-to-be area.
3.2. Hoop the sandwich.
3.3. If the area is unhoopable (for any reason), you’ll be downing the following:
– Hoop the stabilizer,
– Draw axis lines on the stabilizer,
– Spray temporary adhesive onto the hooped stabilizer,
– Apply the bag onto the stabilizer, making sure the axis lines on both coincide.
Tip: To make the coordination of the axis lines on both layers easier, take a pin and put it through the center of the crossed axis lines, drawn on the bag. Then press the same pin to the center of the axis lines, drawn on the stabilizer. The pin will prevent the two layers from shifting while you’re coordinating their centers.
4 – Embroidering. Embroider as usual.
After Lighthouse machine embroidery design is finished, remove the excess stabilizer and loose thread ends. When all the “cleaning up” is through, fill your this pretty bag with sunscreens, water bottles and what have you and go enjoy some sea-infused summer fun! Prepare to get tons of compliments. Accept all of them graciously and with style! It’s your summer so enjoy it to the full!
While enjoying all this sea-infused limelight, don’t forget to share some of its sparkle with friends. With such huge variety of nautical patterns available on our catalogues, all of them can get sea-inspired gifts. Make little something for everyone. For those in love with living wanders under the sea there’s a generous catch of marine life embroidery designs: fishes, turtles and other sea life. Adorable teddy bear sailors and quirky owl captains are waiting there to cheer your little friends. And those who’re willing to inhale a bit of adventurous air, can get little something with all sorts of seafaring embroidery on. Rose of wind, anchors, boats and steering wheels – you can let them take their pick or let it be a surprise.
You may also like
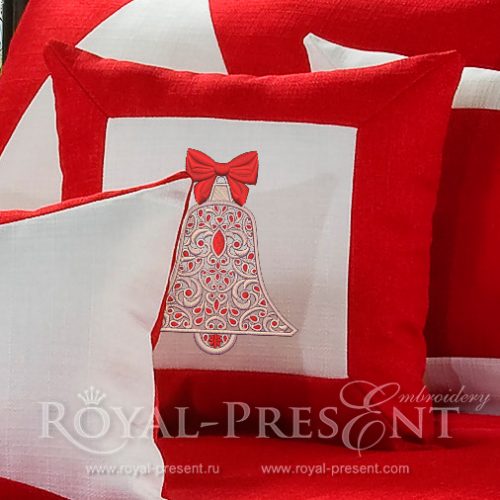
Machine Embroidery Design Christmas Bell

Author: Ludmila Konovalova
My name is Ludmila Konovalova, and I lead Royal Present Embroidery. Embroidery for me is more than a profession; it is a legacy of my Ukrainian and Bulgarian heritage, where every woman in my family was a virtuoso in cross-stitch and smooth stitching. This art, passed down through generations, is part of my soul and a symbol of national pride.
Date: 02.07.2018

 Get Sign-In Link
 Login with Google
 Login with Facebook
 Login with Amazon
 Login with Paypal