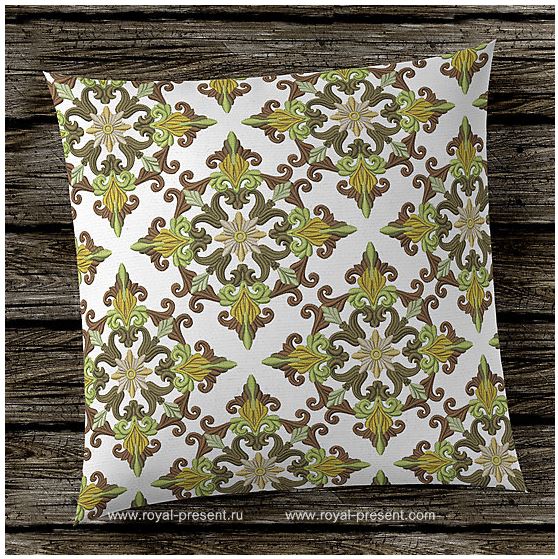
Log cabin, pinwheel, stripes, stars – various block patterns made of mixed fabric scraps is a foundation for the beautiful decorative art of quilting. And, needless to say, most crafters love quilting exactly for this frugal approach to the sweet little pieces they’ve left with from their previous projects. But what would you, deer needle-and-thread artists, say if we’d offered you a way to ennoble your artistic quilting methods and skills? Give them a touch of deluxe, extra sophisticated finish, so to say? With machine embroidery at your service, your quilted projects can reach a higher level of refinement. Take a step away from the traditional piece-to-piece work and add a bit of lovely broidery to your blocks with Machine Embroidery Design Medieval Acanthus. Rich and utterly chic, this gem of a pattern will add regal flair to even the simplest of projects.
Machine Embroidery Design Medieval Acanthus comes in 7 sizes, so you won’t struggle with its calibration when fitting it into your quilt. Superb, isn’t it? You can mix and match different sizes of medieval acanthus to create fantastic quilts. You can go as big or small as you like! Baby quilts, quilted pillows and bags, embroidered bed quilts for your master bedroom – anything is possible with this brilliant set of designs!
Another great thing about Machine Embroidery Design Medieval Acanthus is that due to the really magnificent color palette it can be adapted to various purposes and styles. Use this pattern to tune your home’s décor to the seasonal scenery change. For fall, embroider it on throws, pillows or lush window treatments to make your home feel warm, stylish and chic. Its rich earthy hues are all about the time of the year, when pumpkin spice is in the air and cups of hot chocolate are warming your hands.
For winter, use a different color-palette and medieval acanthus will eagerly turn into a wonderful Christmas decorative accent. Use it on Christmas stockings, Christmas tree skirts or festive table runners in golden, silver or other sparkling metallic threads. In such a shimmering make up machine embroidery design medieval acanthus will make a sure splash during holiday season!
Machine Embroidery Design Medieval Acanthus

Formats: .dst, .jef, .pec, .vip, .hus, .pes, .sew, .exp, .dat, vp3, xxx
If you’re new to quilting but still want to impress with your skills, this medieval acanthus can be your champion indeed. Use it in mini quilt projects, like quilted wall hanging, a pillow, a set of quilted coasters or a runner. Pick any of the examples and let your inner designer, embroiderer and seamstress take the lead. We, of course, we’ll be near to help with our tips and instructions. Our instruction will deal with creating a four-patch quilted pillow, with Machine embroidery design Medieval Acanthus in two of its blocks. We’ll be creating a quilted pillowcase for a pillow which measures 20” at all of its sides. This means that each of the four blocks will measure 10” (+ 0,5” for the seams). Each of the blocks can easily accommodate Machine Embroidery Design Medieval Acanthus in any of the available 7 sizes. We leave the choice of the design’s size up to your preference.
The project is perfect for a beginner and is great for practicing both quilting and machine embroidery skills. If, however, you’d like to step it up a notch, just use a bigger number of patches adjusting the measurements to your plan.
The project consists of the following stages:
1 Gathering of supplies
2 Preparing the supplies according to the layout (a.k.a. measuring and cutting)
3 Embroidering
4 Sewing
So, shall we begin?
1 / Gathering of supplies
~ 2 different fabrics (quilter cotton, jacquard, linen – any non stretch type is ok). Now, keep in mind that you’ll be using machine embroidery design Medieval Acanthus on one of the fabrics. This means that you’ll need a solid (without patterns and prints) piece of fabric for the embroidery base. The other fabric can match the pattern of the embroidery (e.g. bear similar colors or prints).
~ Stabilizers: cut-away backing + temporary spray adhesive (for better hooping).
~ Embroidery threads: rayon or polyester. Don’t take too thick of a thread. Threads of size 40 will work for stitching machine embroidery design Medieval Acanthus on any type of fabric perfectly well.
~ Embroidery needle: sharp, 75/11.
~ Sewing threads and needles. Pick threads so that they match the colors of the fabrics.
~ Measuring tools and a temporary marker.
2 / Preparing the supplies for the layout (measuring and cutting)
1 – Measure and mark two squares on each of the fabrics. Each squares should be 10 x 10” (+0,5” on each of side for the seams). These squares will make up the front of the pillow-cover. If you want to match the back with the front, just repeat the step once more.
2 – Cut the fabric that’s won’t be embroidered according to the measures you’ve made.
Tip: Don’t cut the other piece of fabric yet. Stitching two designs on one piece will save you both hooping time and stabilizer.
3 – Take the to-be-embroidered fabric and move to the embroidering part of the project.
3 / Embroidering
1 – Apply temporary spray adhesive onto the stabilizer and smooth it on the embroidered-to-be area of the fabric.
Tip: Use backing of a larger than the hoop size. This trick will actually save you the stabilizer, as after you cut the used part, you’ll still have enough for the hooping of the next portion of embroidery.
2 – Using your measuring tool find the center of each of the squares. Draw horizontal and vertical lines through the center. These lines will help you hoop the fabric squarely.
2 – Hoop the fabric according to the marks.
3 – Embroider as usual. After the embroidery is done, trim the excess stabilizer. Don’t forget to clean all the loose thread ends.
4 – Now you can cut the embroidered squares according to their measured marks.
After all the cutting is done, you should have four squares of fabric, which will make the front of your quilted pillow-cover. Now you need to sew them together.
4 / Sewing
1 – Position a block with Machine Embroidery Design Medieval Acanthus on a blank one with their right sides facing each other.
2 – Sew the squares, making sure you’re stitching on the distance of exactly 0,5” from their edges. Now you have a first section of your front.
3 – Press the seams of sewn blocks from both sides.
Tip: The seams should be pressed both on the right size of the section and on its back side too. It’s easier to match the sewn blocks when theirs seams are pressed really flat.
4 – Repeat steps 4.2 and 4.3 with the other section of the front.
5 – Lay both sections with their right sides facing each other and sew them. Make sure all the seams perfectly coincide with each other.
Now you should have a perfectly square front side of your pillow-cover. If you want to, you can work its back side in the same manner. If you do, you need to repeat all the steps from the beginning.
6 – Another option is to make the back side using only one of the two fabrics. In this case, just cut a large square 20 x 20” (plus the seams) of one of the fabric pieces that you have. Then sew this square with the four-patched embroidered one, leaving a gap on one of its sides. Through this opening you’ll be putting your pillow-form inside the cover.
Tip: You’ll be closing this opening later with a blind stitch. To make this part of the project easier, iron the stitched-to-be areas so that they form folds. The creases of these folds will be your guiding line for the perfectly even finishing blind stitch.
7 – Trim the excess fabric from the corners of the pillow-cover. If you don’t trim the fabric, it will make corners look bulky and formless when you turn the pillow-cover the right side out.
8 – Turn the pillow-cover out paying extra attention to the corners. It’ll be easier if for the corners you use a pen (or any other not too sharp elongated object).
9 – Tuck the pillow-form into the pillow-cover through the opening and close it with the blind stitch. All the work’s done and now you can enjoy gorgeous fruit of your labor.
In quilt-projects for home decoration Machine embroidery design Medieval Acanthus is a blessing to work with. But that’s not the only virtue that this elegant design is praised for. Aside from the block decoration in quilting and patchwork, it can also be used as infinity pattern for other types of decorative projects. Infinity variation of medieval acanthus embroidery will work great for embellishment of accent pillows, handbags and clutches. Also, this pattern can be worked into an absolutely magnificent border. Pick a less variegated color-pallet and embroider it on table-covers, runners or various bed linens. Whatever composition you decide to work it into, we’re sure, you’ll enjoy the result!
For more creative ideas for quilt block embellishment, browse our collection of square ornaments for machine embroidery. Floral and graphic, oriental and folksy, vintage and modern, Tibetan and Art Nouveau – the list of block embroidery patterns in this collection goes on without end. Whatever quilted project you have in mind, be sure, we have an embroidery pattern for it.
You may also like
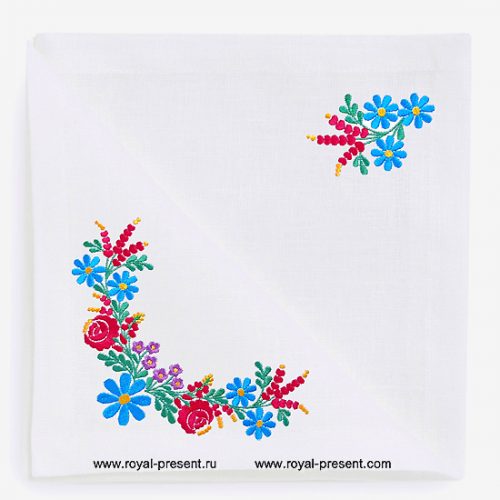
Two Hungarian Machine Embroidery Patterns

Author: Ludmila Konovalova
My name is Ludmila Konovalova, and I lead Royal Present Embroidery. Embroidery for me is more than a profession; it is a legacy of my Ukrainian and Bulgarian heritage, where every woman in my family was a virtuoso in cross-stitch and smooth stitching. This art, passed down through generations, is part of my soul and a symbol of national pride.
Date: 29.06.2018

 Get Sign-In Link
 Login with Google
 Login with Facebook
 Login with Amazon
 Login with Paypal