If you are looking for an interesting idea how to decorate the interior with original elements and add to it the luxury and a style, the Chinese Ornament Machine Embroidery Design will be the right choice.
First, Chinese culture is very popular now and is the part of our modern life. Secondly, Chinese machine embroidery patterns look rich and beautiful. That is why the application of this pattern for machine embroidery is justified.
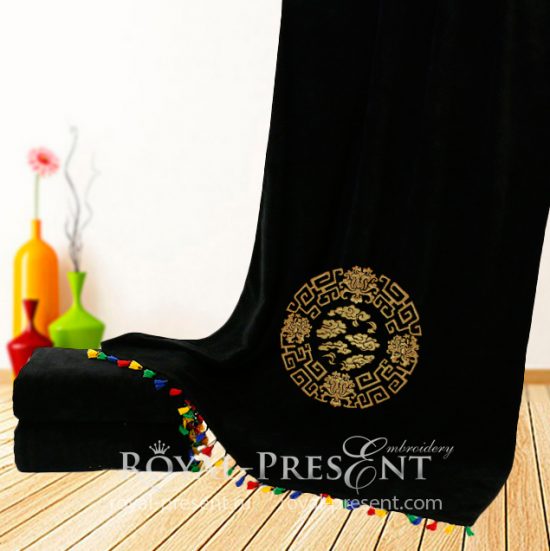
This design, made in the style of Chinese embroidery, is a combination of the basic Chinese elements in a circle and the image of the clouds inside. It can be embroidered almost everywhere, but it will look particularly gorgeous on black or red velvet.
Chinese Ornament Machine Embroidery Design

Size: 128.4×129.6 mm (5.06×5.10 “), Stitches: 2191
Formats: .dst, .jef, .pec, .vip, .hus, .pes, .exp, .sew, .dat, xxx, vp3
To implement this idea, we recommend embroidering a set of velvet decorative covers for pillows and a blanket. Such a set can be used in the area near the fireplace, in the home office or in the living room. Before describing the embroidery process of this design, you should consider the features of embroidery on velvet. Our tips will help you to simplify the embroidery process and do everything as quickly as possible.
Tips from Royal Present for embroidery on velvet:
~ Do not hoop the velvet. Otherwise, the embroidery frame will catch the pile and the impressed marks remain on the fabric. There is a question, what to do? The answer is quite simple. Hoop a tear-away non-adhesive stabilizer and glue the fabric with temporary spray adhesive, without hooping it. ALTERNATIVELY, use the magnetic hoops.
~ On top, use a water-soluble stabilizer, such as Sulky Super Solvy or Madeira Avalon Film. Its using will prevent from the case where the pile may be visible through the stitches.
~ Remember that velvet is also different and it is necessary to choose the right fabric for the embroidery. Therefore, we can divide velvet on cotton, polyester, viscose and even silk-based. In addition, velvet, like all piled fabrics, is divided by the height of the pile. Remember that the higher the pile, the harder it will be for you to embroider on such a fabric. It is like embroidery on a terry cloth. Choose low-pile velvet to prevent puckering.
~ There is also a knitted stretch velvet. It is used mainly to create items for the wardrobe. For pillows and blankets, it does not fit.
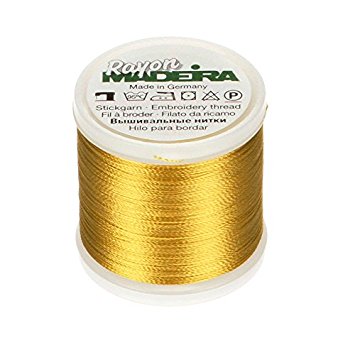
~ Threads for velvet can be very different both in composition and in type of raw material. The only thing that we recommend embroidering the Chinese Ornament Machine embroidery Design with gold polyester threads, as shown in the sample. An excellent option will be the Sulky 40 Wt. Rayon Thread Spark Gold. They have a number of advantages. Firstly, they fully comply with international standards of environmental safety. Secondly, they are characterized by high strength and durability. Such threads are perfect for embroidery on black and red velvet.
Having considered the features of embroidery on velvet fabric, let us move on to the process itself.
So, to embroider such Chinese machine embroidery patterns you will need:
~ Velvet fabric for the cover
~ Velvet fabric for a blanket
~ Tear-away non-adhesive stabilizer, Madeira Tear-away Cotton Soft
~ Thin water-soluble stabilizer, for example, Sulky Solvy or Madeira Avalon Film
~ Temporary adhesive spray, for example, Gunold KK100
~ Printed design template
~ Air-erase pen
~ Chinese Ornament Machine Embroidery Design
~ Zipper
~ Tassel fringe or pom poms fringe for decoration
Let us start with the covers. First, pay attention to the fact that the embroidery on the pillow will be less than on the blanket. For this, it is worth choosing the right size. We provide this design in a single size, but you can order the function of resizing the design.
Take the cloth you measured for the front side. In this case, the size of the fabric corresponds to the size of the cushion. Print a template from the archive, and use the air-erase pen to move the marked lines of the axis direction and the center point of the embroidery. Remember that velvet is better not to hoop. Nevertheless, it is necessary to hoop the stabilizer. To do this, take a tear-away non-adhesive stabilizer, for example, Madeira Tear-away Cotton Soft and a glue of a temporary fixation, for example Gunold KK100. Carry out this sequence:
Hoop a tear-away non-adhesive stabilizer in the embroidery frame ~ Spray the fabric glue stick ~ Attach velvet on top ~ Apply a water-soluble stabilizer and gently pin it.
After you have completed the steps above, place the hoop in the machine so that the needle is in the marked center of the embroidery. Embroider the design. Remove the stabilizer. Now we can say that the half of job is done. Take the same size velvet fabric, namely the back of the cover. Sew the zipper into it. Detailed instructions on how to sew a zipper in a pillowcase can be found on YouTube channels. Now you need to sew parts of the pillow and sew fringe. You can do this with one seam. To do this, take the header of the fringe, and place it around the perimeter between the two parts of the cover, gradually making a basting. Connect parts of the cover and fringe with machine or manual stitching. The cover is ready.
In order to the set looks more impressive, we recommend making two or three decorative pillows with luxurious covers.
Now let us move on to creating a blanket.
At the beginning, attach a printed design pattern to the fabric for the blanket in the place where the embroidery will be. Use the air-erase pen to move the axis direction lines and the center point. Then follow the same instructions that we used for embroidery on the covers, namely:
Use a tear-away non-adhesive stabilizer in the embroidery frame ~ Spray the fabric glue stick ~ Glue velvet on top ~ Apply a water soluble stabilizer and gently pin it.
Place the embroidery frame in the machine so that the needle is in the marked center of the embroidery. Then roll the rest of the fabric as it may fall under the needle during the process. Embroider the design. Remove the stabilizer. Now you need to process the edges of the blanket. There are three ways to do this:
~ Edit the edges on the overlock machine
~ Tighten the edges and sew them by hand or with a sewing machine
~ Since the fabric may fray out, it is possible to treat the edges with special Stop Fraying Glue from Aleene`s production. This thick white glue does not spread during application. It is enough to simply take a brush, apply glue to the edge of the product, and allow drying the glue for 24 hours. We recommend waiting at least 7 days before the washing of the blanket if you use this glue.
Note: the glue is not compatible with certain types of fabric. Therefore, always check their conformity and the result on a piece of the same fabric, so as not to damage the finished product.
Now you need to sew fringe around the perimeter of the blanket. To do this, lay out the header of the fringe around perimeter and make a basting. Then secure by hand or with a sewing machine. Delete the basting. For convenience, you may use special water-soluble threads. They are just used most often for a basting. Moreover, such threads dissolve in water, and they do not need to be evaporated. In addition, this saves time.
A beautiful and luxurious velvet set of covers and blanket is ready. As you can see, Chinese Ornament Machine Embroidery Design from our Chinese machine embroidery patterns looks just great. Successful embroidery!
See some others Chinese machine embroidery patterns in our collection.
You may also like

“A key to style” by Dolce and Gabbana

Author: Ludmila Konovalova
My name is Ludmila Konovalova, and I lead Royal Present Embroidery. Embroidery for me is more than a profession; it is a legacy of my Ukrainian and Bulgarian heritage, where every woman in my family was a virtuoso in cross-stitch and smooth stitching. This art, passed down through generations, is part of my soul and a symbol of national pride.
Date: 07.05.2018

 Get Sign-In Link
 Login with Google
 Login with Facebook
 Login with Amazon
 Login with Paypal