Sweet like candies and colorful like brightest of rainbows, Machine Embroidery Design Magic Pony welcomes anyone who believes in fairytales in a land where magical ponies live. Adorable, funny, charming and endearingly enchanting – this land has magic pony of every “breed”. Take a journey to this artful destination and enjoy a fairytale like no other. Trotting ponies, flying ponies, dancing ponies and of course ponies with crowns – you’ll get to meet them all in Palace Pets category of Royal Present Embroidery catalogue.
Let Machine Embroidery Design Magic Pony be your guide in the land of the “hooved” magic. This magic pony can tell you a lot about the fantasy world where Equestria is just a place. With just few magical tricks involving colors and threads, this magic pony can help you conjure sensational art and décor pieces for you, your kids and your friends. Let the lavender beauty take your imagination to the most magical projects!
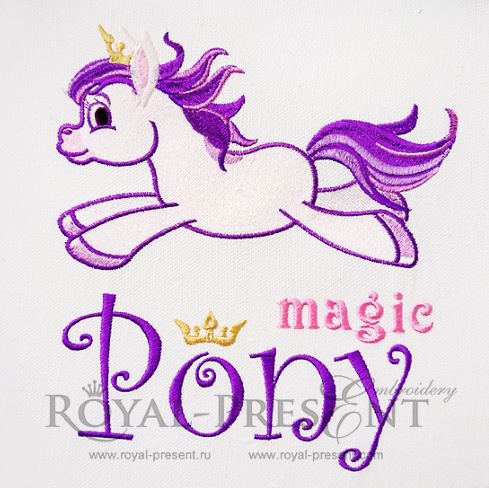
Machine Embroidery Design Magic Pony – 7 sizes

Formats: .dst, .pec, .vip, .hus, .pes, .exp, dat, jef, vp3, .sew, xxx, jef
Are you thinking of a theme for a nursery of your baby-girl? Is there a birthday party for your niece to be held? If the answer is “YES”, then this magic pony can be of help. Interior accents, garments, accessories and more – magic pony design can be used in so many ways. With 7 sizes available Machine Embroidery Design Magic Pony you’ll never be out of inspirational ideas. The largest of the designs (6.18” x 9. 39”), for example, is perfect for decoration of accent pillows. The smallest of them (3.86” x 2.54”) will look great on pockets of jeans or jackets of your little ones. Yep, even pockets can get their share of magic with this adorable lavender pony.
Haven’t yet worked with embroidering pockets? Don’t worry; Royal Present Embroidery is here to help. Further you’ll learn how to decorate pockets with machine embroidery design magic pony. We’ll share some tips and tricks that surely will be handy while working on projects like this. Also, for your convenience, there’ll be a step-by-step instruction of how to embroider on pockets.
The garment of our choice will be kid’s overalls (dungarees). This type of wear has multitude of pockets which all can be decorated in one way or another. While we’ll be working with the smallest design, you can choose whichever pocket you like to place it on. Fabric of the overalls is denim. So are you ready to try the enchanting power of magic pony on pockets of your kids wear? If yes, then let’s begin!
For the project you’ll need:
~ Denim overalls.
~ Machine embroidery design magic pony and its printed template. We’ll be working with the smallest of the available sizes (3.86” x 2.54”).
~ Seam reaper.
~ Embroidery needles. For embroidering on denim you’ll need a 90/14 sharp needle.
~ Threads. We opted for polyester threads as the design will be embroidered on an item, which will be frequently washed. Polyester threads keep their brightness and shine much better than any other type of embroidery floss. Our pick is Madeira Polyneon. Size of the threads could be either 50 or 60.
~ Sewing thread. You’ll need them for sewing the pocket back onto the overalls. Color of the thread should match that of the seams on the pocket.
~ Medium weight tear-away stabilizer is fine for a sturdy fabric like denim.
~ Temporary spray adhesive.
~ Air-erasing pen (a pen for textile)
Now that you’ve gathered your supplies, let’s begin with the work. The project has 5 stages:
1 – Deconstruction of the pocket. During this stage you’ll be making the pocket “embroider-able”.
2 – Positioning and centering of machine embroidery design magic pony.
3 – Hooping.
4 – Embroidery.
5 – Re-construction of the pocket. (aka. sewing it back to the overalls)
Few words before we begin…
On the deconstruction of the pocket:
There’re several methods of decorating pockets using machine embroidery. Some of them require a pocket to be removed from the garment, while others don’t. We’ll be using the one with the “removing” part in it. This method, though a bit more complex, has a great deal of advantages over the rest. Firstly, removing the pocket means fewer layers for the needle to stitch through. Your embroidery machine will thank you later for this. Secondly, with this method there’re fewer chances that stitching will be uneven. Thirdly, after the embroidery will be over, the pocket can still be perfectly functional and handy. That being said, few minutes that you’ll spend on deconstruction and further re-construction of the pocket are worth their while.
On the test embroidery of the design:
It’s common knowledge that all machine embroidery designs should be tried out for each particular project. Same rule applies when embroidering on pockets. However, as you’ll be dealing with a ready-made item, it could be difficult to recreate the needed set-up. That is why we offer a great tip, for every embroidery enthusiast.
Tip: Don’t throw away your old jeans but rather keep them as denim samples collection. Thus, when your next project is about a denim garment, you’ll be able to test your design the right way.
Now let’s the project begin!
1. Deconstruction of the pocket
1.1. – Using a seam reaper, cut the stitches of the seams that attach the pocket to the overalls. Start at the bottom part of the pocket and carefully move upwards first along one of its sides, than along the other.
Tip: Do not cut the reinforced stitching. The design that we’re using fits it in the area of the pocket easily. The upper corners (where the reinforced stitches are made) won’t be in the working area. AS it’s difficult to recreate this type of stitching on a regular home sewing/embroidery machine, you’d save yourself a lot of pains by just leaving them as they are.
1.2. – If there’s some decorative stitching on the pocket itself, you might need to remove it too. However, if it’s a light stitching and it won’t get in the way of your work, than feel free to leave it on.
1.3. – After you’ve finished with the seams, clean up all the loose threads. You’ll need to clean them both from the pocket and from area where it “used” to be sewn on.
2. Positioning of machine embroidery design magic pony on the pocket
2.1. – Place the template on the pocket and mark its vertical and horizontal lines onto the fabric. Use textile marker for the job. Also you’ll need to mark the center of the future embroidery. For this you can press the marker on to the center of the template to trace the center point.
3. Hooping
3.1. – Hoop the tear-away stabilizer.
3.2. – Trace the indicators on the hoop to mark the vertical and horizontal lines on the stabilizer.
3.3. – Spray the stabilizer with temporary adhesive.
3.4. – Attach the pocket onto the stabilizer, coordinating their centers and axis points. It’s easier to coordinate the centers by pinpointing them with a regular pin or a needle.
3.5. – Smooth the pocket onto the stabilizer.
4. Embroidery
4.1. – Embroider as usual.
4.2. – When the embroidery is over, clean all the loose thread ends.
5. Re-construction of the pocket on the overalls.
5.1. – Change the threads. You’ll need the same (or similar) color to the one that was used on the seams of the pocket.
5.2. – Sew the pocket on. As guidelines for the stitching you can use the dark stitch marks of the previous stitching.
5.3. – After the stitching is done. Clean any loose threads ends.
Now you have your sweet overalls with a lovely little magic pony embroidery on. If you want to, you can add one of the two “magic pony” signs to the décor. “Magic pony” embroidery can be done on any part of the overalls. Otherwise, if you feel that the garment doesn’t need any additional frill, embroider a t-shirt with the “magic pony” sign.
Whether making a little something for one of your brony friends or preparing a special gift for you little nieces, Machine Embroidery Design Magic Pony is a must. Not only does it travel you in a world where Equestria could be found, it does it in style too. Your own style that is! With this equine design you can create an entirely new pony crew of your own. Just change threads according to the inspiration that you’ll have and enjoy your own “breed” of magic.
Here’re some examples of how various colors can enchant the design to change its guise. Our magic pony design is all about deliciously pinkish and lavender colored threads. However, Madeira Polyneon Lily White (1803) and Crystal Pink (1818) and other dreamy hues can be changed to help you create your own magical foul or recreate the already existing ones. For a pony that has same sweet-and-spicy flair of your favorite Southern beauty, go with Madeira Polyneon Buttercup (1683) for the coat and off-white Wheat (1666) for the main. Making magic is easier than you think. Combinations of pink and fuchsia or yellow and pink or various shades of purple will pay homage to other pony characters!
Thinking of taking up a notch the hues in machine embroidery design magic pony? With more threads and perseverance you can create your own beautiful version of the charming rainbow pony. Maderia Polyneon Sky Blue (1871) could be the base for the coat. As to the main – the sky is your limit. Just remember to make adjustments in the colors during the 6th and 7th thread changes and you’ll get your variant of the adventurous magical pony.
You may also like

Machine Embroidery Design Little Pony

Author: Ludmila Konovalova
My name is Ludmila Konovalova, and I lead Royal Present Embroidery. Embroidery for me is more than a profession; it is a legacy of my Ukrainian and Bulgarian heritage, where every woman in my family was a virtuoso in cross-stitch and smooth stitching. This art, passed down through generations, is part of my soul and a symbol of national pride.
Date: 05.05.2018

 Get Sign-In Link
 Login with Google
 Login with Facebook
 Login with Amazon
 Login with Paypal