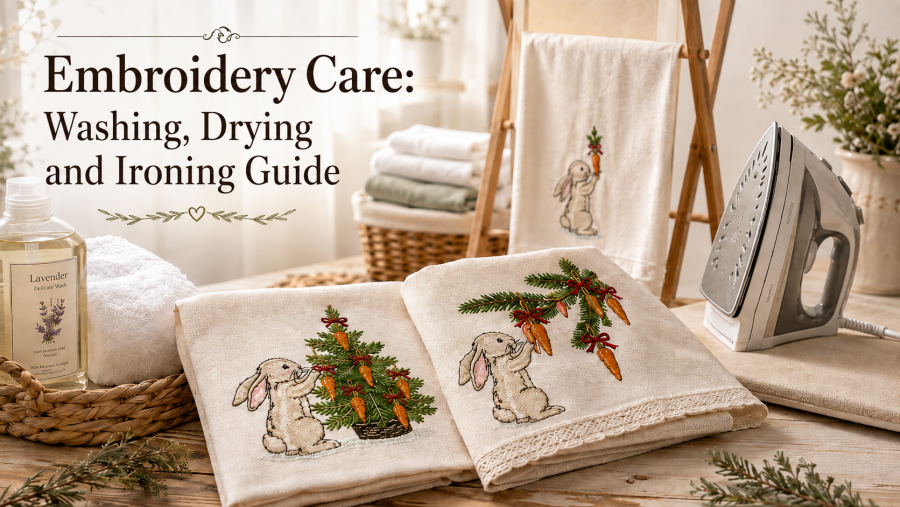
The safest way to care for machine embroidery is to follow the limit of the most delicate component: the fabric, embroidery thread, appliqué, trim or stabilizer. When the materials are unknown, start with a gentle 30 °C / 86 °F wash, a mild bleach-free detergent, a short low-speed spin if the fabric allows it, air-drying in shape and pressing from the wrong side on a soft towel. Do not soak, wring or leave damp embroidery folded against itself.
Updated August 4, 2026, by Ludmila Konovalova, machine embroidery designer and founder of Royal Present Embroidery. This guide is intended for modern machine-embroidered clothing and household textiles. Antique, historically important or already damaged needlework should be assessed by a textile conservator.
Five rules that prevent most embroidery-care damage
- Check both the garment label and the care instructions for the exact thread range.
- Test every dark or saturated shade for colorfastness before the first wash.
- Turn garments inside out and place them in a mesh laundry bag.
- Do not use bleach unless it is explicitly permitted for every material in the project.
- Reshape the item immediately after washing; never leave wet embroidery folded or stuck to another area.
Why there is no universal washing temperature for embroidery
A temperature printed for thread describes the thread’s capability, not the entire embroidered item. Madeira states that both Classic rayon/viscose and Polyneon polyester can withstand washing temperatures up to 95 °C / 203 °F. That does not make 95 °C safe for embroidered silk, dyed linen, stretch jersey, metallic decoration, adhesive appliqué or printed fabric. The final care setting is always limited by the most sensitive component.
Polyester is usually the practical choice for towels, children’s clothing, uniforms and other items that need frequent or commercial laundering. Rayon/viscose provides a softer, silk-like sheen, but should be washed with a detergent free from chlorine, peroxide, sodium carbonate and other bleaching agents. The exact care limits still depend on the thread range, so keep the spool label or the manufacturer’s technical data with your project notes.
| Embroidery or textile | Conservative starting point | Main risk | Check before washing |
|---|---|---|---|
| Rayon/viscose thread | 30–40 °C / 86–104 °F, gentle cycle, mild detergent | Color damage from bleach or brighteners | The exact thread brand’s care instructions and dark-shade colorfastness |
| Polyester thread | 30–40 °C / 86–104 °F for routine home care; hotter only when the label permits | The fabric or decoration may fail before the durable thread | Fabric fiber, print, elastane, adhesive details and bleach restrictions |
| Metallic and Supertwist | Hand wash or gentle cycle, low heat, air-dry | Delamination, kinks and loss of shine from heat or friction | Care instructions for the exact metallic-thread construction |
| Cotton, matte and wool-blend threads | Usually 30–40 °C / 86–104 °F with little mechanical action | Shrinkage, fuzzing or a changed surface texture | Thread composition and the manufacturer’s label |
| FSL, cutwork and lace | Gentle rinsing, wet blocking and flat drying | Loss of shape after the wash-away stabilizer dissolves | Whether all stitch elements connect and the stabilizer is fully removed |
| Knits, silk and velvet | Follow the fabric label; knits commonly start at 30 °C / 86 °F and dry flat | Stretching, water marks, crushing or pile damage | Fiber content and whether water, steam and dry-cleaning are permitted |
Embroidery care begins before the first stitch
- Pre-shrink washable fabric. Wash and dry the fabric in the same way the finished item will be laundered. If cotton shrinks only after embroidery, the fabric can pucker around the comparatively stable stitched area.
- Make a full test sample. Use the same fabric, backing, top thread and bobbin thread. Put the sample through the complete wash, dry and press cycle. A design that looks perfect in the hoop has not yet proved its durability; stitch density, fabric and backing must remain balanced after laundering. See our guide to stitch density, fabric and stabilizer balance.
- Record the materials. Photograph the thread spools or save their numbers, the fabric fiber content and the stabilizer name. Those details will be more reliable than memory a year later.
- Do not tear away cut-away backing. It is permanent support for knitwear and other unstable fabrics. Trim it carefully without nicking stitches or the garment.
- Remove wash-away material according to its instructions. Avalon Film, Avalon Plus and Avalon Ultra do not have identical constructions or uses. Our Madeira Avalon stabilizer guide explains the differences.
Practical trick: keep a small project swatch with the same fabric and several of the actual thread colors. Use it later to test detergent, stain remover, steam and iron temperature without gambling with the finished item.

How to test fabric and embroidery thread for bleeding
For an expensive item or an unknown thread, a water-only test is not enough. A dye may appear stable in plain water but react to a detergent or stain treatment.
- Wet a hidden area or the test swatch with water at the intended washing temperature.
- Press it with a clean white cotton cloth without rubbing.
- Repeat with a weak solution of the detergent you plan to use.
- Test saturated colors separately, especially red, burgundy, dark blue and black.
- If color transfers to the white cloth, do not wash the entire item blindly. Change the detergent or method, or use a professional cleaner experienced with decorated textiles.
Do not add salt or white vinegar as a reflex. Neither is a universal fixative for modern industrial dyes, and neither replaces a proper colorfastness test. Vinegar can also change detergent performance or affect certain finishes.
How to wash machine-embroidered clothes and linens
Machine washing
- Close the item’s own zippers and hooks, then turn it inside out.
- Use a mesh laundry bag. Keep the item away from shoes, hook-and-loop fasteners and jeans or garments with exposed metal hardware.
- Select a gentle cycle at 30–40 °C / 86–104 °F. Start at 30 °C when the material combination is uncertain.
- Use a small dose of liquid detergent without bleach. Excess detergent is difficult to rinse out of dense fill stitches.
- If the fabric label allows spinning, select a short low-speed spin, up to about 600 rpm as a conservative starting point. Disable spinning for silk, velvet, lace or dimensional embellishment when necessary.
- Do not overload the drum. Remove and reshape the item as soon as the cycle ends.
Hand washing
Dissolve a mild detergent completely before adding the item. Gently press the textile through the water with an open hand; do not scrub the stitches, twist the fabric or leave it soaking. Rinse in water of a similar temperature until it runs clear and contains no foam. To remove excess water, place the item on a clean white terry towel, roll it loosely and press without wringing.
If a new thread releases excess dye during the first wash: do not dry or iron the item. Rewash it immediately in the warmest water permitted for both the fabric and the exact thread, then rinse thoroughly. Repeat if needed. Heat-setting the transferred dye before it is removed makes recovery harder.
Spot-wetting a new dark design to dissolve water-soluble topping can trigger this problem before the first full wash. Remove the larger loose pieces of film, then rinse the entire embroidered area evenly. Never leave a wet dark design resting against a light section of fabric.
How to dry embroidered items without distortion
- Reshape immediately. Creases formed while the item is wet are harder to remove without pressing the stitches.
- Dry knitwear, lace, metallic embroidery and delicate fabrics flat. Use a clean white towel underneath and return the item to its correct dimensions.
- Use a tumble dryer only when the garment label allows it. Warm tumble drying may be suitable for robust fabric embroidered with ordinary rayon or polyester. Air-dry metallics, silk, velvet, dimensional work and items with heat-sensitive appliqué.
- Avoid radiators and strong direct sun. Localized heat can distort the base fabric, while long UV exposure is particularly undesirable for rayon shades.
- Do not hang a heavy wet textile from one narrow edge. Water weight can stretch the fabric around a dense design.
FSL and cutwork trick: place the damp lace over a template of the intended finished size, pin the outer points with rustproof pins on a blocking mat and let it dry completely. Restore geometry while the lace is damp instead of pulling on dry satin columns.
How to iron machine embroidery without flattening the stitches
- Place a clean white terry towel on the ironing board.
- Lay the item face down. The towel pile gives raised stitches somewhere to sink instead of crushing the satin surface.
- Cover the wrong side with a clean pressing cloth and set the iron for the most heat-sensitive component.
- Lower and lift the iron; do not slide it over the design under pressure.
- Allow the item to cool and dry completely while lying in shape.
Press metallic thread only at low temperature through a protective cloth. Silk, satin and velvet may develop water or steam marks, so test a hidden area first. Never press a hot soleplate onto 3D foam, raised appliqué, loops or high pile.
Do not put books or plastic over damp embroidery. Weight flattens the relief, trapped moisture encourages color transfer, and book covers may mark the textile. If fabric puckers after washing, reshape it while damp and press only the free fabric around the design from the wrong side. Severe distortion is not an ironing problem; investigate fabric shrinkage, file density and support. Our guide explains how to prevent puckering in machine embroidery.
How to remove a stain without damaging embroidery
- Blot a fresh stain with a white absorbent cloth. Do not rub it along satin stitches.
- Place a white towel underneath and work from the outside of the stain toward the center.
- Test the cleaner on the project swatch or a hidden area first.
- Use the smallest effective amount and rinse it out completely.
- Do not use a brush, abrasive sponge, chlorine bleach or oxygen bleach unless every affected material explicitly permits it.
Durable polyester thread does not automatically make the entire item bleach-safe. Fabric dye, prints, elastane, appliqué adhesive, decorative films and the base color may react before the thread does.
Troubleshooting embroidery after washing
| Problem | What to do now | Likely cause |
|---|---|---|
| Dye transferred to the fabric | Do not dry or iron; rewash immediately and rinse thoroughly | Excess dye, an unsuitable product or prolonged wet contact with a light area |
| White, cloudy or stiff residue | Rinse again in enough water and follow the stabilizer instructions | Wash-away film or fabric-like stabilizer did not dissolve completely |
| Fabric puckered around the design | Reshape while damp and press the free fabric around the embroidery from the wrong side | Fabric shrinkage, excessive stitch density or insufficient permanent support |
| A thread loop was pulled | Do not cut it; use a blunt needle or fine hook to move the loop to the wrong side, redistribute tension and secure the tail | Snagging, abrasion against hardware or an insecure end |
| Satin stitches look flat | Lightly dampen, place face down on a towel and steam from the wrong side without pressure if the fabric permits steam | Direct ironing or excessive pressure |
| Outlines shift after repeated washing | The finished item is rarely repairable; test and correct the next project’s materials and digitizing | An incompatible design, fabric, density or removed permanent backing |
How to store embroidered textiles
- Store embroidery only when it is clean and completely dry.
- Choose a dark, dry location away from radiators and direct sunlight.
- For long-term storage, wrap valuable textiles in clean cotton or acid-free tissue. Do not seal them in plastic for years.
- Loosely roll large tablecloths, runners and wall textiles around a clean archival tube instead of repeatedly folding the same lines.
- Do not hang heavy textiles from a thin wire hanger or stack heavy objects on top.
- Inspect stored work periodically and change fold lines.
Care depends on more than the name of the fabric. Fiber content, stretch, nap, weave and surface finish all matter. Learn how these properties affect machine embroidery in our guides to woven and knit fabrics and fabric properties for machine embroidery.
Printable care instructions for embroidery customers
If you sell finished embroidered towels, clothing, napkins or décor, include a tested care card in each order. State the fabric fiber, thread type, wash temperature and whether tumble drying, bleach and ironing are allowed. Clear instructions reduce preventable damage and customer complaints.
Care-card template — customize it only after a test wash
Turn inside out and wash in a mesh bag at 30 °C / 86 °F on a gentle cycle. Use mild detergent without bleach. Do not soak or wring. Reshape immediately and dry flat. Press from the wrong side through a cloth with the embroidery face down on a soft towel.
Embroidery-care checklist
Long-lasting machine embroidery does not depend on one universally gentle setting. It depends on compatible materials and a care routine limited by the weakest component. Test before the first wash, do not leave embroidery damp, avoid unapproved bleach, and press raised stitches from the wrong side over a soft surface. If laundering changes the shape or registration noticeably, inspect fabric shrinkage, design density and stabilization instead of blaming only the washing machine.
Frequently asked questions
Can machine embroidery be washed in a washing machine?
Yes, when the garment label and thread instructions permit it. Turn the item inside out, use a mesh bag, select a gentle 30–40 °C / 86–104 °F cycle and use a short low-speed spin. Metallic thread, silk, velvet and dimensional embellishment may require hand washing or an even gentler method.
What temperature should I use to wash embroidered clothes?
For an unknown combination of materials, 30 °C / 86 °F is a conservative starting point. Increase the temperature only when both the fabric label and the care instructions for the exact thread range allow it.
Can I iron directly over machine embroidery?
Direct ironing is not recommended. Place the embroidery face down on a clean terry towel and press from the wrong side through a cloth. Use low heat for metallic thread and avoid crushing velvet pile, 3D foam or raised details.
What should I do if embroidery thread bleeds in the first wash?
Do not dry or iron the item. Rewash it immediately in the warmest water safe for both the thread and the textile, rinse thoroughly and repeat if needed. Stop experimenting with household chemicals if the mark does not clear.
Can I use bleach on an embroidered towel?
Only when bleach is explicitly permitted for both the towel and the exact embroidery thread. Rayon/viscose and metallic threads generally require bleach-free care. Even with polyester embroidery, test the towel dye and any appliqué or decorative material first.

Author: Ludmila Konovalova
My name is Ludmila Konovalova, and I lead Royal Present Embroidery. Embroidery for me is more than a profession; it is a legacy of my Ukrainian and Bulgarian heritage, where every woman in my family was a virtuoso in cross-stitch and smooth stitching. This art, passed down through generations, is part of my soul and a symbol of national pride.
Date: 01.05.2026

 Get Sign-In Link
 Login with Google
 Login with Facebook
 Login with Amazon
 Login with Paypal