Madeira stabilizers are not the cheapest ones out there, but it is good value for the price, because the results they yield are truly beautiful.
It is not uncommon for us to hear questions about the designs after the damage, caused by a purely chosen stabilizer have, have already occurred. That is why in order to revel and not cry over the spoiled project, one should spend extra minute on the stabilizers’ choice.
Hopefully, this review of Madeira stabilizers will make it easier to navigate in the world of toppings and backings, thus helping to lessen unpleasant results of your embroidery work.
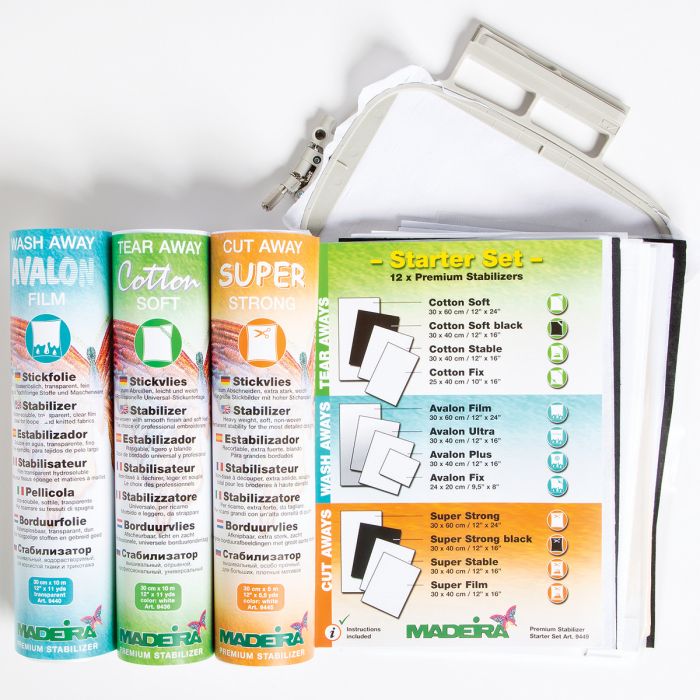
First of all, let’s group Madeira stabilizers. There are 3 kinds of them: Avalon – water soluble ones; Super – cut aways; Cotton – tear aways.
Each of the groups is further divided by color (transparent, black and white); by its positioning (toppings or backings); by the attachment to fabric (some are glued with temporary glue sprays others have special adhesive on their sides) and by the manner they are removed from the fabric after the work is complete (by water or by heat).
Every stabilizer is packed in a tube, which protects the vulnerable item from getting wrinkled, dirty or parched by air. It is advisable to always keep the stabilizer tightly closed in its original package.
![Madeira Avalon stabilizers]() Avalon Film, machine embroidery stabilizer
Avalon Film, machine embroidery stabilizer
 Avalon Film, machine embroidery stabilizer
It is a water soluble stabilizer, suitable for fabrics requiring special care. Knitted and looped textiles, ones with high pile (e.g. velvet) and delicate fabrics like organza and silk will definitely need this type of interfacing. It could be described as a transparent film with one side having a little bit rough feel, sized 1m x 30 cm. When used for embroidery, this stabilizer helps to achieve smooth stitching coverage of fabric surface; when used for sewing, due to its good grip, even with such frail fabrics as silk, it fastens layers of textiles very well. Other uses may include patterning (copying or duplicating of other sewing patterns), making of buttonholes on delicate fabrics and “Sandwich†and “Pizza†quilting methods.
Usage
High piled fabrics, like ones used for towels, should be hooped together with the stabilizer, and with the latter used as a topping. After the completion of the work, the excess topping should be removed. The fabric piece must be washed and rinsed strictly in accordance with its requirements.
Fine textile, like silk and organza, should be hooped with the stabilizer on both sides of the fabric (i.e. bifold use as both backing and topping). After the work is done, the stabilizer should be carefully removed with the help of water.
 Avalon Fix, machine embroidery stabilizer
 Avalon Fix, machine embroidery stabilizer
This stabilizer is water soluble, with adhesive cover on one side. It is used for embroidering lace and borders. The size, as written on the package, is 1m x 24 cm. This stabilizer is particularly valuable with pieces, which could not be hooped. It is used in any embroidery techniques, especially such complex ones as freehand machine embroidery and textile surface design. Thin transparent fabrics, lace or cut work designs, inkle or ribbon scarves and heavy stitched patterns require the very stabilizer, for the embroidery and even sewing projects to come out perfectly well.
Usage
Working with fine fabric:Â the needed amount of stabilizer is put on the hoop with paper-back size facing upwards. Very carefully make a cross-shaped cut on the paper surface, trying not to touch the stabilizer itself. Remove the protective paper cover from the area of the design, making sure some extra space around the pattern is opened too. The fabric should be placed on the backing and pressed well for firmer grip. Carefully separate the fabric from the stabilizer after the embroidery pattern is finished; usually there should not be any problems. The excess stabilizer is removed with water.
Working with ribbon and inkle scarves the needed amount of Avalon fix should be put on even surface with paper-back facing upwards. The adhesive layer is revealed by removing the paper protective coverage. Place ribbons and inkles or wool threads on the adhesive layer, in the manner of your design. Cover the ribbons and wool threads surface with appropriate toppings (Avalon Fix and Avalon Ultra suit better here) and sew all the composition together. Make sure the stitching is overlaying all the way through the surface, in order for the netted fabric not to fell apart after the topping and backing are discarded. Use water to remove the stabilizers.
Working with lace and cut work: Avalon fix is placed in the hoop with the paper side up. The paper coverage is carefully removed from the place, intended for the size of the pattern. Lace or ribbons should be positioned in the center of the sticky surface and only after that complementary colors or lace should be applied. In same manner a brand-new lace article could be created. After the work is finished, redundant trimmings are removed with scissors. The parts of stabilizers, which are left in the loops of the lace, are removed with the help of water.

It is a water solible stibilzer, very good for light airy textile. Its size, as written on the packedge is 3 m x 30cm.
This stibilizer is perfect for the followwing types of thread work:
- Quilting;
- Buttonholes making;
- Lace, openwork and monogramms; embroidering with mercerized threads and inkles, also suitable for crochet;
- Richelieu technique;
- Textile surface design.
Usage
Freehand machine embroidery: the design should be sketched, with the use of a vanishing in water pen, directly on hooped layers of the stabilizer (one or two layers may be used). The outline of the design must be double sewed (i.e. the lines should be sewed two times). Only after this operation is complete, the design could be embroidered. The threading should go in circular motions or with the help of a template. Stitching should overlay throughout, otherwise the project will fall apart after interfacing is removed. As a finishing touch, zigzag or straight line stitching should go through the piece. The stabilizer should be cut off with from the edges of the pattern with scissors. The remaining parts are dissolved in water. The still dump piece should be placed between soft fabric layers (i.e. towels) and ironed till dry.
Working with light fabrics and high-piled textiles (towels): sandwich the fabric between two layers of the stabilizer, hoop all the three layers together and embroider on. After the work is finished, cut off the excess topping and backing. The piece than should be rinsed in water to remove the remaining parts of the stabilizer.
Richelieu needlework: put the fabric directly on the backing and outline the assigned holes with straight stitching. Carefully cut out the fabric, covering the holes. Use embroidery scissors for better results. The backing must remain untouched. After this the embroidery can be complete with zigzag stitching following the holes’ borders. The stabilizer removed from the finished project by water.
 Avalon Ultra, machine embroidery stabilizer
 Avalon Ultra, machine embroidery stabilizer
This stabilizer is s personal favorite of mine for FSL embroidery designs. All the lace patterns, designed by Royal Present, are tested on this very stabilizer.
It is highly resistant during heavy stitching work, but easily removable by water. This stabilizer is used both with hooped fabrics and ones, which could not be hooped. Moreover, when there is need of extra support and stability, it is this interfacing that is preferred for all needle work (sewing and embroidery). It is very functional with “Sandwich†needle crafting, creating of ribbons and inkles’ scarves and other various embroidery techniques. Its size is 3 m x 30 cm.
Usage
Hooped and freehand machine embroidery: cut the needed sized of the stabilizer from the roll. If the design requires a frame, hoop the stabilizer, otherwise work without a frame. During the embroidery process make sure stitching lines overlay each other to secure the structure of the design after the stabilizer’s removal. Upon finishing, cut off the excess interfacing. The uncut remnants of it could be removed by rinsing the piece in water.
Lace embroidery: lace could be embroidered on this stabilizer without the use of fabric. The needed amount of interfacing should be put in the hoop (freehand work doesn’t require this step) and let the needle and threads do the work. Decoration of lace designs with additional colors or patterns require extra adhesive medium (usually glue spray). After the project is finished, the excess of stabilizer is cut off and then rinsed away.
“Sandwich†method applied to a textile collage: sandwich fabric details between two layers of Avalon Ultra. With this technique extra adhesion is advisable for the layers to stay put. Basting or glue spray is equally helpful here. Thread lines should be arranged in an intercrossing fashion to keep the project from crumbling after the stabilizers are removed. The removal procedure is same as described above.
Next chapter of the review will cover Madeira Super stabilizers
You may also like: Washing, ironing and other embroidery projects cleaning tips

Author: Ludmila Konovalova
My name is Lyudmila Konovalova, and I lead Royal Present Embroidery. Embroidery for me is more than a profession; it is a legacy of my Ukrainian and Bulgarian heritage, where every woman in my family was a virtuoso in cross-stitch and smooth stitching. This art, passed down through generations, is part of my soul and a symbol of national pride.
Date: 23.11.2016

 Get Sign-In Link
 Login with Google
 Login with Facebook
 Login with Amazon
 Login with Paypal