
Lips machine embroidery design is one of the most vivid and unusual of our contour machine embroidery patterns. It will become a bright adornment of your wardrobe. Since the design is light and not dense, you can embroider it both on dense fabrics, and on thin elastic and delicate fabrics.
We offer you two interesting ideas for using magnificent and creative design.
Lips Machine Embroidery Design

Formats: .dst, .jef, .pec, .vip, .hus, .pes, .exp, .sew, .dat, xxx, vp3
The first option is embroidering contour lips on a chiffon light scarf. Such a summer scarf can be nicely tied around the neck, or even on a summer handbag.
Many needlewomen do not much like embroidery on delicate fabrics, especially such as chiffon. They often face the fact that the fabric is pulled together, and thus spoils the appearance of the entire product. Moreover, the whole secret of embroidery on chiffon is in the right choice of design, suitable stabilization, the right choice of needle and thread.
In order to embroider such a unique delicate scarf using Lips machine embroidery design follow the instructions below.
1 – Firstly, chiffon is now produced natural – on a silk-based basis, and synthetic – on a polyester basis. It all depends on what kind of product you want to get. However, it is more expedient for an embroidery to take polyester chiffon, as it is denser, more stable and easier to embroider on it.
2 – If it is necessary, you can sprinkle the fabric with liquid starch, which is popular in ironing. This will help making the fabric more stable.
3 – Since Lips machine embroidery design is very light, it is ideal for embroidery on chiffon.
4 – Use a dense water-soluble stabilizer (for example, Vilene or Sulky Ultra Solvy).
5 – When embroidering the contour lips, place them chaotically over the entire plane of the fabric. The distance between them should be not too small, since this will increase the load on the fabric.
6 – For embroidery on chiffon, use a thin needle, for example, No. 60.
7 – We do not recommended embroidering with a metallic thread on the chiffon.
We have considered with you the features of machine embroidery on chiffon, and now we turn to the process of embroidery.
First, print out the design template that is in the archive. Make as many copies as you want to place patterns on the fabric. Transfer the centerlines and the axes from each template. Use a cloth with a water-soluble stabilizer and embroider the slips. Remove excess stabilizer residue. Then do the same for embroidering subsequent machine embroidery patterns.
To remove small residues of the water-soluble stabilizer, wet the scarf. Allow it to dry, and gently, at the lowest temperature iron the scarf.
Voila, a summer thin scarf with the original embroidery is ready.
The second idea of ​​using this interesting design for machine embroidery is to create an original T-shirt. First, we will discuss how to embroider a machine embroidery Lips machine embroidery design on a T-shirt, and then we will reveal the secret of how to make this T-shirt look different each time.
Before embroidering, wash, dry and iron the T-shirt, as the fabric can shrink or change a color. Therefore, we recommend in this case taking a T-shirt of white color.
Now print out the paper design template and attach it to the place where the embroidery will be. Transfer the direction of the axes lines and the center of the embroidery using the air-erase pen. Take a medium-weight cut away stabilizer of the required size. Spray onto it the glue of a temporary fixation and attach the fabric on top.
You can find more information about a glue of temporary fixation, as well as cut-away stabilizers, by visiting our Embroidery library.
Place the fabric together with the stabilizer in the embroidery frame and install it into the machine. For convenience, it is best to fold the edges of the T-shirt and secure them with clips. You should do it in order the fabric does not fall under the needle during embroidery. Make sure that the needle is above the embroidery center you marked and lower the presser foot. Embroider Lips machine embroidery design.
After embroidery, cut off the excess stabilizer. If you have very sensitive skin, you can use Cloud Cover Stitch for the inside. It not only gives the backside an ideally smooth surface, but also protects the sensitive skin from irritations that are often observed due to contact with the stabilizer.
The t-shirt is ready. Now we, as promised, will tell you how to make it look different every time. To do this, take paints on the fabric from the famous German manufacturer Gutermann. They are of two kinds. The first are fixed on the fabric with the help of a hot iron, and remains forever. However, we need a second type for the embodiment of the original idea. The second type is paint that disappears after washing. It is really very convenient and interesting. T-shirt is the same, and lips are in a variety of color and shades. Moreover, it will seem like you have a new T-shirt every day.
We hope that you liked our ideas on using this creative design from our machine embroidery patterns, and you will certainly try them in practice. With love, Royal Present Embroidery!
You may also like
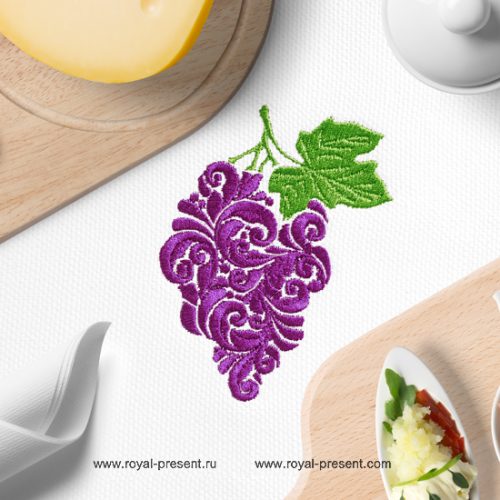
Ornate Machine Embroidery Design Branch grapes – 2 sizes</p

Author: Ludmila Konovalova
My name is Lyudmila Konovalova, and I lead Royal Present Embroidery. Embroidery for me is more than a profession; it is a legacy of my Ukrainian and Bulgarian heritage, where every woman in my family was a virtuoso in cross-stitch and smooth stitching. This art, passed down through generations, is part of my soul and a symbol of national pride.
Date: 30.04.2018

 Get Sign-In Link
 Login with Google
 Login with Facebook
 Login with Amazon
 Login with Paypal